RS-Key
RS-Key (RSK) is open-source security-key firmware for the Raspberry Pi RP2350. It turns an RP2350 board into a USB authenticator: FIDO2/WebAuthn/U2F, OpenPGP card, PIV, OATH, Yubico-style OTP. It ships the host-side tooling to drive and provision it.
Written in Rust (no_std, embassy). For development,
research, and controlled experiments.
This project is experimental. It has had no external security audit. The RP2350 is not a secure element. A stolen board is only as strong as the optional OTP / secure-boot hardening you have applied to it. Do not use it to guard credentials you cannot afford to lose or have stolen. Read the threat model and limitations before trusting it with anything real.
flowchart TD
    user["You"] --> tools["Host tools<br/>browser · ssh · gpg · ykman · rsk"]
    tools -->|USB| dev["RS-Key firmware (applets)"]
    dev --> hw["RP2350 board<br/>flash · TRNG · OTP"]
Start here
- Quick start: build, flash, set a PIN, enroll something
- Hardware: supported boards and the knobs for them
- Build options: every compile-time flag and environment knob
- Using the device: per-feature guides for FIDO2, SSH, OpenPGP, PIV, OATH, OTP, seed backup, soft-lock, and more
- Production hardening: OTP master key + secure boot (irreversible fuses; read it end to end first)
- Security: threat model, limitations,
and the
unsafeaudit - Project: Contributing · Security policy · Licensing & compliance
What it is, plainly
- It aims to behave like a USB security key and to work with the host software
people already use:
ssh,gpg, browsers, libfido2, andykman(which needs the opt-inVIDPID=Yubikey5build, see below). What has actually been checked on hardware is recorded in the interop matrix, with dates. - It is not a certified hardware security key, and not a drop-in replacement for an audited commercial key in production. There is no secure element.
- The default USB identity is RS-Key’s own (VID
0x1209/ PID0x0001, from pid.codes, the open-source USB VID), presenting as “RS-Key Security Key”. An opt-inVIDPID=Yubikey5build instead borrows a YubiKey’s identity (VID0x1050/ PID0x0407) so thatykmanand Yubico Authenticator (which key off the “Yubico YubiKey” reader name) work without custom rules. That flavor is for interop only and is never distributed. See limitations. RS-Key is not affiliated with or endorsed by Yubico, Nitrokey, or Raspberry Pi.
License
AGPL-3.0-only. RS-Key is a from-scratch Rust reimplementation of the AGPL-3.0-only pico-keys firmware family, so it inherits that license and cannot be relicensed. See NOTICE and COMPLIANCE.md.
Quick start
From zero to a working security key in about ten minutes.
This is experimental firmware with no security audit and no secure element. It’s fine for trying things out and for credentials you can afford to lose. See the threat model before using it for anything real.
flowchart TD
    a["nix develop · cargo build"] --> b["firmware.uf2"]
    b --> c["hold BOOT, plug in"]
    c --> d["flash: drag-and-drop or picotool load"]
    d --> e["board reboots, enumerates over USB"]
    e --> f["set PIN, enroll a passkey / ssh key"]
What you need
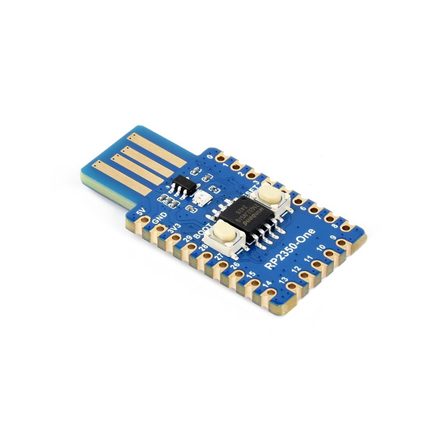
- An RP2350 board (tested: Waveshare RP2350-One; any RP2350 with USB works)
- A USB cable
- Nix with flakes enabled (the dev shell provides
everything: toolchain,
picotool, host tools). Without Nix: rustup +rustup target add thumbv8m.main-none-eabihf+ picotool ≥ 2.0, and the Python deps fromflake.nixfor the host tools.
1. Build
nix develop                                  # first run downloads the toolchain
cargo build --release -p firmware
picotool uf2 convert target/thumbv8m.main-none-eabihf/release/firmware -t elf firmware.uf2
This is the touch build: FIDO operations (registering, logging in) require
a press of the presence button (BOOTSEL by default; set PRESENCE_PIN=<gpio> for
a dedicated GPIO button). For a no-touch build (needed by the automated test
suites, or if your board is hard to reach) add --features no-touch. All build knobs:
build.md.
2. Flash
-
Hold the BOOT button while plugging the board in (or hold BOOT, tap RESET). A mass-storage drive named
RP2350appears. -
Flash it, either way:
- Drag-and-drop:
cp firmware.uf2 /Volumes/RP2350/(macOS) or copy it to the mounted drive on Linux. - picotool (more reliable: it verifies and skips the mass-storage layer):
picotool load -v firmware.uf2 && picotool reboot.
The
RP2350drive is a fake FAT volume the bootrom emulates. It only understands the UF2 blocks written to it, not a real filesystem. On some machines the OS’s mass-storage layer breaks that (macOS resource-fork sidecar files and Spotlight, buffered or reordered writes, the board rebooting the instant the last block lands), so the copy errors or silently does nothing.picotool loadspeaks the bootrom’s PICOBOOT protocol directly, so reach for it whenever the drive never appears or the copy fails. - Drag-and-drop:
-
The board reboots itself and enumerates as
RS-Key Security Key. (The default build uses the project’s own USB identity, VID:PID0x1209:0x0001from pid.codes; the PC/SC reader name contains “RS-Key”. For a build that presents the YubiKey USB identity soykman/Yubico Authenticator auto-recognize it, build the opt-inVIDPID=Yubikey5flavor; see build.md.)
Check it:
rsk status        # FIDO getInfo + secure-boot + backup state, over USB
ykman info        # needs the opt-in VIDPID=Yubikey5 build: YubiKey 5A, firmware 5.7.4, 6 apps
On Linux, the CCID half (OpenPGP/PIV/OATH) needs pcscd + a polkit rule
first. See linux.md. FIDO works as soon as the udev rules are in
place.
3. Set a PIN (recommended)
rsk fido set-pin
Browsers and ssh-keygen will prompt for it when enrolling. 8 wrong attempts
lock the PIN until a reset. Standard security-key behaviour.
4. Enroll something
A passkey: go to any WebAuthn site (or https://webauthn.io to try), register a security key, touch the button when the LED asks.
An SSH key:
ssh-keygen -t ed25519-sk -f ~/.ssh/id_ed25519_sk    # touch twice, enter PIN
ssh-copy-id -i ~/.ssh/id_ed25519_sk you@server
ssh -i ~/.ssh/id_ed25519_sk you@server              # one touch to log in
The id_ed25519_sk file is a handle, not a key. It is useless without the
board. Copy it to other machines you ssh from.
macOS note: Apple’s
/usr/bin/sshhas no FIDO support. Use Homebrew OpenSSH (brew install openssh, then the absolute path/opt/homebrew/opt/openssh/bin/sshor put it first inPATH). Details: guides/ssh.md.
5. Back up your identity (optional but wise)
rsk backup export --scheme bip39          # 24 words, write them down
rsk backup finalize                       # seals the export window
The words recover your deterministic FIDO identity (ssh-sk logins, 2FA
registrations) onto a fresh board with rsk backup restore. Anyone who has the
words can recreate that identity on their own board, so store them like cash.
They do not cover resident passkeys, OpenPGP or PIV keys. See
guides/seed-backup.md.
Where next
- Feature guides: OpenPGP with gpg, PIV, OATH codes, OTP slots, soft-lock, LED colors
- production.md: fuse the master key into OTP + enable secure boot (irreversible, read first)
- threat-model.md: what this device protects against
Hardware
What RS-Key runs on, and the build knobs you need for a board other than the reference one. The full knob reference is in build.md. This page is the short version.
Supported boards
 |
 |
 |
 |
| RP2350-One reference · USB-A WS2812 on GPIO16 |
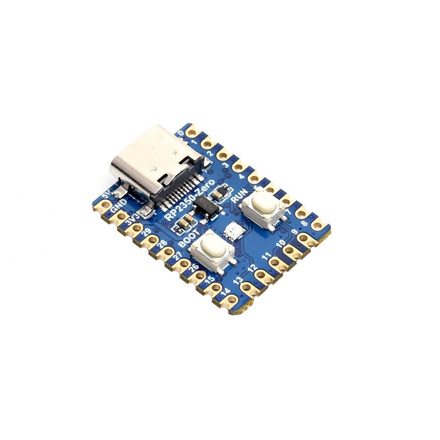
RP2350-Zero mini stick · USB-C |
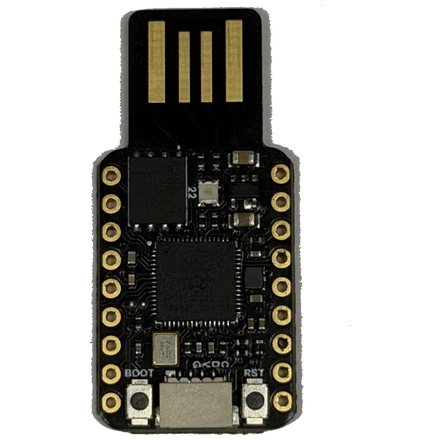
TenStar RP2350-USB USB-A stick WS2812 on GP22 |
RP2350-Touch-LCD-2.8 trusted display · 2.8″ LCD |
Board photos: Waveshare (RP2350-One / Zero / Touch-LCD-2.8).
Any RP2350 board with a USB connector should work. Development and on-device
testing happen on the Waveshare RP2350-One, where the WS2812 status LED on
GPIO16 works out of the box. Boards without an addressable LED run fine. The
indicator is optional and the firmware just runs dark. A board whose LED sits
behind a power gate — the Seeed XIAO RP2350 powers its WS2812 through GP23 —
lights up once that enable pin is set with LED_POWER_PIN (below).
The RP2350’s dual Cortex-M33, 520 KB SRAM, hardware TRNG, OTP fuses, and glitch detectors do the work. There is no secure element and no debugger requirement: the firmware flashes over USB BOOTSEL, so a bare board and a USB cable are enough.
Defaults and the knobs to change them
The default build targets a 4 MB flash chip with the LED on GPIO16, uses BOOTSEL for user presence, and assumes a standard 12 MHz crystal. For a different board, three compile-time knobs usually cover it:
| Knob | Default | When to change it |
|---|---|---|
FLASH_SIZE | 4M | A board with a different QSPI flash chip (e.g. 8M). build.rs regenerates memory.x from it. Must be ≤ 16 MB and leave ≥ 1 MB for code after the KV store; a 2 MB board also needs a smaller KVMAIN (below). |
KVMAIN | 1408K | A 2 MB board (Seeed XIAO RP2350, Waveshare RP2350-Zero-CM): the default 1408K KV main partition leaves too little for the ~900K image. Shrink it — FLASH_SIZE=2M KVMAIN=896K — to fit. A fully provisioned key uses only a few hundred KB. See build.md. |
LED_PIN | 16 | A board that uses GPIO16 for something else, or wires its addressable LED elsewhere (RP2350A: GPIO 0..=29). |
LED_POWER_PIN | none | A board whose LED sits behind a power gate that must be driven high to light it (e.g. the Seeed XIAO RP2350’s WS2812 on GP23). Set the enable GPIO; it must differ from LED_PIN and any GPIO PRESENCE_PIN. |
USR_LED_PIN | none | A board with a nuisance onboard user LED that lights by default (the Seeed XIAO RP2350’s active-low USR LED on GP25). Set the GPIO to park it off at boot; flip USR_LED_ACTIVE_HIGH=1 for an active-high LED. Must differ from LED_PIN, LED_POWER_PIN, and any GPIO PRESENCE_PIN. |
PRESENCE_PIN | bootsel | A board with a dedicated user-presence button on a GPIO. Set a pin number (0..=29); active-low with a pull-up by default (e.g. 0 for GPIO0-to-GND). |
PRESENCE_ACTIVE_HIGH | 0 | A presence button/sensor that reads high when pressed (a capacitive touch sensor, or a button to VCC). 1 flips the GPIO to pull-down + active-high. Only with a GPIO PRESENCE_PIN. |
LED_KIND | ws2812 | ws2812 (addressable RGB, default), gpio (plain on/off), pimoroni (3-pin PWM RGB), or none (no indicator). See build.md. |
LED_ORDER | rgb | A ws2812 board whose red and green come out swapped (blue fine): set grb (the WS2812B standard). The Waveshare RP2350-One is rgb; most other parts are grb. |
MAX_LEDS | 8 | A board with more than 8 daisy-chained addressable LEDs. The buffer ceiling; the actual connected count is set at runtime (guides/led.md). |
# example: an 8 MB board with a plain LED on GPIO25
env FLASH_SIZE=8M LED_KIND=gpio LED_PIN=25 cargo build --release -p firmware

# example: a 16 MB TenStar RP2350-USB — WS2812 on GP22, standard GRB order
env FLASH_SIZE=16M LED_PIN=22 LED_ORDER=grb cargo build --release -p firmware

# example: a Seeed XIAO RP2350 — WS2812 on GP22, GRB, power-gated by GP23 (driven high),
# its active-low USR LED on GP25 parked off, and its 2 MB flash (smaller KVMAIN)
env FLASH_SIZE=2M KVMAIN=896K LED_PIN=22 LED_ORDER=grb LED_POWER_PIN=23 USR_LED_PIN=25 cargo build --release -p firmware

# example: WS2812 on GP22 and a button-to-GND on GP0 (active-low)
env LED_PIN=22 PRESENCE_PIN=0 cargo build --release -p firmware

# example: an active-high capacitive touch sensor on GP0
env PRESENCE_PIN=0 PRESENCE_ACTIVE_HIGH=1 cargo build --release -p firmware
The four LED knobs (LED_PIN / LED_KIND / LED_ORDER / MAX_LEDS) set only the
boot defaults. A non-none build compiles all three backends, so the pin,
driver, wire order, and buffer ceiling are also changeable at runtime (no
reflash) with rsk hw or PicoForge, which write them to the device’s phy
record
(guides/led.md). The build knobs still matter for picking a
lean none build and for the out-of-the-box default.
Most RP2350A boards work with at most a one-line change. Everything else (USB descriptors, applets, flash layout) is board-independent.
Enclosures
A bare board works fine, but a printed case makes it pocketable. Three community designs fit the boards above:
- Waveshare RP2040-One / RP2350-One case by Patrick van der Leer. Sized for the reference board.
- RP2350 USB case by Vladimir Varzaru (a remix of Patrick’s design). A slimmer USB-stick form.
- Pico 2 Zero FIDO2 case (RP2350) on MakerWorld. Fits the RP2350-Zero.
The two Printables designs are licensed CC BY-SA 4.0: print, sell, and remix them freely, as long as you credit the authors and keep any derivative under the same license. Check the MakerWorld design’s own license on its page before reusing it. All are third-party designs, linked for convenience, not part of this project.
What the hardware does not give you
The OTP fuses and secure boot (production.md) are real hardening, but the RP2350 is a general-purpose microcontroller, not a certified secure element. Physical attacks are out of scope: decapping, microprobing, fault injection beyond the on-chip glitch detectors, power/EM side channels. See the threat model and limitations.
Build options
Every knob is compile-time. Set environment variables and cargo features at
cargo build and they bake into the image. Nothing here changes at runtime
(except where noted for the phy record).
# the general shape
nix develop -c env KNOB=value cargo build --release -p firmware [--features ...]
picotool uf2 convert target/thumbv8m.main-none-eabihf/release/firmware -t elf firmware.uf2
flowchart TD
    knobs["env knobs + cargo features"] --> build["cargo build (or nix build)"]
    build --> elf["firmware.elf"]
    elf --> conv["picotool uf2 convert"]
    conv --> uf2["firmware.uf2"]
    uf2 --> flash["BOOTSEL flash"]
    uf2 -. "secure boot only" .-> seal["picotool seal --sign<br/>signing key (host-only)"]
    seal -.-> signed["firmware-signed.uf2"]
    signed -.-> flash
Cargo features
| Feature | Default | Effect |
|---|---|---|
no-touch | off | Auto-confirm user presence. FIDO operations (makeCredential, getAssertion, U2F, reset, selection) and OpenPGP UIF data objects no longer require a press of the presence button (BOOTSEL by default, or PRESENCE_PIN when set). Requiring a touch is the default and is not a feature; --features no-touch is the explicit escape hatch for the automated suites (tests/, python-fido2, OpenPGP card tests), which cannot press a button and would hang on the (default) touch build. Never ship a no-touch build. |
advertise-pqc | off | Prepends ML-DSA-65 (COSE −49) and ML-DSA-44 (−48) to the getInfo algorithms list. Off by default because released Firefox versions abort the entire getInfo parse on an unknown COSE id and report the authenticator broken. PQC capability is on regardless of this flag. makeCredential negotiates −49 / −48 from the request’s pubKeyCredParams; the flag only controls advertising. |
fips-profile | off | Bakes a locked FIPS-style policy into the image: ES256K (secp256k1) leaves the FIDO menu, the minimum PIN rises to 6 and trivially guessable PINs are refused (the strong-pin policy below), the vendor seed export is refused, and PIV refuses new 3DES management keys and RSA-1024. The default build is unchanged; with secure boot the policy is sealed by your signature. A profile, not a FIPS validation. Details and rationale: guides/fips.md. |
strong-pin | off | Raises the FIDO clientPIN minimum to 6 code points (from CTAP’s default 4) and refuses the most guessable PINs — a single repeated digit (000000) or a ±1 run (123456, 654321). A narrow PIN-hardening knob: unlike fips-profile (which bundles this same PIN policy with dropping secp256k1, refusing the seed export, and constraining PIV), it changes only the PIN policy. Off by default; the default build keeps the CTAP-standard 4-code-point floor. Rationale: on the RP2350 a BOOTSEL flash snapshot/restore rolls back the wrong-PIN counter (#37), so a longer, non-trivial PIN is the practical bound on offline brute force. Enforced on the host setPIN/changePIN path and the trusted-display PIN pad. |
strict-up | off | Require a touch on every getAssertion. By default RS-Key honors the platform’s silent pre-flight probe (up:false): it returns the discovery assertion with no touch and the UP flag clear, so a WebAuthn login with an allowCredentials (non-resident) credential is a single touch, matching the CTAP2 spec and YubiKey. With strict-up the button is polled even for that probe, so such a login asks for two touches (one for the probe, one for the real assertion). A deliberately stricter “every assertion needs an explicit gesture” stance for those who want it; it is not spec-conformant for up:false. Resident-credential / passkey logins are a single touch either way. fido-conformance enables this implicitly (the conformance pass was validated with it). |
always-uv | off | Bake the CTAP 2.1 alwaysUv option on by default, so the key requires user verification (a PIN — or the display build’s built-in UV pad) for every makeCredential / getAssertion straight out of the box, with no post-flash ykman fido config toggle-always-uv. The shipped image leaves alwaysUv off until a platform turns it on; this flag flips the default. It stays runtime-toggleable — toggleAlwaysUv writes an override that survives reboots but not an authenticatorReset, which restores this compiled default. Set a PIN after flashing: with alwaysUv on and no PIN, FIDO operations return CTAP2_ERR_PUAT_REQUIRED until one is set — the standard cue for the platform (Windows, Chrome) to prompt for a PIN. While alwaysUv is on the CTAP1/U2F interface is disabled (CTAP 2.1 §7.2.4, as on a YubiKey): U2F only proves presence, never verification, so legacy U2F-only logins stop working, and getInfo drops U2F_V2 from its advertised versions; WebAuthn / CTAP2 (passkeys) are unaffected. The one exception §7.2.4 allows is a build “protected by a built-in user verification method”: on a display build with a PIN set, U2F stays available and every register / authenticate collects the PIN on the panel instead of a touch. |
display | off | Experimental trusted-display build for a screen + touch board (Waveshare RP2350-Touch-LCD-2.8). Adds an on-screen Approve / Deny that paints the real relying party for every touch (Deny refuses with OPERATION_DENIED), an on-device PIN pad (built-in user verification (options.uv), plus a CCID pinpad so GnuPG / OpenSC collect the OpenPGP / PIV PIN on the panel, never over USB), a read-only Apps browser (OpenPGP / PIV / OATH state, no PIN), a Passkeys manager (delete / rename on-device), and Settings (device & FIDO PINs, on-screen BIP-39 / SLIP-39 recovery export, audit log, factory reset). Entirely dep:-gated. A standard key compiles none of it, so its image is unaffected. Build it LED_KIND=none FLASH_SIZE=16M … --features display (the panel takes GPIO16 for its backlight; a compile-time guard enforces LED_KIND=none). Full walkthrough with screenshots: guides/display.md. |
strict-config | off | Restores the historical strict admin-write authorization. The DEFAULT build is now the permissive, full-ykman/YubiKey-compatible admin surface: device-config writes (CCID Management WRITE CONFIG, FIDO vendor CONFIG_WRITE, the CTAPHID 0x43 and OTP-HID 0x15 transport writes) are ungated, and Management RESET (device-wide factory reset) plus the OTP-HID DEVICE_CONFIG / SCAN_MAP / NDEF slots are served. --features strict-config re-imposes the presence/PIN gates and refuses the ungated transport writes — the historical shipped behavior. This deliberately weakens the DEFAULT threat model: any USB host can rewrite the reported identity with no operator confirmation (threat-model.md). Not the runtime flash flag EF_HARDENED. Ship it as firmware-strict-config. |
Environment variables
| Variable | Default | Values | Effect |
|---|---|---|---|
VIDPID | RSKey | RSKey, Yubikey5, YubikeyNeo, YubiHSM, NitroHSM, NitroFIDO2, NitroStart, NitroPro, Nitro3, Gnuk, GnuPG, Pico, Dev | USB VID/PID preset. The default RSKey (0x1209:0x0001) is this project’s own pid.codes identity, not a masquerade. The opt-in Yubikey5 (0x1050:0x0407) instead presents Yubico’s VID/PID and swaps the descriptor strings to Yubico / YubiKey RSK …. That is what makes ykman, Yubico Authenticator and the stock Yubico udev rules recognize the device; build it only for local interop / the interop suite. Pico = the Raspberry Pi generic id (0x2E8A:0x10FD); Dev = a non-colliding placeholder (0xFEFF:0xFCFD). An unknown preset fails the build. The vendor-mimicking presets are for local interop only. Never distribute hardware carrying them. |
USB_VID / USB_PID | from preset | 0xHHHH | Raw override, applied on top of the preset (you can override either half alone). |
USB_MANUFACTURER / USB_PRODUCT | from preset | string | Raw override of the USB descriptor strings. The default is RS-Key / RS-Key Security Key; the Yubico VID instead bakes Yubico / YubiKey RSK OTP+FIDO+CCID. The project’s own tools (rsk, rsk-tui) match the reader by the RS-Key (or RSK) token in the product string. |
FW_VERSION | 5.7.4 | X.Y.Z or X.Y | The firmware version reported everywhere a tool looks: management DeviceInfo (ykman info), FIDO getInfo, CTAPHID INIT, OATH/OTP/PIV version fields. Yubico tools gate features on it; 5.7.4 mimics a current YubiKey 5. Does not change the OpenPGP card version (3.4) or the USB bcdDevice (an internal build counter). |
XOSC_DELAY_MULT | 128 | 1..=1024 | Crystal-oscillator startup-delay multiplier (“delayed boot”). A longer settle wait is intended to harden the early-boot clock-switch window against glitch/fault injection. 128 is the embassy default. |
FLASH_SIZE | 4M | bytes, 0xHEX, or <n>K/<n>M | External QSPI flash size. build.rs regenerates memory.x from it. The KV store (KVMAIN + KVCNT) stays pinned at the top and the code region is the rest; 4M with the default KVMAIN reproduces the checked-in layout byte-for-byte. Use this for boards with a different flash chip (e.g. 8M); must be ≤ 16 MB and leave ≥ 1 MB for code after the KV store (a 2 MB board needs a smaller KVMAIN, below). |
KVMAIN | 1408K | bytes, 0xHEX, or <n>K/<n>M | Size of the KV main partition (credentials, keys, OpenPGP DOs). The default 1408K is the checked-in layout; shrink it to free code space on a small flash. A 2 MB board (Seeed XIAO RP2350, Waveshare RP2350-Zero-CM) can’t fit the firmware (~900K) under a 1408K KVMAIN, so build it FLASH_SIZE=2M KVMAIN=896K (896K creds + 128K counters + 1024K code). Sector-aligned, min 128K; the counter partition (KVCNT, 128K) is fixed. Baked into both memory.x and flash_storage.rs from one value, so the two never drift. Set at build time only — changing it on a provisioned device shifts the partition offsets and orphans the store. |
LED_PIN | 16 | 0..=29 | The status-LED GPIO for the ws2812 and gpio backends (RP2350A). Default GPIO16 is the Waveshare RP2350-One. Point it at a free GPIO on boards that use 16 for something else; the indicator simply drives whatever pin you pick. (Unused by pimoroni, which has fixed PWM pins, and by none.) |
LED_POWER_PIN | none | none or 0..=29 | An optional GPIO driven high at boot to power a gated LED rail — some boards put the addressable LED behind a load switch. The Seeed XIAO RP2350 is the case in point: its onboard WS2812 data is on GP22 but its power sits behind GP23, so the LED stays dark until GP23 is high (LED_PIN=22 LED_ORDER=grb LED_POWER_PIN=23). Held for the device’s lifetime; must differ from LED_PIN and a GPIO PRESENCE_PIN (rejected at compile time). Boot-only, so it is not in the runtime phy record. Ignored by LED_KIND=none. |
USR_LED_PIN | none | none or 0..=29 | An optional GPIO wired to a nuisance onboard user/status LED that the firmware drives to its OFF level at boot and holds. The Seeed XIAO RP2350’s USR LED sits on GP25, is active-low, and comes up lit (weak pull-down); USR_LED_PIN=25 parks it high so it stays dark. Independent of the addressable status LED, so it works on a LED_KIND=none build too. Held for the device’s lifetime; must differ from LED_PIN, LED_POWER_PIN, and a GPIO PRESENCE_PIN (rejected at compile time), and is unsupported on a display build (the panel replaces the onboard LED). Boot-only, not in the runtime phy record. |
USR_LED_ACTIVE_HIGH | 0 | 0 / 1 | Polarity of the USR_LED_PIN LED. 0 (default) = active-low (lit when the pin is low, so OFF = drive high — the XIAO USR LED). 1 = active-high (lit when high, so OFF = drive low). Ignored without a USR_LED_PIN. |
PRESENCE_PIN | bootsel | bootsel or 0..=29 | User-presence input source. Default bootsel keeps the BOOTSEL hardware-button path. Set a GPIO number for a dedicated button (active-low with an internal pull-up by default; flip with PRESENCE_ACTIVE_HIGH). Example: PRESENCE_PIN=0 for a button to ground on GPIO0. |
PRESENCE_ACTIVE_HIGH | 0 | 0 / 1 | GPIO presence-button polarity, only meaningful with a GPIO PRESENCE_PIN. 0 (default) = active-low: button to ground, internal pull-up, a press reads low. 1 = active-high: internal pull-down, a press reads high, for a capacitive touch sensor or a button to VCC. Ignored for the BOOTSEL default. |
WAKE_PIN | 25 | none or 0..=29 | display builds only. The button that wakes the panel from display sleep. Default 25 is the Waveshare RP2350-Touch-LCD-2.8’s BAT_PWR button. none makes wake touch-only (no button); any other GPIO selects a different button. A value in the LCD/touch range (10..=18) is rejected at compile time. The display-sleep timeout itself is set on-device (Settings → Display sleep). |
WAKE_ACTIVE_HIGH | 0 | 0 / 1 | Wake-button polarity (display builds, with a GPIO WAKE_PIN). 0 (default) = active-low (internal pull-up, press reads low, e.g. BAT_PWR to ground); 1 = active-high (internal pull-down). |
LED_KIND | ws2812 | ws2812 / gpio / pimoroni / none | The LED driver backend, and the boot default. A non-none build compiles all three so the driver/pin/order are runtime-switchable via rsk hw / PicoForge (see below). ws2812 = a single addressable RGB on LED_PIN (the Waveshare default). gpio = a plain on/off LED on LED_PIN. Hue/brightness collapse to lit/unlit, but the blink pattern still distinguishes statuses. pimoroni = a 3-pin PWM RGB (Pimoroni Tiny 2350: R=GPIO18, G=GPIO19, B=GPIO20, common-anode). none = no indicator (the status engine still runs; nothing renders it, and the phy LED fields are ignored). |
LED_ORDER | rgb | rgb / grb | WS2812 wire byte order (ws2812 backend only). The Waveshare RP2350-One is unusually rgb (the default); standard WS2812B parts (e.g. the TenStar RP2350-USB) are grb. If a ws2812 board comes up with red and green swapped (blue fine), flip this to grb. |
MAX_LEDS | 1 | 1–64 | PIO state-machine and frame-buffer ceiling for addressable LEDs. The actual connected count is set at runtime via rsk hw --led-num and must be ≤ MAX_LEDS. Default 1 is a single onboard LED; a board with a chain of N builds with MAX_LEDS=N (up to 64). |
FAKE_MKEK / FAKE_DEVK | unset | 64 hex chars | Test builds only. Bakes a fake OTP master key / device key into the image instead of reading the OTP fuses, so the whole OTP migration path can be exercised with zero fuse writes. The build prints a loud warning and the key is greppable in the binary. Flashing a FAKE build onto a provisioned device migrates its data under the fake key. Going back orphans that data (recovery = per-applet resets). Never flash one on a device you care about. |
The LED_PIN / LED_KIND / LED_ORDER / MAX_LEDS values are boot defaults
only. A
non-none build compiles all three backends, so the LED pin, driver, and wire
order are runtime-configurable (no reflash) with rsk hw (or PicoForge),
which write them to the device’s phy record. The build knobs decide the
out-of-the-box behaviour and let you drop to a lean none build. Everything
else is a rsk hw call away (guides/led.md).
Verify what got baked without flashing:
rg PK_USB_VID  target/thumbv8m.main-none-eabihf/release/build/firmware-*/output   # decimal: 4617 = 0x1209
rg PK_FW_VERSION target/thumbv8m.main-none-eabihf/release/build/rsk-sdk-*/output
rg PK_XOSC_DELAY_MULT target/thumbv8m.main-none-eabihf/release/build/firmware-*/output
The firmware-* glob matches one build dir per feature combination you have
built, so a stale entry can show an old value. Read the freshest one (or
cargo clean -p firmware first) if the output looks doubled.
Flash size and the memory map
FLASH_SIZE regenerates memory.x: the KV store stays pinned to the top
of flash and only the code region grows. A 16 MB board just gets more (unused)
code headroom. The credential capacity is unchanged (why the flash is mostly
empty by design: architecture.md).
The KV store is 1.5 MB by default (KVMAIN 1408K + KVCNT 128K). On a 2 MB
board that leaves too little for the ~900K image, so the firmware can’t link.
KVMAIN shrinks the main partition to make room: build a 2 MB Seeed XIAO RP2350
or Waveshare RP2350-Zero-CM with FLASH_SIZE=2M KVMAIN=896K (896K creds + 128K
counters + 1024K code). build.rs bakes the size into both memory.x and
flash_storage.rs, so the two partitions never disagree, and it rejects a split
that leaves under 1 MB for code with a message that names the fix. A fully
provisioned key needs only a few hundred KB, so 896K is ample.

At the 4M default the code region is 2560K; the shipping image uses roughly a
third of it. check.sh enforces a ratchet well under that: a ceiling that
hugs the current image, so a runaway dependency (a whole extra EC curve is
~150 KiB) or any surprise growth trips it long before the linker’s hard limit.
Lower FIRMWARE_FLASH_BUDGET_KIB when the image shrinks; raise it in the same
commit when a real feature legitimately grows it.
Examples
# default: touch build, RS-Key identity (0x1209:0x0001), fw 5.7.4
cargo build --release -p firmware

# opt-in Yubico interop flavor (so ykman / Yubico Authenticator see the device)
env VIDPID=Yubikey5 cargo build --release -p firmware

# no-touch test build (for the automated suites)
cargo build --release -p firmware --features no-touch

# Nitrokey FIDO2 identity with its own version number
env VIDPID=NitroFIDO2 FW_VERSION=1.4.0 cargo build --release -p firmware

# advertise PQC in getInfo (breaks released Firefox — see above)
cargo build --release -p firmware --features advertise-pqc

# ship with CTAP 2.1 alwaysUv enabled by default (set a PIN after flashing)
cargo build --release -p firmware --features always-uv

# strict admin-write posture (the historical default; config writes stay gated)
cargo build --release -p firmware --features strict-config
nix build (hermetic, no dev shell)
The flake exposes the firmware as a package, so you can build a UF2 without entering the dev shell or having a Rust toolchain installed. Nix pins the toolchain, the cross target, and every dependency:
nix build .#firmware                 # default touch image
ls result/                           # firmware.elf  firmware.uf2
result/firmware.uf2 is functionally the image the dev-shell cargo build
produces. Unlike the dev-shell build, it is bit-for-bit
reproducible: the derivation remaps the two absolute build inputs out of
the binary (the per-build sandbox dir and the toolchain store path; both
land in panic-location strings in .rodata, plus DWARF in the .elf) with
stable --remap-path-prefix, so one flake.lock yields one firmware.uf2
on every machine of a platform. The daily repro job in
deep-checks
proves it (nix build twice, the second with --rebuild so nix compares
every output byte) and publishes the canonical sha256 in its run summary.
To verify a published image: nix build .#firmware at the release commit
and compare hashes. A sealed image can’t be reproduced by a third party
(the signature is the signer’s); verify the unsigned payload instead, then
check the seal with picotool. The flavors mirror the
CI matrix:
| Attribute | Image |
|---|---|
.#firmware (default) | touch build, RS-Key identity (0x1209:0x0001), fw 5.7.4 |
.#firmware-no-touch | --features no-touch (the test build) |
.#firmware-fips | --features fips-profile |
.#firmware-pqc | --features advertise-pqc |
.#firmware-strong-pin | --features strong-pin (6-code-point PIN floor + trivial-PIN block; also .#firmware-strong-pin-pqc) |
.#firmware-always-uv | --features always-uv (CTAP 2.1 alwaysUv on by default; also .#firmware-always-uv-pqc) |
.#firmware-strict-up | --features strict-up (touch on every assertion — not spec-conformant for up:false; also .#firmware-strict-up-pqc) |
.#firmware-display | --features display, FLASH_SIZE=16M, LED_KIND=none (experimental, Waveshare RP2350-Touch-LCD-2.8) |
.#firmware-2mb | default features + RS-Key identity, FLASH_SIZE=2M, KVMAIN=896K (2 MB boards: Seeed XIAO RP2350, Waveshare RP2350-Zero-CM) |
.#firmware-16mb | default features + RS-Key identity, FLASH_SIZE=16M (16 MB boards, e.g. TenStar RP2350-USB) |
.#firmware-strict-config | --features strict-config (historical strict admin-write posture; the default firmware is now the permissive full-ykman admin surface) |
Two caveats:
-
The output is UNSIGNED. On a secure-boot device you still seal it with your key. The signing key deliberately never enters the build sandbox:
picotool seal --sign --hash result/firmware.uf2 firmware-signed.uf2 \
    ~/.rs-key-secrets/secure_boot_key.pem ~/.rs-key-secrets/otp_secureboot.json \
    --major 1 --minor 0
The
.pemis your signing key, the.jsonis wheresealwrites the boot-key fingerprint, and--major/--minorstamp an image version into the boot metadata: a plainmajor.minorlabel, separate from both the firmware version RS-Key reports (5.7.x) and the rollback version. The full meaning of each flag is in production.md.If you have enabled anti-rollback, the seal additionally needs
--rollback <your board's floor>, a separate, deliberate step with its own rules and a finite OTP budget. Don’t add it blindly; the full flashing-with-rollback workflow is in anti-rollback.md. -
The env knobs above are declarative Nix args, not ambient env. A plain
nix buildbakes the defaults; to customize, pass them to the builder. For a config you reuse, add a one-line preset package (the flake shipsfirmware-pico = mkFirmware { name = "firmware-pico"; vidpid = "Pico"; }as a copy-me example) and build it:nix build .#firmware-picoFor a one-off without committing a package, call the exposed builder. (The
--impurehere only letsgetFlakeread the working tree; the knobs themselves are pure. A committed/pushed flakeref needs no flag.)nix build --impure --expr \ '(builtins.getFlake (toString ./.)).lib.${builtins.currentSystem}.mkFirmware { name = "fw"; vidpid = "Nitro3"; fwVersion = "2.0.0"; }'Knobs:
vidpid,usbVid,usbPid,fwVersion,xoscDelayMult,flashSize,ledPin,presencePin,fakeMkek,fakeDevk(mirroring the env vars above). As a convenience each also falls back to the like-named env var, soVIDPID=Pico nix build --impure .#firmwareworks for a quick throwaway, but the declarative arg is the reproducible path and needs no--impure.
nix run — host tools without the dev shell
The host tooling is also exposed as flake apps, so it runs straight from the
flake without nix develop (Nix pins every dependency):
nix run .#rsk -- status          # the Python device CLI (rsk --help for groups)
nix run .#rsk-tui                # the live ratatui dashboard (prebuilt binary)
nix run .#flash -- --help        # build + sign + flash, one command (secure boot)
#rsk wraps the bundled tools/rsk package on the pinned interpreter; #rsk-tui
is a prebuilt host binary (no compile-on-run). Both are also buildable as
packages (nix build .#rsk-tui).
nix run .#flash wraps the secure-boot flash ritual end to end: it seals
(signs) an unsigned image, reboots the device into BOOTSEL, loads it, then
reboots. With no argument it seals the reproducible default firmware
(.#firmware); pass a path to seal a flavor you built yourself
(nix run .#flash -- firmware-no-touch.uf2). It reads the signing key from the
host (~/.rs-key-secrets/{secure_boot_key.pem,otp_secureboot.json} by default,
override the directory with RS_KEY_SECRETS) and stamps --rollback 1 into the
seal (set RSK_ROLLBACK to change). It prompts before flashing (-y skips). The
device must already run secure boot with the matching boot key provisioned; the
full ritual, the anti-rollback rules, and recovery are in
production.md and anti-rollback.md.
Runtime overrides (phy record)
The rescue applet can store a small config record in flash (rsk /
rsk-tui expose the safe fields). At boot, a stored VID/PID and product
string override the compile-time defaults, useful to re-identify a device
without rebuilding. A bad value can make the device enumerate strangely;
recovery is a BOOTSEL reflash (which never reads the record) or rewriting the
record over CCID.
The effective identity is resolved in this order:
flowchart TD
    a["VIDPID preset"] --> b["USB_VID / USB_PID raw override (compile time)"]
    b --> c["phy record (runtime, at boot)"]
    c --> d["effective VID/PID + product string"]
Notes
- The PC/SC reader name comes from the USB strings. The default build reads
RS-Key RS-Key Security Key …, and the project’s own tools (rsk,rsk-tui) match theRS-Keytoken.ykmanand Yubico Authenticator derive the device’s PID purely from that name. They need theYubico YubiKeywords and theOTP/FIDO/CCIDtokens, which only the opt-inVIDPID=Yubikey5flavor supplies (Yubico YubiKey RSK OTP+FIDO+CCID); on the default build those tools do not see the device.gpg,ssh -sk, browsers, libfido2 and OpenSC are identity-independent and work on either build. bcdDevice(USB device release) is an internal build counter, not the firmware version.- The two UF2 flavors on a release build of this repo:
firmware.uf2(touch) andfirmware-test.uf2(no-touch).scripts/check.shbuilds both.
Releases & verification
Releases live on the GitHub Releases
page. Each is cut from a v* git tag by the
release workflow.
It builds every artifact reproducibly, hashes it, and signs the manifest.
What a release contains
-
Fourteen firmware images:
rs-key-<tag>-<flavor>.uf2. Every published image requires a physical touch; theno-touchtest builds are never released (a signed presence-bypass asset would remove the consent gate):flavor flags use defaulttouch the normal build; start here pqc+ advertise-pqc advertises ML-DSA-65 and ML-DSA-44 in getInfo (breaks old Firefox) fips+ fips-profile the locked FIPS-style policy (guides/fips.md) fips-pqc+ both strong-pin+ strong-pin 6-code-point PIN floor + trivial-PIN block (build.md, threat-model.md) strong-pin-pqc+ both always-uv+ always-uv bakes CTAP 2.1 alwaysUvon: user verification (a PIN) for every operation, U2F disabled. Set a PIN after flashing (build.md)always-uv-pqc+ both strict-up+ strict-up not spec-conformant: a touch on every assertion, so a WebAuthn allowCredentialslogin asks for two touches (build.md). Pick it only if you want that stricter stancestrict-up-pqc+ both display+ display experimental trusted-display build (Waveshare RP2350-Touch-LCD-2.8, guides/display.md) 2mbFLASH_SIZE=2M KVMAIN=896K2 MB boards (Seeed XIAO RP2350, Waveshare RP2350-Zero-CM) 16mbFLASH_SIZE=16M16 MB boards (e.g. TenStar RP2350-USB) strict-config+ strict-config the historical strict admin-write posture: config writes stay presence/PIN-gated and the ungated transport writes are refused (build.md, threat-model.md). The defaultbuild is now the permissive full-ykman admin surfaceAll fourteen present the default RS-Key USB identity (
0x1209:0x0001). For the YubiKey-interop identity, buildVIDPID=Yubikey5yourself (build.md). -
SHA256SUMS: a checksum for every image and the SBOM. -
SHA256SUMS.cosign.bundle: a keyless cosign signature ofSHA256SUMS(sigstore/Fulcio; the signer is the reusable build workflow’s GitHub OIDC identity,release-build.yml, see the verify step below; logged in Rekor). -
rs-key-<tag>-sbom.cdx.json: a CycloneDX software bill of materials for the firmware’s dependency tree.
The images are UNSIGNED for secure boot. The cosign signature attests who built them, not the boot seal. On a secure-boot device you seal an image with your own key before flashing.
nix run .#flashdoes it, or see production.md. The reproducibility claim is about the unsigned payload (a seal is signer-specific and not reproducible by a third party).
Verify a download
Grab the images you want plus SHA256SUMS and SHA256SUMS.cosign.bundle.
# 1. the checksums file is authentic (keyless cosign — needs cosign >= 2.0)
#    The signer is the *reusable* build workflow (release-build.yml), not the
#    thin release.yml caller: a workflow_call job's OIDC identity is its own
#    job_workflow_ref, so that is what the Fulcio cert's SAN carries.
cosign verify-blob \
  --bundle SHA256SUMS.cosign.bundle \
  --certificate-identity-regexp '^https://github\.com/TheMaxMur/RS-Key/\.github/workflows/release-build\.yml@refs/tags/v.*' \
  --certificate-oidc-issuer 'https://token.actions.githubusercontent.com' \
  SHA256SUMS

# 2. the images match the (now-trusted) checksums
sha256sum -c SHA256SUMS
Both must pass. Step 1 proves SHA256SUMS was produced by this repo’s release
workflow; step 2 ties each .uf2 (and the SBOM) to it.
Verify the build is reproducible
The images are bit-for-bit reproducible per platform, per flake.lock, so you can
rebuild them yourself and compare (no need to trust the published binary):
git checkout <tag>
nix build .#firmware              # the default flavor (others: .#firmware-fips, …)
sha256sum result/firmware.uf2     # compare against SHA256SUMS for rs-key-<tag>-default.uf2
A match on Linux reproduces the CI-built artifact exactly. (Cross-platform identity, macOS vs Linux, is not guaranteed; the canonical bytes are the Linux ones the workflow publishes.)
Supply chain
How a downloaded RS-Key release proves it came from this source tree, was built by this project’s CI, and pulls in only reviewed dependencies. And how you verify each claim yourself.
No private keys are involved here. The build provenance is keyless (sigstore/Fulcio, signed against this workflow’s GitHub OIDC identity, recorded in the public Rekor transparency log). The only signing key in the project is the secure-boot key. That is a different thing entirely. It seals an image so the RP2350 bootrom will run it. It has nothing to do with the supply chain. See production.md for that.
What every release carries
| Layer | Artifact | What it proves |
|---|---|---|
| Reproducible build | the 11 .uf2 flavors | the binary is a pure function of the source at the tag. Anyone can rebuild it |
| Repro gate | (CI, blocking) | the release job fails if any flavor doesn’t rebuild bit-identical, so a non-reproducible image is never published |
| Checksums + signature | SHA256SUMS + SHA256SUMS.cosign.bundle | the hashes were signed by this repo’s release workflow (keyless cosign) |
| Build provenance | a GitHub attestation (not a release file) | which reusable workflow, at which commit, on which runner built each .uf2. SLSA v1 Build L3, keyless via attest-build-provenance |
| SBOM | rs-key-<tag>-sbom.cdx.json | the CycloneDX bill of materials for the firmware crate |
| Dependency audit | supply-chain/ (in-repo) | every dependency is covered by an imported audit or a recorded exemption (cargo-vet) |
Verifying a download
1. Reproducible build
Rebuild from the tagged source and compare. This is the strongest check, because it needs no trust in the publisher at all:
git checkout <tag>
nix build .#firmware            # or .#firmware-pqc, .#firmware-fips, …
sha256sum result/firmware.uf2   # compare against SHA256SUMS
CI already enforces this: the release job rebuilds all eleven flavors with
nix build --rebuild and fails on any bit-level difference before publishing.
2. Checksum signature (keyless cosign)
cosign verify-blob \
  --bundle SHA256SUMS.cosign.bundle \
  --certificate-identity-regexp '^https://github.com/TheMaxMur/RS-Key/\.github/workflows/release-build\.yml@.*$' \
  --certificate-oidc-issuer https://token.actions.githubusercontent.com \
  SHA256SUMS
sha256sum -c SHA256SUMS          # then check the artifacts against it
The certificate identity is release-build.yml, not release.yml: cosign
runs inside the reusable builder. Sigstore stamps the cert with the reusable
workflow’s identity (job_workflow_ref).
3. Build provenance (GitHub attestation)
gh attestation verify rs-key-<tag>-default.uf2 \
  --repo TheMaxMur/RS-Key \
  --signer-workflow TheMaxMur/RS-Key/.github/workflows/release-build.yml
This confirms the .uf2 was built by the release-build.yml reusable
workflow in this repo. The attestation records the workflow, commit and
runner, so a hand-built upload won’t verify. Pinning --signer-workflow to the
reusable builder is the SLSA Build L3 check: it proves a specific, trusted
workflow produced the artifact, not merely that something in the repo did.
(Dropping --signer-workflow still verifies an attestation exists for this repo,
a weaker Build-L2-style check.) The provenance is a GitHub attestation
(Sigstore-signed, logged in Rekor) kept in the attestation API rather than as a
release asset, so it stays available even though the published release is
immutable.
Dependency review — cargo-vet
cargo-deny already blocks bad licenses and known advisories. cargo-vet
answers a different question (has anyone actually reviewed this crate’s code?)
by requiring every dependency to be covered by a recorded audit.
The audit set lives in supply-chain/:
imported audits from Mozilla, Google, ISRG and Zcash, plus our own
exemptions for everything they don’t cover. The gate runs in check.sh:
nix develop -c cargo vet --locked
Honest scope. RS-Key is an embedded tree: embassy, the RP2350 HAL, defmt
and many RustCrypto crates are not in the big organizations’ audit sets, so they
are recorded as exemptions (grandfathered in, not yet line-reviewed). The
point isn’t that every line is audited. It’s that a new, unreviewed crate
cannot enter the tree silently. It fails cargo vet until it’s audited,
imported, or explicitly exempted. To see the current state and shrink the
exemption list:
nix develop -c cargo vet              # what's audited vs exempted
nix develop -c cargo vet suggest      # diffs to review next
The host tools/tui workspace is separate and not yet under cargo-vet. It is
covered by Dependabot and cargo-deny.
Transparency-log monitoring
The Rekor log that backs every signature above is tamper-evident, not
tamper-proof: it records misuse, but only if someone looks. A scheduled
workflow,
rekor-monitor.yml,
does the looking. Every hour it runs
sigstore/rekor-monitor and files
a GitHub issue listing any Rekor entry signed as an RS-Key GitHub-Actions
identity (any …/RS-Key/.github/workflows/* subject under the GitHub OIDC
issuer).
This is the detection half that complements the verification above: the
attestations prove a legitimate release is genuine, while the monitor surfaces
an illegitimate signature, one made with our identity by something we didn’t
run (a compromised OIDC token, repo, or runner). Each real release adds a couple
of expected entries from release-build.yml, so a known issue or two per release
is normal. The alarm is an entry you don’t recognise.
What’s deliberately not here
- No
cargo-vetof a fully line-reviewed tree. See the honest scope above. - No image encryption / signed-for-boot release artifacts. The published
.uf2s are unsigned for secure boot by design. You seal them with your own key (production.md). The signatures on this page attest the build, not the boot.
See also: releases.md for the release index, and COMPLIANCE.md for the licensing posture.
Linux host setup
The board enumerates as a composite FIDO HID + CCID device. By default it
uses the project’s own RS-Key USB identity 0x1209:0x0001 (pid.codes), with the
PC/SC reader name containing RS-Key. The opt-in VIDPID=Yubikey5 interop build
instead presents the YubiKey identity 0x1050:0x0407 (other presets:
build.md). The two transports have different host requirements on
Linux:
| Transport | Used by | Out of the box? |
|---|---|---|
FIDO HID (0xF1D0) | WebAuthn, ssh ed25519-sk, fido2-token, python-fido2 | yes, once the yubico udev rules grant your user access to the hidraw node |
| CCID (PC/SC) | OpenPGP, PIV, OATH, Yubico-OTP, gpg --card-status (ykman only on the opt-in VIDPID=Yubikey5 build) | needs pcscd running and a polkit rule to use it as a non-root / SSH-session user |
flowchart TD
    a["FIDO HID<br/>WebAuthn · ssh-sk · fido2-token"] --> b["hidraw + yubico udev rules<br/>(usually works out of the box)"]
    c["CCID (PC/SC)<br/>ykman · gpg · OpenPGP / PIV / OATH"] --> d["pcscd + polkit rule<br/>(+ disable-ccid for gpg)<br/>— needs both pieces"]
FIDO generally works after installing the standard yubico udev rules. CCID needs
the extra two pieces below: a polkit rule (so a non-root user, including one
over SSH, may talk to pcscd) and, if you also use GnuPG, disable-ccid in
scdaemon.conf so gpg’s scdaemon goes through pcscd instead of grabbing
the raw CCID interface and locking out ykman/pcsc-tools.
Verified on a NixOS 25.11 host (kernel 6.18.x): FIDO
getInfoworks as a plain user over SSH once the udev rule below is in place, andgpg --card-statusworks withdisable-ccid.ykman infoworks the same way on the opt-inVIDPID=Yubikey5build (it gates on theYubico YubiKeyreader name, which the default RS-Key build does not present).
Replace youruser with your login name throughout.
NixOS (declarative)
Add to your configuration.nix:
{ pkgs, ... }:
{
  # PC/SC daemon for the CCID applets (OpenPGP / PIV / OATH / OTP).
  services.pcscd.enable = true;

  # udev rules that grant access to the FIDO hidraw node. The stock yubico
  # rules match VID 0x1050 only, so the default RS-Key identity (0x1209) needs
  # its own rule; build VIDPID=Yubikey5 instead if you want to reuse the stock
  # yubico rules unchanged.
  services.udev.packages = [
    pkgs.yubikey-personalization
    pkgs.libfido2
  ];
  services.udev.extraRules = ''
    # RS-Key own identity (pid.codes 0x1209:0x0001) — FIDO HID + CCID access.
    SUBSYSTEM=="hidraw", ATTRS{idVendor}=="1209", ATTRS{idProduct}=="0001", TAG+="uaccess"
    SUBSYSTEM=="usb", ATTRS{idVendor}=="1209", ATTRS{idProduct}=="0001", TAG+="uaccess"
  '';

  # Let a non-root user (e.g. over SSH) talk to pcscd. Without this, CCID works
  # only as root and `ykman`/`gpg --card-status` fail from an SSH session.
  security.polkit.extraConfig = ''
    polkit.addRule(function(action, subject) {
      if ((action.id == "org.debian.pcsc-lite.access_pcsc" ||
           action.id == "org.debian.pcsc-lite.access_card") &&
          subject.user == "youruser") {
        return polkit.Result.YES;
      }
    });
  '';

  # Optional: the host tools (ykman, gpg, openssh with FIDO support).
  environment.systemPackages = with pkgs; [
    yubikey-manager   # ykman
    libfido2          # fido2-token, fido2-assert
    opensc            # opensc-tool -l, pkcs11
    pcsctools         # pcsc_scan
  ];
}
nixos-rebuild switch, then re-plug the board (or restart pcscd).
Generic Linux (Debian / Ubuntu / Fedora / Arch)
-
Install the stack. Package names vary by distro:
- Debian/Ubuntu:
pcscd pcsc-tools libfido2-1 yubikey-manager opensc - Fedora:
pcsc-lite pcsc-tools libfido2 yubikey-manager opensc - Arch:
pcsclite ccid yubikey-manager libfido2 opensc
- Debian/Ubuntu:
-
Enable pcscd:
sudo systemctl enable --now pcscd.socket -
udev rules. The stock yubico rules that ship with
libfido2/yubikey-personalization/libu2f-hostmatch VID0x1050only, so they do not cover the default RS-Key identity (0x1209). Add your own rule. Create/etc/udev/rules.d/70-rsk.rules:# RS-Key own identity (pid.codes 0x1209:0x0001) — FIDO HID + CCID access. SUBSYSTEM=="hidraw", ATTRS{idVendor}=="1209", ATTRS{idProduct}=="0001", TAG+="uaccess", GROUP="plugdev", MODE="0660" SUBSYSTEM=="usb", ATTRS{idVendor}=="1209", ATTRS{idProduct}=="0001", TAG+="uaccess", GROUP="plugdev", MODE="0660"Then
sudo udevadm control --reload && sudo udevadm triggerand re-plug. (Alternatively, buildVIDPID=Yubikey5to reuse the stock yubico rules unchanged.) If your user still can’t open the device, confirm you’re in the right group (plugdevon Debian/Ubuntu). -
polkit rule for non-root pcscd access. Create
/etc/polkit-1/rules.d/41-pcsc-rsk.rules:polkit.addRule(function(action, subject) { if ((action.id == "org.debian.pcsc-lite.access_pcsc" || action.id == "org.debian.pcsc-lite.access_card") && subject.user == "youruser") { return polkit.Result.YES; } });(Use
subject.isInGroup("plugdev")instead ofsubject.user == …to grant a whole group.) Restart polkit/pcscd or re-plug afterwards.
GnuPG (gpg --card-status, OpenPGP)
scdaemon defaults to grabbing the CCID interface directly, which fights
pcscd and locks out ykman/pcsc_scan. Route it through pcscd instead by
adding to ~/.gnupg/scdaemon.conf:
disable-ccid
pcsc-shared
Then reload it: gpgconf --kill scdaemon. After this, gpg --card-status and
pcsc_scan (and ykman, on the opt-in VIDPID=Yubikey5 build) coexist (they
share the one reader through pcscd).
FIDO / SSH (ed25519-sk)
Once the udev rules are in place, OpenSSH with libfido2 support works directly. No pcscd involved (FIDO is HID, not CCID):
ssh-keygen -t ed25519-sk -f ~/.ssh/id_ed25519_sk   # enroll (touch + PIN)
ssh -i ~/.ssh/id_ed25519_sk youruser@host          # login (one touch)
The key file is a handle, copyable between machines. Use lowercase -i (not
-I, which is PKCS#11). Most distro OpenSSH builds already link libfido2; if
ssh-keygen reports “no FIDO SecurityKeyProvider”, install libfido2 and point
SSH_SK_PROVIDER / SecurityKeyProvider at libsk-libfido2.so.
Going further (NixOS quality-of-life)
The FIDO-based YubiKey-on-NixOS recipes (PAM U2F for sudo/login, LUKS
FIDO2 unlock, gpg-agent SSH) bind the FIDO HID usage page (or the OpenPGP
card via PC/SC), not the VID/PID, so they apply to the default RS-Key build
unchanged. (Recipes that gate on ykman or the Yubico YubiKey reader name
need the opt-in VIDPID=Yubikey5 build.) A good walkthrough:
Improving QoL on NixOS with a YubiKey.
Substitute this device wherever it says YubiKey.
Troubleshooting
pcsc_scan(orykman, on theVIDPID=Yubikey5build) says no reader, or “Failed to connect”:scdaemon(from a priorgpg) is holding the reader exclusively.gpgconf --kill scdaemon, then retry. Thedisable-ccid+pcsc-sharedconfig above prevents the recurrence.ykmandoes not see the device at all:ykmanderives the device purely from the PC/SC reader name, which must containYubico YubiKey. The default RS-Key build names the readerRS-Key Security Key, soykmanwill not recognize it. Build the opt-inVIDPID=Yubikey5flavor (reader nameYubico YubiKey RSK OTP+FIDO+CCID) to useykman(see build.md).- Everything hangs after heavy USB debugging: the
pcscd+scdaemon+ kernel USB stack can wedge in a way that survivingpcscd/scdaemonrestarts or a re-plug do not clear. A full host reboot does. This is a host-stack quirk, not a firmware issue. - Verify the reader:
pcsc_scan(oropensc-tool -l) should listRS-Key Security Keyon the default build (orYubico YubiKey RSK OTP+FIDO+CCIDon the opt-inVIDPID=Yubikey5build). On that opt-in build,ykman infoshould report5.7.4with all six applications enabled.
Windows host setup
The board enumerates as a composite FIDO HID + CCID device. By default it
uses the project’s own RS-Key USB identity 0x1209:0x0001 (pid.codes), with the
PC/SC reader name containing RS-Key. The opt-in VIDPID=Yubikey5 interop build
instead presents the YubiKey identity 0x1050:0x0407 (other presets:
build.md). The two transports have different host requirements on
Windows:
| Transport | Used by | Out of the box? |
|---|---|---|
FIDO HID (0xF1D0) | WebAuthn, ssh ed25519-sk (see ssh.md), browser passkeys | yes — Windows drives it through the built-in webauthn.dll, no driver install |
| CCID (PC/SC) | OpenPGP (gpg / Kleopatra), PIV, OATH, Yubico-OTP | yes — the Windows Smart Card service binds the standard CCID class; the friction is arbitration, not drivers |
FIDO needs nothing: WebAuthn talks to the HID interface directly. CCID needs no driver either — the device is a standard CCID smart card — but the whole card is a single reader carrying several applets (OpenPGP, PIV, OATH, OTP), and only one host program can hold that one reader at a time. That is the crux of the Windows friction below.
Not yet hardware-verified on Windows. The Linux remedy in linux.md is confirmed on real hardware; the steps here mirror it and the cross-platform GnuPG behaviour, but have not been checked on a Windows host. Treat them as a starting point and please report corrections via an issue. (The Linux page carries the tested reference config.)
The single-reader contention (issue #44)
RS-Key presents OpenPGP and PIV on one CCID card, exactly as a YubiKey does. On Windows two different stacks then compete for that one card:
- GnuPG’s
scdaemonclaims it to drive the OpenPGP applet (Kleopatra,gpg --card-status). - The Windows PIV minidriver (and any PKCS#11 layer such as OpenSC/
ykcs11) claims the same card to drive the PIV applet.
Because a smart-card SELECT switches the whole card between applets, two stacks talking at once stomp on each other’s selection. The visible symptoms in issue #44 — Kleopatra showing the device as two cards, a PIV error that then makes the OpenPGP keys look gone, and PicoForge unable to reconnect until you unplug and re-plug — are this host-side arbitration, not a fault on the card. The keys are never lost: OpenPGP clears only its PIN-verified state on an applet switch (spec-required, same as a YubiKey), and re-selecting the card shows them again.
Reducing the contention
There is no driver to install. The fixes are arbitration hygiene:
-
One PC/SC app at a time. Close PicoForge (and any other tool that opened the card) before using Kleopatra/
gpg, and vice-versa. If a tool wedges and will not reconnect, unplug and re-plug the board — this clears the held reader handle. -
Let
scdaemonshare the reader. By defaultscdaemoncan grab the reader exclusively and lock out other tools. Route it through the Windows Smart Card service and let it share. Edit (create if absent)%APPDATA%\gnupg\scdaemon.conf:pcsc-shared disable-ccidThen reload it from a terminal:
gpgconf --kill scdaemonpcsc-sharedis the key line (share the reader instead of taking it exclusively);disable-ccidforcesscdaemononto the Windows PC/SC stack rather than its own internal CCID driver. Re-plug the board afterwards. -
Prefer one PIV path. For PIV, either the native Windows minidriver or OpenSC/
ykcs11(PKCS#11) — not both against the card at the same moment. If OpenSC and GnuPG clash, drive PIV throughykcs11and keep OpenPGP in Kleopatra, one operation at a time.
FIDO / SSH (ed25519-sk)
FIDO uses the HID transport and the built-in webauthn.dll; no PC/SC, no
scdaemon, so none of the contention above applies. OpenSSH for Windows enrols
and authenticates directly:
ssh-keygen -t ed25519-sk -f %USERPROFILE%\.ssh\id_ed25519_sk
ssh -i %USERPROFILE%\.ssh\id_ed25519_sk user@host
See ssh.md for the WebAuthn/OpenSSH details.
Troubleshooting
- Kleopatra shows two cards / a serial unrelated to the PIV one: expected —
one physical card surfaced through two host stacks (OpenPGP via
scdaemon, PIV via the minidriver). Recent firmware aligns the OpenPGP card serial with the device serial the other applets report; older firmware showed a divergent OpenPGP serial. - PIV certificates unusable / signing “pending” under CAPI (CryptoAPI): the
Windows PIV minidriver enumerates the card’s containers from its CHUID. Recent
firmware serves a default CHUID automatically, so a freshly flashed card is
usable; on older firmware, provision one with
ykman piv objects generate chuid. (The RSA/EC signing itself is unaffected — it matches a real YubiKey byte-for-byte.) - PicoForge / a PC/SC tool cannot connect until re-plug: another program is
holding the single reader. Close it (PicoForge, Kleopatra, a stray
gpg), or unplug and re-plug.gpgconf --kill scdaemonreleases agpg-held handle. gpg --card-statusand another PC/SC tool cannot coexist: apply thepcsc-shared+disable-ccidconfig above, thengpgconf --kill scdaemon.ykmandoes not see the device:ykmanmatches on the PC/SC reader name containingYubico YubiKey, which the default RS-Key build does not present. Build the opt-inVIDPID=Yubikey5flavor (reader nameYubico YubiKey RSK OTP+FIDO+CCID) to useykman(see build.md).
rsk — the device CLI
rsk is the host-side command-line tool for an RS-Key. It consolidates every
day-to-day and production task into one command: device status, seed backup,
secure-boot provisioning, OTP fuses, FIDO2 management, OpenPGP reset, audit
verification, fleet inventory, offboarding. It talks to the device directly:
CTAPHID over hidapi for the FIDO interface, and the CCID applets over PC/SC.
It is the canonical interface. The terminal cockpit (rsk-tui) is a
read-mostly companion that points you back here for anything irreversible. Most
other guides in this section assume rsk is on your PATH and show the exact
rsk <group> … command for the task.
flowchart LR
    cli["rsk (host CLI)"] -->|hidapi / CTAPHID| fido["Device — FIDO<br/>backup · audit · lock · attestation"]
    cli -->|PC/SC / pcscd| ccid["Device — CCID applets<br/>OpenPGP · PIV · OATH · rescue"]
    cli -->|USB BOOTSEL / picotool| boot["Device — bootloader<br/>secure-boot · OTP fuses"]
Running it
In the Nix dev shell, rsk is already on PATH with every dependency pinned:
nix develop
rsk status            # FIDO getInfo + secure-boot + backup state
rsk --help            # all command groups
rsk <group> --help    # a group's subcommands and flags
Without Nix
rsk also runs on any host with Python ≥ 3.9, packaged at tools/. With
uv (no install step, an ephemeral environment),
from the repo root:
uvx --from ./tools rsk status
uvx --from ./tools rsk --help
Or install it as a persistent tool, so plain rsk is on your PATH:
uv tool install ./tools        # then: rsk status
pipx install ./tools           # or pipx
pip install ./tools            # or a venv + pip
Two dependencies wrap system libraries: hidapi (the CTAPHID transport) and
pyscard (PC/SC, for the CCID applets). macOS ships both frameworks and the
wheels work out of the box. On Linux install pcsclite and run pcscd for the
CCID half, plus udev rules for non-root HID. The full setup and the Apple-Silicon
pyscard rebuild note are in tools/README.md
and Linux host setup.
The Nix shell stays the primary, reproducible path (it also carries picotool,
ykman, gpg, and the test suites). The uv/pip path is for hosts without Nix.
Command groups
| Group | What it does | Guide |
|---|---|---|
status | one-shot device overview (FIDO getInfo + secure-boot + backup) | quickstart |
inventory | fleet enumeration (list) + identity proof (verify) | Fleet tooling |
backup | wallet-style seed export / restore / finalize (BIP-39, SLIP-39) | Seed backup |
pair | guided primary + backup (two independent keys) enrollment | Backup key |
lock | at-rest soft-lock of the FIDO seed (enable/unlock/disable) | Soft-lock |
secure-boot | secure-boot provisioning + key rotation (irreversible) | Production, OTP fuses |
otp | burn + lock the at-rest master key (MKEK) into OTP (irreversible) | OTP fuses |
fido | FIDO2 management: set-pin, list-passkeys, attestation | FIDO2, Attestation |
led | LED color / brightness per device state | LED |
openpgp | OpenPGP applet utilities (e.g. reset to factory PINs) | OpenPGP card |
reboot | reboot to the app or to BOOTSEL, over CCID | — |
audit | read + cryptographically verify the tamper-evident journal | Audit journal |
offboard | guided full wipe + signed receipt; prompts for a replug (destructive) | Fleet tooling |
Note the two distinct “OTP“s:
rsk otpburns the device’s at-rest master key into RP2350 one-time-programmable fuses (a production ritual). The Yubico-style OTP slots feature (touch-to-type codes) is a runtime applet managed withykman. They share a name, not a mechanism.
Conventions
These hold across the whole CLI, so each group’s guide does not repeat them.
Entering a PIN
Every command that needs the FIDO2 clientPIN accepts it the same way: pass
--pin <value> for scripting, or omit it and rsk prompts interactively
(hidden input). You never have to remember which form a given command supports.
rsk backup export --pin 1234     # explicit, for scripts / CI
rsk backup export                # prompts:  FIDO2 PIN:
The prompt is only shown when the device actually has a clientPIN set. A
touch-only key is never asked, so the plug-and-touch flow is unchanged. If stdin
is not a terminal (a pipe) and no --pin was given, rsk skips the prompt and
lets the device report device requires a PIN rather than hanging. The
PIN-gated commands are:
backup export/backup restoreaudit log/audit verifylock enable/lock disableinventory verifyfido list-passkeys,fido attestation import/clearfido set-pin:--pinis the current PIN when changing.--new-pinsets the new one (prompted, with confirmation, if omitted)
This is always the FIDO2 clientPIN (the one rsk fido set-pin manages), never
an OpenPGP PW1/PW3 or a PIV PIN. Those are entered only in their own tools
(gpg, ykman).
Touch
Operations that release or sign over a secret require a physical touch: a
press of the BOOTSEL button while the LED blinks, within a 30-second window.
rsk prints touch the device … to stderr before blocking. Touch-gated
commands include backup export/restore/finalize, audit verify,
inventory verify, lock enable/disable, and fido attestation import/
clear. Read-only commands (status, inventory list, */status) need no
touch. audit log needs one only on a device with no PIN (the PIN token gates
it otherwise).
One press approves one operation. Consent is per-operation, so a press is
spent the moment the ceremony it approved returns. Holding the button through a
second prompt does nothing: lift your finger and press again. This matters
because requests from every transport are serialised, so a browser, gpg and
ykman can queue behind each other — without the rule, one long hold would
approve whatever ran next. The touch window is 30 seconds by default and never
shorter than 10, even if the device config asks for less.
Machine-readable output
status and inventory list take --json for scripting: a stable object you
can pipe to jq. Everything else is human-formatted text.
rsk status --json | jq '.secure_boot, .fido.clientPin'
rsk inventory list --json        # one JSON object per connected key, per line
Irreversible actions
Destructive or fuse-burning commands (offboard, secure-boot, otp,
lock enable, openpgp reset) require a typed confirmation: you type an
exact token (e.g. LOCK-SEED) rather than pressing a single key. Anything else
aborts. The OTP and secure-boot rituals burn one-time-programmable fuses and
cannot be undone. Read Production setup before running them.
Errors and exit codes
On failure rsk prints error: <message> to stderr and exits non-zero (1),
so it composes in scripts. A device-reported status is surfaced with its CTAP
code where it helps (e.g. a wrong PIN, a sealed export window, a missing OTP
DEVK) instead of a bare stack trace.
Where next
- A linear first-run walkthrough: Quick start.
- The read-mostly TUI companion: Terminal cockpit.
- Each task in depth via the Command groups table above.
For contributors
The CLI lives in tools/rsk/: one module per group, each exposing a
register(sub) that adds its argparse subparser, wired together in
__main__.py. Shared helpers (error exit, the --pin flag + PIN resolution,
the picotool runner, the FIDO HID connect) live in common.py. The raw CTAPHID
transport and CBOR codec are in ctaphid.py.
PIN entry goes through one chokepoint, common.resolve_pin (flag-or-prompt)
and common.add_pin_arg (the shared flag), so consistency is structural, not
per-command discipline. The pure-logic unit tests need no device:
# from tools/ (or: uv run --extra test python -m pytest …)
nix develop -c bash -c 'cd tools && python -m pytest rsk/'
Host-tool changes like these do not bump the firmware bcdDevice. See
Versions.
FIDO2 / WebAuthn / U2F
The FIDO half of the device: passkeys, two-factor security-key logins, and
legacy U2F. It speaks CTAP2 (FIDO_2_0) and CTAP1 (U2F_V2) over the HID
interface, so standard WebAuthn browsers and OS dialogs drive it without extra
software. It passes the FIDO Alliance Conformance Tools clean (CTAP2.3
235/0, U2F 55/0, a self-run pass, not a paid certification; see
testing). What has been checked against
real client software is in the interop matrix.
The default build enumerates as “RS-Key”, its own USB identity
(0x1209:0x0001, the pid.codes FOSS VID), not a YubiKey one
(build.md). FIDO clients don’t care: browsers, python-fido2,
and libfido2 bind the FIDO HID usage page, not the VID/PID, so everything on this
page works regardless of USB identity. The one exception is ykman, which gates
on a “Yubico YubiKey” reader name and so needs the opt-in
VIDPID=Yubikey5 interop build (build.md). The reported firmware
version is 5.7.4, which is what FIDO tooling reads back. It is a build constant,
not the RS-Key release.
Touch is always required
On the default (touch) build every FIDO operation needs a press of the
BOOTSEL button: both registration (makeCredential) and login
(getAssertion). The firmware’s user-presence bit is implicitly true and it does
not honour a request to skip it. WebAuthn userVerification/up cannot turn
the touch off, and OpenSSH’s -O no-touch-required is silently ignored on this
device. A “no-touch” SSH key still asks for the touch at login. The LED tells
you when the device is waiting. See led.md for the colours. A request
times out after no touch (the browser shows its own timeout UI). No button wired
on a custom board means presence confirms instantly.
Set a PIN first
rsk fido set-pin            # set, or change once one exists
ykman fido access change-pin   # the same operation via ykman (needs the VIDPID=Yubikey5 build)
The clientPIN gates credential creation once it exists. It unlocks anything a site requests user verification (UV) for. Rules from the firmware:
| Value | |
|---|---|
| Length | 4–63 characters (6–63 on the fips-profile build), counted in Unicode code points — 密码 is two, not six |
| Per-power-cycle | 3 wrong attempts → PIN_AUTH_BLOCKED (0x34), re-plug to retry |
| Retry budget | 8 wrong attempts (across power cycles) |
| On exhaustion | PIN locks until a factory reset, no separate unblock |
After 3 wrong attempts in a single power cycle the device returns
PIN_AUTH_BLOCKED (0x34) and refuses more PIN entry until you unplug and
re-insert it. The 8-attempt budget is the across-power-cycle hard limit.
“Power cycle” means a real one. Both the block and the count of wrong attempts that arms it are held in a register a warm reset preserves and only a power-on reset clears, so a host that reboots the device — which it can do without any credential — cannot restart the batch and walk through the 8-attempt budget unattended.
The retry counter resets on a correct PIN. There is no PUK or admin override:
once it is locked, the only way back is ykman fido reset, which wipes everything
and has to run within ten seconds of a replug (see Factory
reset). rsk fido set-pin asks for the current PIN when changing,
the new one twice, and prints the resulting clientPin state.
Once a PIN is set, registering a passkey refuses to run without it (CTAP
PUAT_REQUIRED, 0x36). The browser collects the PIN and retries. That is
expected, not a fault.
Registering a plain second-factor credential (non-discoverable, what a site asks
for with userVerification: "discouraged") needs only a touch, PIN or no PIN —
the CTAP 2.1 makeCredUvNotRqd option, as on a YubiKey. Sites that want the PIN
on every registration ask for UV, and ykman fido config toggle-always-uv (or
the always-uv build) forces it device-wide.
Passkeys (resident / discoverable credentials)
Register on any site offering a passkey or “security key” method. The browser drives the device. You touch the button when the LED pulses. These are stored on the device and surface at login without the site sending an allow-list.
Capacity: 256 resident passkeys (and 256 relying parties), flash-bound. When
the store is full, makeCredential returns KEY_STORE_FULL (0x28) and the
browser reports the key is out of space. Delete some first.
Inspect and clean up (PIN required, credentialManagement is PIN-gated):
rsk fido list-passkeys              # relying parties + user handles + free slots
ykman fido credentials list        # same, via ykman (needs the VIDPID=Yubikey5 build)
ykman fido credentials delete <id>  # remove one (same build; browsers expose this too)
rsk fido list-passkeys prints the existing count and remaining slots, then each
relying party with its user names and a credential-id prefix. There is no
rsk-native delete yet. Use ykman or the browser/OS passkey manager for that.
credProtect. A site can mark a passkey UV-required (credProtect level 3). The firmware then hides it from discovery and from exclude-list checks until you verify with the PIN, so it never leaks its existence to an unauthenticated caller. RS-Key applies a credProtect level only when the relying party asks for one. It does not silently force a default.
Second-factor registrations (non-resident)
The classic security-key flow (GitHub, Google, GitLab, …) stores nothing on the device. The credential is derived deterministically from the master seed and handed back as an opaque id the site presents at login. This path is effectively unlimited (it costs no flash). The registrations survive a seed backup → restore onto a new board: the same derivation on the same seed reproduces the same keys.
Legacy U2F (CTAP1, U2F_V2) works the same way for older 2FA setups: the
register/authenticate pair is non-resident, with a monotonic signature counter,
attested by the device’s end-entity certificate.
Signature counters
Every assertion carries a signature counter, the tripwire a relying party watches for a cloned key. RS-Key keeps one per resident credential: a passkey starts at 0 and only its own logins advance it, so colluding sites can’t read a shared global counter to gauge how much you use the key elsewhere (WebAuthn §6.1.1). A non-resident second-factor credential stores nothing on the device, so it reports 0. Legacy U2F keeps the single monotonic counter that protocol expects.
Upgrading an existing key is forward-safe for passkeys: each seeds its counter from the old global value on first use, so the reported number never counts backwards.
Advertised algorithms
getInfo advertises these COSE algorithms. A relying party picks one in its
pubKeyCredParams:
| COSE alg | Curve / scheme | Notes |
|---|---|---|
-7 ES256 | NIST P-256 | the universal default |
-8 EdDSA | Ed25519 | |
-35 ES384 | NIST P-384 | slow keygen/sign (pure-Rust arithmetic) |
-36 ES512 | NIST P-521 | slow keygen/sign |
-47 ES256K | secp256k1 | dropped from new credentials on fips-profile |
The curve-explicit COSE ids (-9 ESP256, -19 Ed25519, -51 ESP384, -52
ESP512) are also accepted in pubKeyCredParams. RS-Key selects the first
supported algorithm a site offers, so put your preferred curve first in the list.
Post-quantum credentials
The device implements ML-DSA-44 (FIPS 204, COSE -48) and ML-DSA-65
(COSE -49) makeCredential / getAssertion. They obey the same first-supported
rule as everything else, so a site that wants one lists it before its classic
fallback. Nothing mainstream requests them yet. A client that does (e.g. a
python-fido2 script offering -49) gets a PQC
credential today. Both are backed by the in-tree, stack-optimized rsk-mldsa
implementation, which streams the FIPS 204 matrix A on the fly so ML-DSA-65’s
larger keys still fit the RP2350 stack.
The getInfo advertisement is build-gated behind advertise-pqc
(build.md) because shipped Firefoxes (authenticator-rs before
2026-06-02) hard-fail the whole getInfo parse on an unknown COSE id. The
capability is always on. Only the advertisement is opt-in. ML-DSA-87 (-50)
is recognised but unsupported: its makeCredential response overruns the CTAPHID
message ceiling.
Extensions supported
getInfo advertises seven extensions:
| Extension | What it does | Limit |
|---|---|---|
hmac-secret | per-credential secret keyed by a salt (the WebAuthn PRF maps onto it) | 32-byte output |
hmac-secret-mc | the same evaluation at registration time | |
credProtect | UV-gated credential visibility (levels 1–3) | |
credBlob | small opaque blob stored with the credential | 128 bytes |
largeBlobKey + large blobs | per-credential key into a device blob store | 2 KB store |
minPinLength | the device hands its PIN-length policy to the RP | |
thirdPartyPayment | the secure-payment-confirmation marker |
Enterprise attestation is supported but off until enabled. The ep option flips
to true once an org key is installed. See attestation.md.
Factory reset
ykman fido reset # needs the VIDPID=Yubikey5 build; or any WebAuthn "reset security key" UI
Wipes all FIDO state: resident passkeys, the PIN, and the master seed (so all derived non-resident credentials and U2F registrations die too). It regenerates a fresh identity and signature counter. The OpenPGP / PIV / OATH applets are untouched: each applet’s reset wipes only its own files, and a FIDO reset deliberately steps around them even where the file ids interleave.
Replug the key first. The wipe is gated by a physical touch and by the
CTAP 2.1 §6.6 power-up window: the firmware accepts authenticatorReset only
within 10 seconds of the key attaching to USB. Later than that it answers
CTAP2_ERR_NOT_ALLOWED (0x30) straight away, before asking for the touch, and
the host tool reports the reset as failed. So the flow is: unplug, plug back in,
run the reset, touch within ten seconds.
Two details that catch people out:
- A software reboot does not reopen the window — it closes it. A host can ask
the device to reboot without any credential (
rsk reboot, a phy config write), so a window a host could restart at will would be no protection. Pull the key out. - Trusted-display builds are exempt. There the prompt names the operation on screen, so the window is not what stands between you and an accidental wipe; the reset works whenever you confirm it on the panel.
rsk offboard handles this for you: it sends the reset, and only if the device
refuses does it prompt for the replug and retry.
Troubleshooting
- “device not eligible / already registered”. Expected: the site sent an exclude-list matching a credential already on the device.
- “PIN required” / repeated PIN prompts at registration. A PIN is set and the
site is registering a passkey, so makeCredential needs it (
PUAT_REQUIRED 0x36). Enter it. If you have forgotten it, only a reset clears it — replug first. - The reset fails immediately with
CTAP2_ERR_NOT_ALLOWED(0x30), without ever asking for a touch. The key was plugged in more than ten seconds ago. Unplug it, plug it back in, re-run. Arsk rebootdoes not count: only a real power cycle opens the window. - A site demands UV but you have no PIN. Set one (
rsk fido set-pin); UV on this device means the FIDO PIN. - “no space” / store-full at registration. 256 resident passkeys is the cap
(
KEY_STORE_FULL 0x28). Delete some withykman fido credentials delete(needs theVIDPID=Yubikey5build) or your browser/OS passkey manager. rsk fido …says “missing dependency: python-fido2”. Runrskfrom insidenix develop. The management commands need thepython-fido2library.- A “no-touch” SSH key still asks for a touch. By design: the firmware
always polls the button (see the top of this page). For the
ssh-keygenPIN / touch / resident flags, see ssh.md. - Linux permissions / the device is invisible to the browser. Udev rules in linux.md.
SSH with FIDO keys (ed25519-sk / ecdsa-sk)
Hardware-backed SSH keys. The private key is generated on the device and never
leaves it. The file on disk is only a handle that points at it. Logging in
takes one touch (and a PIN, if you ask for one). This is the OpenSSH “security
key” (-sk) feature. The device is a FIDO2 authenticator, and RS-Key supports
both key types it can use:
| Key type | Algorithm | Use it when |
|---|---|---|
ed25519-sk | Ed25519 (EdDSA) | the default: smallest, fastest |
ecdsa-sk | NIST P-256 (ES256) | a server or old client rejects ed25519-sk |
Requirements
- OpenSSH 8.2+ for
-skkeys (8.3+ to download resident keys with-K). - A FIDO middleware: distro OpenSSH links
libfido2; check withssh -Q key | grep sk. - macOS: Apple’s
/usr/bin/sshships without FIDO support and fails withPermission deniedbefore touching the device. Use Homebrew OpenSSH:brew install openssh export PATH="/opt/homebrew/opt/openssh/bin:$PATH" # ahead of /usr/bin - Linux: OpenSSH links
libfido2almost everywhere; you only need the FIDO udev rules (see linux.md). FIDO is local to whereversshruns, so logging in to a remote box needs nothing special there. - Windows: OpenSSH for Windows routes
-skkeys through the Windows WebAuthn API (webauthn.dll), which only offers algorithms the device advertises in its FIDOgetInfo.ed25519-skneeds firmware that advertises EdDSA: RS-KeybcdDevice 0x077Dor newer (seersk status). On older firmwareed25519-skfails at create with a generic error whileecdsa-skstill works, so either reflash or useecdsa-sk. macOS and Linux talk tolibfido2directly and send the algorithm regardless, so they are unaffected.
Enroll
ssh-keygen -t ed25519-sk -f ~/.ssh/id_ed25519_sk -C "you@laptop"
# → enter the FIDO PIN if one is set, then touch the button
The -C comment is free text that ends up in the .pub and on the server. It
is handy for telling keys apart. Two files appear:
id_ed25519_sk: the handle. Not a private key; useless without the physical device. Copy it (and the.pub) to every machine you ssh from. The device is the second factor, the file is just a pointer.id_ed25519_sk.pub: the public key, forauthorized_keys.
Then install it on a server:
ssh-copy-id -i ~/.ssh/id_ed25519_sk.pub you@server
ssh -i ~/.ssh/id_ed25519_sk you@server      # one touch
Enrollment options (-O)
Pass -O flags at ssh-keygen time to shape the credential:
-O option | Effect |
|---|---|
resident | store the key on the device so it can be downloaded later (see below) |
verify-required | demand the FIDO PIN on every login, not just a touch |
application=ssh:NAME | tag the credential (default ssh:); a distinct string is a distinct key |
user=NAME | user handle stored with a resident key (for listing/telling them apart) |
no-touch-required | mark the key as not needing a touch; see the note below |
write-attestation=FILE | save the enrollment attestation for later verification |
challenge=FILE | use a fixed challenge (for reproducible attestation) |
# PIN on every login, and store the key on the device:
ssh-keygen -t ed25519-sk -O resident -O verify-required \
    -O application=ssh:work -f ~/.ssh/id_work_sk
no-touch-requireddoes nothing useful on RS-Key. The default (touch) build always polls the button on every assertion. The firmware does not honorup:false. The flag still marks the credential, but you will be asked to touch regardless. The touch is the point; enroll without it.
PIN and touch: what to expect
RS-Key follows the standard FIDO2 flow, the same as a YubiKey: the PIN unlocks a session token silently (no touch for the PIN itself), and then each operation takes one touch.
| Action | PIN | Touch |
|---|---|---|
Enroll (ssh-keygen -t …-sk) | once | once* |
| Log in, normal key | — | once |
Log in, verify-required key | once | once |
* You only touch twice at enrollment when several FIDO devices are plugged in at once: the first touch is a CTAP “selection” gesture (which key did you mean?), the second authorizes the key creation. With one device connected it is a single touch.
So a single login asks for the PIN at most once. If you ever see the PIN
prompt twice in one action, two separate operations are running. Usually the
key is offered by both ssh-agent and an IdentityFile (add IdentitiesOnly yes), or git push opened two SSH channels (use ControlMaster /
ControlPersist, see the git guide).
A real YubiKey behaves identically in those setups. It is the client, not the
device.
Resident (discoverable) keys
-O resident stores the key handle on the device itself, so you can recover it
onto any machine later instead of carrying the file:
ssh-keygen -K                      # download handles into the current dir (PIN)
# → writes id_ed25519_sk_rk[...]  and the matching .pub
ssh-add -K                         # load resident keys straight into the agent
rsk fido list-passkeys             # see what's stored on the device
Resident keys cost one of the device’s 256 discoverable-credential slots. For most people the non-resident default plus a seed backup is better: non-resident keys are re-derivable from the seed, so a restored board logs in with the same handle files. No slot used, nothing to download. Reach for resident keys when you want to walk up to a fresh machine with only the device in your pocket.
ssh-agent and ~/.ssh/config
Add the key to the agent so you are not retyping -i:
ssh-add ~/.ssh/id_ed25519_sk       # non-resident: add the handle file
ssh-add -K                         # resident: pull from the device
ssh-add -l                         # list loaded keys
A config block makes plain ssh host use the right key (and the Homebrew binary
on macOS):
# ~/.ssh/config
Host server
    HostName server.example.com
    User you
    IdentityFile ~/.ssh/id_ed25519_sk
    IdentitiesOnly yes
IdentitiesOnly yes stops the agent from offering every other key first. Worth
it so each connection prompts for exactly one touch.
Server side
The .pub goes in ~/.ssh/authorized_keys like any key. You can also pin
requirements there, independent of how the key was enrolled:
# authorized_keys — require the FIDO PIN for this key (touch is omitted = required)
verify-required sk-ssh-ed25519@openssh.com AAAA... you@laptop
sshd enforces verify-required from OpenSSH 8.4+; older servers accept the
key but skip the check. A key enrolled verify-required always asks for the PIN
on the client regardless of the server. (Adding no-touch-required here would
relax the touch requirement, but RS-Key touches anyway, as above.)
Signing git commits
The same key signs git commits and tags (no GPG needed). See the git guide. The short version:
git config gpg.format ssh
git config user.signingkey ~/.ssh/id_ed25519_sk.pub
git config commit.gpgsign true     # one touch per commit
Using the OpenPGP AUT slot instead
If you already run an OpenPGP key on the card, its authentication subkey doubles
as an SSH key via gpg-agent, a different path that needs no -sk support in
the client. See openpgp.md (gpg --export-ssh-key,
enable-ssh-support).
Troubleshooting
Permission deniedinstantly on macOS → you are on/usr/bin/ssh; use the Homebrew binary (above).Key enrollment failed: requested feature not supported→ the client lacksed25519-skmiddleware; installlibfido2/ Homebrew OpenSSH, or fall back to-t ecdsa-sk.device not found/ no prompt → FIDO udev rules missing (linux.md), or a browser /gpg-agentis holding the device; close it and retry.- Asks for a PIN you never set → some client builds require a PIN to enroll;
set one with
rsk fido set-pinand retry. sign_and_send_pubkey: signing failedon login → the wrong device is plugged in, or the key is resident on a device you reset. Re-plug the right key, orssh-add -Kagain.- After a factory FIDO reset, old
id_*_skfiles stop working. The seed they derive from is gone. Re-enroll, or restore the seed first so the same handles work again.
Git with the device
Two jobs you do with git and a hardware key: sign your commits and tags, and authenticate to push, pull, and clear the forge’s 2FA / “confirm access” challenges. The same RS-Key handles both. They are just different credentials on it. Signing comes first. Authentication and 2FA are at the end.
Signing keeps the key off the disk and takes a touch per signature. It has two flavours. RS-Key supports both:
| SSH signing | OpenPGP signing | |
|---|---|---|
| Key | your -sk SSH key (ssh.md) | a key on the OpenPGP card (openpgp.md) |
| Needs | git 2.34+, nothing else | gpg + scdaemon |
| Trust model | an allowed_signers file you curate | the OpenPGP web of trust |
| Touch / PIN | touch per signature | PIN once, then touch per signature (UIF) |
| Best when | you only want commit signing, no GPG | you already use GPG, or want WoT |
If you have no GPG setup and just want verified commits, use SSH signing. It is the smaller path. If you already keep a GPG identity, use OpenPGP.
SSH signing
Point git at your -sk public key and turn signing on:
git config --global gpg.format ssh
git config --global user.signingkey ~/.ssh/id_ed25519_sk.pub
git config --global commit.gpgsign true     # sign every commit
git config --global tag.gpgsign true        # sign every tag
Now git commit asks for one touch. Drop --global to scope it to a single
repo (handy if only some repos should be signed by the device).
git commit -m "…"          # touch the device when the LED blinks
git log --show-signature   # see the signature on each commit
Verify locally
Verification needs an allowed_signers file mapping identities to public keys:
mkdir -p ~/.config/git
echo "you@example.com namespaces=\"git\" $(cat ~/.ssh/id_ed25519_sk.pub)" \
    >> ~/.config/git/allowed_signers
git config --global gpg.ssh.allowedSignersFile ~/.config/git/allowed_signers

git verify-commit HEAD              # "Good \"git\" signature for you@example.com"
git log --show-signature -1
Without that file git can make signatures but reports every commit as “No signature” on verify. That means the file is missing, not a bad signature.
On GitHub / GitLab
Add the same .pub as a Signing key. On GitHub this is a separate entry
from an authentication key (Settings → SSH and GPG keys → New SSH key → Key
type: Signing Key). Commits then show as Verified. Turn on vigilant mode
(GitHub) to flag any unsigned commit on your account as Unverified.
OpenPGP signing
First put a signing-capable key on the card and learn its key id. See openpgp.md. Then:
git config --global gpg.format openpgp        # the git default; set it explicitly
git config --global user.signingkey 0xLONGKEYID
git config --global commit.gpgsign true
git config --global tag.gpgsign true
# if gpg isn't found by name on your platform:
git config --global gpg.program $(command -v gpg)
git commit now goes through gpg → scdaemon → the card: the User PIN
once per session, then a touch per signature if the SIG slot’s UIF touch
policy is on (openpgp.md).
git commit -m "…"
git log --show-signature        # "Good signature from …" via your gpg keyring
git verify-tag v1.0
On GitHub / GitLab
Export the public key and add it as a GPG key (Settings → SSH and GPG keys → New GPG key):
gpg --armor --export 0xLONGKEYID # paste the block into the forge
The email on a signing UID must match your commit email for the forge to mark it Verified.
Authenticating: push, pull, and 2FA
Signing proves who wrote a commit. Authenticating is how you push, pull, and get past the forge’s security-key prompts. The device does this too, with separate credentials from the signing key.
Push / pull over SSH
The cleanest path: use the device’s -sk SSH key (or the OpenPGP AUT subkey
via gpg-agent) as your transport. Add the public key to the forge as an
Authentication key. On GitHub this is a separate entry from the signing
key (Settings → SSH and GPG keys → New SSH key → Key type: Authentication).
Point the remote at SSH, and each connection is a challenge the key answers with
a touch:
git remote set-url origin git@github.com:you/repo.git
git push                     # touch when the LED blinks
That is one touch per connection, not per command. To keep a burst of pushes under a single touch, reuse the SSH channel:
# ~/.ssh/config
Host github.com
    User git
    IdentityFile ~/.ssh/id_ed25519_sk
    IdentitiesOnly yes
    ControlMaster auto
    ControlPath ~/.ssh/cm-%r@%h:%p
    ControlPersist 10m         # one touch covers everything in the window
The key setup itself is the SSH guide. Here it just doubles as the git transport.
Push / pull over HTTPS
Over HTTPS git authenticates with a token, not the key. The device isn’t in
that path. But it protects the account the token comes from: gh auth login,
or signing in to mint a token, triggers the 2FA challenge below, which a tap
clears.
Account 2FA and “confirm access” challenges
The forges require 2FA and re-challenge for sensitive actions: signing in on a new machine, changing keys, deleting a repo (GitHub calls this sudo mode). Register the device once and a tap answers every such prompt:
- GitHub: Settings → Password and authentication → add a Passkey (one tap, no password) or a Security key (second factor).
- GitLab: Settings → Account → enable a WebAuthn Device.
A passkey is a resident credential. It costs one of the device’s 256 discoverable slots (ssh.md). A security key 2FA credential is non-resident. Either way the browser shows “use your security key”, you touch, and the challenge clears.
One device, three jobs: a signing key for commits, an SSH auth key for push/pull, and a passkey / 2FA credential for the account. Three independent credentials on the same RS-Key, each its own touch.
Living with the touch
Every signature is one touch. That is the security benefit (malware can’t sign in the background), but it adds up on a rebase that re-signs many commits.
- SSH signing always touches. There is no caching. For a big rebase, sign the
final result rather than every intermediate commit, or temporarily set
commit.gpgsign falsefor the rebase and re-sign at the end. - OpenPGP caches the PIN (via
gpg-agent,default-cache-ttl), but the touch still happens per signature when UIF is on. Turn UIF off on the SIG slot if you want PIN-only signing (weaker: any process with the cached PIN can then sign). git commit --no-gpg-signskips signing for a one-off commit.
Troubleshooting
error: gpg failed to sign the data(SSH mode) →gpg.formatisn’tssh, oruser.signingkeypoints at a missing file. Re-check both.git verify-commitsays “No signature” but the commit is signed → theallowed_signersfile isn’t configured (above).- OpenPGP:
No secret key/selecting card failed→scdaemonlost the reader (often afterykman/another tool grabbed it):gpgconf --kill scdaemonand retry. On Linux apply the linux.md scdaemon settings. - Commits show Unverified on the forge → the signing key/GPG key isn’t added to your account, or the commit email doesn’t match the key’s identity.
git pushsaysPermission denied (publickey)→ the authentication key isn’t on the forge (it is a separate entry from the signing key), or the remote is HTTPS not SSH. Check withgit remote -vandssh -T git@github.com.- The device never prompts for a touch → another process is holding it (a
browser,
gpg-agent, the TUI). Close it and retry.
OpenPGP card
A full OpenPGP card 3.4 over CCID: three key slots (signature, decryption, authentication), works with stock GnuPG. The same slots cover commit signing, SSH login (via gpg-agent), and end-to-end mail/file encryption.
Prereqs: on Linux, pcscd + the scdaemon.conf lines from
linux.md. Check the card is visible:
gpg --card-status # reader: RS-Key Security Key …, OpenPGP v3.4
gpg works regardless of the reader name. scdaemon identifies the card by its
ATR and applet SELECT, not the USB identity. The default build reports the
reader as “RS-Key”; the opt-in VIDPID=Yubikey5 flavor reports it as “Yubico
YubiKey” (build.md).
PINs
| Default | Length | Unlocks | |
|---|---|---|---|
| User PIN (PW1) | 123456 | 6–127 | signing, decryption, authentication |
| Admin PIN (PW3) | 12345678 | 8–127 | key import/generation, card settings |
| Reset Code (RC) | unset | 8–127 | unblocking PW1 without PW3 |
The card enforces those lengths itself: a CHANGE REFERENCE DATA or RESET RETRY COUNTER carrying a new value outside the range is refused with 6700,
whatever the host’s own policy is. gpg applies the same ≥ 6 / ≥ 8 minima
before it ever reaches the card. A shorter reference stored by an older firmware
keeps verifying; only new ones are checked.
A fresh card has no Reset Code. It stays deactivated until an admin sets one
(passwd option 4, below), so RESET RETRY COUNTER in its RC form cannot run
against a known default.
Each PIN has its own retry counter, default 3. A correct entry resets
that PIN’s counter. A wrong one decrements it. gpg --card-status prints them
as PIN retry counter : 3 3 3 (PW1, RC, PW3: all three default to 3).
Change them first:
gpg --card-edit
gpg/card> admin
gpg/card> passwd            # menu: 1 change PW1 · 3 change PW3 · 4 set Reset Code
The same menu sets the Reset Code (option 4, under admin), which lets a
holder who has forgotten PW1 reset it without the admin PIN. Useful when the
admin PIN lives somewhere offline.
Two ways admin operations lock:
- Three wrong PW3 blocks the admin PIN. Unlike PW1, the admin PIN has no higher authority to unblock it. Recovery is a factory reset of the applet (below). Plan to keep PW3 written down somewhere offline.
- Three wrong PW1 blocks the user PIN. This one is recoverable: unblock it with the admin PIN or the Reset Code (see Unblocking PW1).
Generate keys on-card
gpg --card-edit
gpg/card> admin
gpg/card> key-attr           # per slot, pick the algorithm (table below)
gpg/card> generate           # makes all three keys + a gpg keyring entry
key-attr is asked once per slot (signature, then encryption, then
authentication), so you can mix: e.g. Ed25519 for signing and authentication,
Cv25519 for encryption (gpg’s default modern pair), or RSA across the board.
Supported per-slot attributes (advertised via DO 0xFA, the list ykman and
gpg read back):
| Family | Choices | Notes |
|---|---|---|
| ECC (sign/auth) | Ed25519, NIST P-256 / P-384 / P-521, secp256k1, brainpoolP256r1 / P384r1 | EdDSA on Ed25519; ECDSA on the Weierstrass curves |
| ECC (encrypt) | Cv25519 (X25519), NIST P-256 / P-384 / P-521, secp256k1, brainpoolP256r1 / P384r1 | ECDH; the DEC slot only |
| RSA | 2048 / 3072 / 4096 | exponent fixed at 65537 (what gpg imports) |
Not supported. gpg will offer them, and the card even accepts the key-attr
write, but GENERATE / keytocard then refuses with 0x6A81 “Function not
supported”: X448, Ed448, and brainpoolP512r1. (X448 and Ed448 still
appear in the 0xFA advertisement but are non-functional; brainpoolP512r1 is not
advertised.) No mature no_std Rust arithmetic exists for those yet, so shipping
them would mean unaudited curve math.
On-card generation means the private keys never existed anywhere else, and cannot be backed up. gpg’s “make an off-card backup” prompt covers the encryption key only, and only if you say yes. (A lost signing or authentication key is regenerated, not recovered.) RSA generation is slow on this hardware. The firmware races both RP2350 cores for the two primes and streams CCID keepalives while gpg waits:
| Size | Typical on-card keygen |
|---|---|
| RSA-2048 | ≈ 4–6 s |
| RSA-3072 | ≈ 22 s |
| RSA-4096 | ≈ 50 s |
| any EC curve | instant |
The spread is wide because the prime search is random. RSA-4096 has been seen anywhere from ~17 s to ~120 s on the same board. See ../limitations.md for the measured dual-core numbers. EC is the pragmatic default unless a peer needs RSA.
Or import existing keys
If you already have a GnuPG key (and want a recoverable off-card copy), import the subkeys instead of generating:
gpg --expert --edit-key YOURKEY
gpg> toggle                  # show secret subkeys (ssb)
gpg> key 1                   # select the subkey to move (repeat per subkey)
gpg> keytocard               # pick the matching slot: 1 sig · 2 enc · 3 auth
gpg> save
keytocard moves the selected subkey onto the card, replacing the on-disk
copy with a stub that points at the device. Set key-attr to match the
incoming key’s algorithm before keytocard, or the card refuses the import.
A mismatched algorithm/curve returns “Wrong data” / “Function not supported”
and a missing admin (PW3) session returns “Security status not satisfied”. gpg
surfaces one of these as a card refusal.
Importing keeps an off-card copy in your keyring until you delete it. Your call which way the trade-off goes. The usual recoverable setup: generate the master key offline, move only the three subkeys to the card, and store the master key material on encrypted offline media.
Daily use
Signing and decryption
echo hi | gpg --clearsign                 # PW1, then a touch if UIF is on
gpg --encrypt -r alice@example.com file    # public-key op, no card needed
gpg --decrypt file.gpg                     # PW1 (PW2), card does the ECDH/RSA
gpg drives the slots automatically: the SIG slot signs, the DEC slot decrypts. Encryption to a recipient is a public-key operation and never touches the card. Only decryption does.
By default PW1 stays valid for the session after the first signature. To force a PIN on every signature, flip the PW1 status byte:
gpg/card> admin
gpg/card> forcesig          # toggles "PW1 valid for one signature only"
SSH authentication via gpg-agent
The AUT slot doubles as an SSH key through gpg-agent:
# one-time agent setup
echo enable-ssh-support >> ~/.gnupg/gpg-agent.conf
gpgconf --kill gpg-agent

# add the authentication subkey's keygrip to sshcontrol
gpg --list-keys --with-keygrip YOURKEY     # find the [A] subkey's keygrip
echo <KEYGRIP> >> ~/.gnupg/sshcontrol

# export the public key in OpenSSH format and install it
gpg --export-ssh-key YOURKEY > ~/.ssh/id_rsk.pub
ssh-copy-id -f -i ~/.ssh/id_rsk.pub you@server
Then export SSH_AUTH_SOCK=$(gpgconf --list-dirs agent-ssh-socket) (in your
shell rc) and ssh you@server prompts for PW1 and logs in. This is the
standard gpg-agent recipe, nothing device-specific.
For FIDO-backed SSH (
ed25519-sk, no gpg) see ssh.md; for signing git commits and tags with the SIG slot see git.md.
Touch policies (UIF)
Each slot has an independent user-interaction flag. When on, every use of
that key additionally requires a button press. The firmware polls the BOOTSEL
button and fails the operation (0x6600) if it is not pressed in time. PIN
alone is no longer enough. A remote attacker holding your unlocked session
still cannot sign or decrypt without physical access.
gpg/card> admin
gpg/card> uif 1 on          # 1 sig · 2 enc · 3 auth   (off to disable)
gpg/card> uif 1 permanent   # irreversible: only a factory reset clears it
UIF is per-slot, so you can require a touch for signing but not decryption, or any mix. On a board with no button configured the check is a no-op.
on is revocable with the admin PIN, so it protects against a stolen user PIN,
not a stolen admin PIN. permanent (the card’s UIF value 02) cannot be lowered
by any command — PUT DATA answers 6985 — so a host that learns PW3 still
cannot turn your signatures touchless. Clearing it takes TERMINATE DF +
ACTIVATE FILE, which wipes the applet. Set it only when you mean it.
AES encryption (PSO)
The DEC slot carries an on-card AES-256 key, minted automatically whenever
the encryption keypair is generated. Tools that expose the card’s symmetric
PSO (e.g. gpg-card) can ENCIPHER / DECIPHER arbitrary block-aligned data
with it (raw AES-CBC, zero IV; output is 0x02 || cryptogram). It needs PW1
(PW2). Most users never touch this. Public-key encryption is the normal path.
Recovery and reset
Unblocking PW1
Three wrong user-PIN tries block PW1 but not the keys. Two ways back:
# with the admin PIN
gpg --card-edit
gpg/card> admin
gpg/card> unblock           # verify PW3, set a new PW1

# or with the Reset Code, if one was set (no admin PIN needed)
gpg/card> passwd            # menu option 2: "unblock PIN" via Reset Code
Both reset PW1’s retry counter and re-seal its key material under the new PIN.
Factory reset (OpenPGP only)
rsk openpgp reset # or: gpg --card-edit → admin → factory-reset
rsk openpgp reset blocks both PINs, then drives the spec-compliant
TERMINATE (0xE6) + ACTIVATE (0x44) and reseeds factory defaults
(PW1 123456, PW3 12345678). It wipes the OpenPGP applet (keys, PINs, DOs,
reset code) and nothing else. FIDO / PIV / OATH / OTP survive (the
TERMINATE is scoped to the OpenPGP FIDs). This is also the only way out of a
PW3 that you have blocked: a blocked admin PIN cannot be unblocked, only reset
away, along with the keys it protected. It also works when the admin verifier
itself is unusable — a card provisioned by an older firmware with an empty PW3
could otherwise neither verify nor terminate, leaving a device-wide factory reset
as the only escape.
It is destructive but idempotent, so it is the clean way to clear non-default PINs a prior gpg session left behind (which otherwise block the test suite at VERIFY).
Troubleshooting
gpg: selecting card failed: No such device→ scdaemon vs pcscd fight; apply linux.md’sdisable-ccid, thengpgconf --kill scdaemon.ykmanstops seeing the device after gpg used it → same fix; gpg’s scdaemon holds the reader.gpgconf --kill scdaemonreleases it.- A card refusal on
keytocard/generate(gpg may report “Function not supported”, “Wrong data”, or “Security status not satisfied”) → the slot’skey-attrdoesn’t match the key, or you skippedadmin(no PW3 session). gpg --card-statusshowsPIN retry counter : 0 …→ that PIN is blocked; see Recovery and reset.- RSA
generateseems to hang → it isn’t; on-card RSA keygen takes the times above and gpg shows no progress bar. Wait it out, or use an EC curve. ykman openpgp info(needs the opt-inVIDPID=Yubikey5build:ykmanonly sees the device when the reader name contains “Yubico YubiKey”) →ERROR: Incorrect TLV lengthon firmware before0x0759: the GET DATA6Ereply was missing its constructed-DO wrapper, which ykman’s strict parser requires (gpgtolerated it). Fixed in0x0759; flash it and re-run. See interop.md.
PIV
A PIV smart-card (NIST SP 800-73-4) over CCID: X.509 client certificates,
S/MIME, PIV-aware OS login, SSH and age through PKCS#11. Driven with
ykman piv or yubico-piv-tool; the applet also speaks the Yubico extensions
(metadata, serial, attestation, move/delete, set-retries) those tools use.
ykman piv and yubico-piv-tool gate on the “Yubico YubiKey” reader name,
which the default RS-Key build (VID:PID 0x1209:0x0001) does not present. They
need the opt-in VIDPID=Yubikey5 interop build (build.md). The
PKCS#11 / OpenSC and OS-native (macOS CryptoTokenKit, Windows) routes below
identify the card by its applet, not the reader name, so they work on the default
build.
Windows note: the card serves a default CHUID automatically — the Windows PIV minidriver needs it to enumerate the certificate containers, so no manual
ykman piv objects generate chuidstep is required.
Prereqs: on Linux, pcscd plus the polkit rule from linux.md;
if you also use GnuPG, the disable-ccid line so scdaemon and pcscd stop
fighting over the reader. Check the card is visible (the ykman commands here
assume the opt-in VIDPID=Yubikey5 build):
ykman piv info # PIV version 5.7.4, slot + PIN/PUK/mgmt-key state
Defaults
| Default | Notes | |
|---|---|---|
| PIN | 123456 | 6–8 chars; padded to 8 with 0xFF on the wire |
| PUK | 12345678 | 6–8 chars; unblocks a blocked PIN |
| Management key | 010203040506070801020304050607080102030405060708 | AES-192, the well-known YubiKey 5.7-era default |
| PIN / PUK retries | 3 / 3 | resets to full on each correct entry |
Change all three before real use:
ykman piv access change-pin
ykman piv access change-puk
ykman piv access change-management-key --generate --protect
--protect stores the new management key on the card, encrypted under the PIN,
so ykman can recover it from the PIN alone (no separate hex string to carry).
The applet accepts AES-128/192/256 management keys; under the FIPS-style build
it refuses to set a new 3DES key, though an existing 3DES key still
authenticates so a reflashed device can migrate itself to AES.
PIN protection is per key and does not survive a rotation. Setting a new management key clears the protected flag, so the new key is not PIN-readable unless you opt in again —
ykman piv access change-management-key --protectre-writes the flag as part of the same operation, so nothing changes for the command above. It matters if you rotate with anything else (a rawSET MANAGEMENT KEYAPDU,yubico-piv-tool): the card then holds a key only the hex string opens, andykman piv inforeports it as not protected. Rotating away from a protected key is also how you revoke that PIN-only access. The flag is cleared only once the new key is stored, so a rotation that fails part-way leaves the escrow describing the key that is still on the card — you are never left holding aPRINTED-only key the card no longer admits to escrowing.
On the panel (trusted-display builds). The PIV PIN and PUK can be changed
(and a blocked PIN unblocked with the PUK) on the device, no host needed:
Settings → Security → PIV PIN → Change PIN / Change PUK / Unblock PIN.
Each verifies the current PIN/PUK against the applet’s own retry counter (shown
on the pad) and stores the new value in the 8-byte 0xFF-padded wire form, so a
later ykman / yubico-piv-tool VERIFY accepts it.
A 24-byte management key can’t be typed on a numeric pad, so the panel sets a
random, PIN-protected one instead: Settings → Security → PIV PIN →
Protect mgmt key. The device generates a random AES-256 management key, seals
it, and marks it PIN-protected (the ykman --protect scheme), so a host then
uses it with just the PIV PIN. ykman piv info shows it as protected and
ykman piv operations no longer need the hex key. Security: once protected,
the PIV PIN alone grants management access (it unlocks the random key), so
treat the PIN accordingly; the panel states this and gates the action behind the
device PIN and a hold. (ykman piv access change-management-key --generate --protect does the same thing from the host.)
The panel manages PINs/PUKs that follow the standard PIV convention (6–8
digits, padded to 8 bytes with 0xFF), which is what ykman, yubico-piv-tool
and OpenSC all use. A PIN or PUK provisioned outside that convention (e.g.
hand-crafted raw CHANGE REFERENCE DATA / RESET RETRY APDUs that store an
unpadded or sub-6-digit value) can’t be verified on the panel; re-set it with
ykman first. The factory defaults follow the convention, so the panel works
out of the box.
The defaults are public. Until you change the PIN, PUK and management key, anyone with physical access can generate, import or delete keys. Treat a default-credential card as unprovisioned.
Slots
| Slot | Role | Typical use | Default PIN policy |
|---|---|---|---|
9a | PIV Authentication | system / domain login, SSH, client TLS | once per session |
9c | Digital Signature | document & email signing | every operation |
9d | Key Management | decryption, key agreement (ECDH) | once per session |
9e | Card Authentication | physical-access / contactless | once per session |
82–95 | Retired Key Management | 20 slots for old decryption keys | once per session |
9b | Management Key | admin auth (not an asymmetric key) | — |
f9 | Attestation | signs slot attestation certs (on-card) | — |
The signature slot (9c) demands the PIN before every private-key
operation; the other slots cache the PIN for the rest of the session after one
VERIFY. 9e carries no special default on this firmware. Like the other
non-signature slots it defaults to PIN once per session, so a default-policy
9e key still needs one VERIFY before use. For true card-auth / contactless
no-PIN behaviour, generate the 9e key with an explicit --pin-policy NEVER.
Algorithms. On-card generation and import accept RSA-2048 / 3072 / 4096,
RSA-1024 (disabled under the FIPS-style build, SP 800-131A), ECC P-256 /
P-384, and the Curve25519 pair Ed25519 (signing) and X25519 (key
agreement), the Yubico 5.7 PIV algorithm ids 0xE0 / 0xE1, so ykman drives
them as --algorithm ED25519 / X25519. An Ed25519 key generates with a
self-signed certificate like the other curves; an X25519 key is key-agreement-only
and can’t self-sign, so generation writes no auto-certificate (provision one
from a CA via ykman piv certificates import). RSA-3072/4096 keygen is slow on
this hardware (tens of seconds to a minute-plus).
Generate a key on-card
ykman piv keys generate --algorithm ECCP256 9a pub.pem   # on-card key, public part out
ykman piv certificates generate --subject "CN=me" 9a pub.pem   # self-signed cert into 9a
ykman piv info
Generating in a slot already writes a self-signed certificate into that slot’s
certificate object, so a GET DATA serves one immediately even before you run
certificates generate. Management-key auth is required to generate.
For a real CA, emit a CSR instead of a self-signed cert:
ykman piv certificates request --subject "CN=me" 9a pub.pem me.csr
# … sign me.csr at your CA, then import the issued cert:
ykman piv certificates import 9a issued.pem
On-card generation means the private key never existed off-device and cannot be exported or backed up. Losing the card loses the key (that is the point). RSA generation is slow on this hardware (RSA-2048 takes roughly 4–6 s, and the prime search is random so run-to-run times vary; the device streams CCID keepalives so the connection stays alive; it is not a hang). See limitations.md for the measured dual-core figures. EC generation is instant.
Or import an existing key
ykman piv keys import 9d existing.pem        # PEM with the private key
ykman piv certificates import 9d existing-cert.pem
Import is management-key gated and also accepts RSA-2048/1024, P-256/P-384 and Ed25519/X25519. An imported key keeps whatever copy you imported it from. Your call which way the trade-off goes. Imported keys cannot be attested (see below): attestation proves on-card generation, which import didn’t do.
PIN and touch policy per key
Both policies are fixed at generate/import time and stored in the slot metadata:
ykman piv keys generate --pin-policy ALWAYS --touch-policy ALWAYS 9a pub.pem
--pin-policy | Effect |
|---|---|
NEVER | no PIN to use the key |
ONCE | PIN once per session (default for 9a/9d/9e/retired) |
ALWAYS | PIN before every operation (default for 9c) |
--touch-policy | Effect |
|---|---|
NEVER | no button press (default for the 9b management key) |
ALWAYS | a physical touch before every private-key operation (default for generated slot keys) |
CACHED | treated as ALWAYS on this device (see below) |
Generated slot keys default to touch ALWAYS: each sign / decrypt / ECDH
needs a button press. A declined touch fails the operation with 6982. The
management key ships touch NEVER so admin provisioning isn’t gated; raise it
with ykman piv access change-management-key --touch if you want admin actions
to require a press too.
CACHEDis treated asALWAYS. The device has no wall clock, so it cannot honour the 15-second touch cache a real YubiKey offers; it errs strict and asks every time. If you setCACHED, expectALWAYSbehaviour.
Attestation
ykman piv keys attest 9a attestation.pem
Proves a slot key was generated on-device, not imported. The attestation
certificate is signed on-card by the f9 key (a P-384 CA key, self-signed at
first boot) and carries the standard Yubico OIDs: firmware version, device
serial, and the slot’s pin/touch policy. Subject/issuer names are
C=ES, O=RS-Key, CN=RS-Key PIV …. Read the f9 CA cert with:
ykman piv certificates export f9 attestation-ca.pem
Attestation only works for generated keys; an imported key returns
6A80 / INCORRECT PARAMS (there is nothing to attest). For the FIDO side of
attestation (org-provisioned enterprise attestation) see
attestation.md.
An interrupted keys import or keys move fails closed: the target slot’s
metadata is dropped before the new key is written, so a power cut between the two
leaves a slot that reads as empty (GET METADATA → 6A88) rather than one whose
key and its recorded provenance disagree. Re-run the import; the slot works again
once it completes. That ordering is what keeps attestation honest — it can never
certify an imported key as generated on-device.
Move and delete keys
ykman piv 5.7 can move a key (with its certificate and metadata) between
slots, or delete it:
ykman piv keys move 9a 82          # 9a → retired slot 82, cert + metadata follow
ykman piv keys delete 9c           # wipe the signature slot's key
A key in a retired slot cannot be moved back into an active slot. Both operations require management-key auth.
Use it
The card shows up as a standard PIV token; nothing here is RS-Key-specific.
-
PKCS#11 (browsers, VPNs, SSH,
age): point the app at OpenSC’sopensc-pkcs11.so, found at/usr/lib/x86_64-linux-gnu/opensc-pkcs11.soon Debian,/usr/lib/opensc-pkcs11.soon many distros, or the Nix store path under NixOS (linux.md). -
SSH via PKCS#11:
ssh-keygen -D /usr/lib/opensc-pkcs11.so          # print the slot 9a public key
ssh -I /usr/lib/opensc-pkcs11.so you@host        # log in with it (touch + PIN per policy)
For an
ed25519-skhardware SSH key the FIDO path is simpler (see ssh.md). PIV-over-PKCS#11 is the route when you need an RSA or NIST-curve key, a smart-card-login certificate, or a server that wants a real X.509 chain. -
ageencryption:age-plugin-yubikeydrives PIV slots directly for identity files but, likeykman, keys off the “Yubico YubiKey” reader name, so it wants the opt-inVIDPID=Yubikey5build; on the default RS-Key build use any PKCS#11-awareagebuild againstopensc-pkcs11.so. -
ECDH / key agreement (
9dand retired slots, P-256/P-384 and X25519):ykman piv ...exposes it (ykman piv keys calculate-secretfor X25519); at the wire level it is GENERAL AUTHENTICATE with tag0x85, the operationyubico-piv-tooland OpenSC use for decryption. -
Windows / macOS native smart-card stacks pick the PIV applet up as-is; macOS CryptoTokenKit binds its
pivtoken.appexto the reader (interop.md).
At rest
PIV private keys are stored AES-256-GCM-sealed under the device root (the
sealed blob is nonce ‖ ciphertext ‖ tag, authenticated against the device
serial). Once the OTP master key is fused, a flash dump does
not yield key material; before that burn, the seal’s root derives from
on-chip state an attacker with the flash and chip could reconstruct, so at-rest
protection is only meaningful after provisioning (see
threat-model.md). The seal is bound to the device, not the
slot, so a keys move re-homes the blob verbatim (no re-encryption).
Factory reset (PIV only)
ykman piv reset
Wipes PIV keys, certificates and PINs only; the other applets are untouched.
The reset is only accepted once both the PIN and the PUK are blocked;
ykman blocks them for you first. To wipe every applet at once (PIV included),
use rsk offboard, which blocks PIN+PUK then resets PIV as part of a full-device
wipe with a signed receipt (see fleet.md).
9000 from the reset means every PIV file is gone — private keys, public-key
caches, certificates, the data objects a host wrote through PUT DATA, and the
PIN/PUK files, which are then re-seeded to the factory defaults. The sweep runs
until the enumeration comes back empty rather than for a fixed number of passes,
and its safety budget counts files actually deleted, so neither a card stuffed
with PUT DATA objects nor one whose flash holds many superseded copies of them
can outrun it.
If the flash refuses a delete — or reports an enumeration it could not finish, so
“nothing left” cannot be proven — the command answers 6581 (MEMORY_FAILURE)
instead of claiming a wipe it did not complete. Treat that as “the card is still
provisioned” and retry: a failed reset still re-creates the PIN, PUK and
retry-counter files it deleted first, so the next attempt behaves like the first
one instead of answering 6A88 for the rest of the power cycle.
There is no rsk piv command group: PIV is provisioned entirely through
ykman piv / yubico-piv-tool / PKCS#11, with rsk only involved for a
whole-device offboard.
Troubleshooting
ykmancan’t connect → linux.md (pcscd + polkit + thedisable-ccidscdaemon note).ykmanstops seeing the card aftergpgused it →scdaemongrabbed the raw CCID interface; applydisable-ccidandgpgconf --kill scdaemon(openpgp.md).- PIN blocked →
ykman piv access unblock-pin(needs the PUK). PUK blocked too → onlyykman piv resetrecovers, and it wipes the slots. ykman piv keys attestfails withINCORRECT PARAMS→ the key in that slot was imported, not generated; attestation is generated-keys-only.change-management-keyrejects 3DES on the FIPS-style build → expected; set an AES-128/192/256 key instead.- RSA-2048 generate takes a few seconds (≈ 4–6 s, occasionally longer since the prime search is random) → that’s the prime search on this hardware, not a hang; the device keeps the CCID connection alive with keepalives.
OATH — TOTP / HOTP codes
The device stores authenticator-app secrets and computes the 6/8-digit codes on-card, over Yubico’s YKOATH protocol (CCID). The HMAC secret is written once and never leaves the chip again: every code is derived inside the firmware and only the digits come back. Up to 255 accounts.
Clients are the stock Yubico tooling: ykman oath on the command line and the
Yubico Authenticator desktop/mobile app over USB. There is no rsk oath
subcommand; OATH is driven entirely through those. Both ykman oath and the
Yubico Authenticator gate on a Yubico YubiKey reader name, so they only see
the device on the opt-in VIDPID=Yubikey5 build; the default RS-Key build
enumerates as RS-Key Security Key (VID:PID 0x1209:0x0001) and stays invisible
to them. Build that flavor when you want to drive OATH from the Yubico tools
(build.md).
On Linux this needs pcscd running plus the polkit rule from
linux.md; if you also use gpg, the disable-ccid line there
keeps scdaemon from grabbing the reader and locking ykman out.
ykman oath info # applet version + whether an access password is set
Add accounts
# Interactive: paste the base32 secret when prompted.
ykman oath accounts add github --issuer GitHub

# Straight from an otpauth:// URI (everything — secret, issuer, digits,
# algorithm, period — is parsed out of the URI):
ykman oath accounts uri 'otpauth://totp/GitHub:me@example.com?secret=BASE32SECRET&issuer=GitHub'
The account name shown in lists is issuer:account (here GitHub:me@example.com).
Most sites hand you the secret two ways at enrollment: a QR code and a
“can’t scan it?” base32 string. Either works:
- base32 string →
accounts add(oraccounts uriif they give the fullotpauth://link). - QR code on screen →
ykman oath accounts uri --reads it from the primary display, or the Yubico Authenticator GUI has a Scan QR code button that grabs whatever QR is visible.
Options that matter:
| Option | Effect | Default |
|---|---|---|
--touch | computing this account’s code needs a button press | off |
--oath-type {TOTP,HOTP} | counter-based vs time-based | TOTP |
--algorithm {SHA1,SHA256,SHA512} | HMAC hash | SHA1 |
--digits {6,7,8} | code length | 6 |
--period N | TOTP step in seconds | 30 |
--counter N | HOTP starting counter | 0 |
--force | overwrite an existing account of the same name without asking | — |
All three hashes are implemented on-card (SHA-1/256/512); RFC 6238/4226 test
vectors for each pass in crates/rsk-oath. Adding a name that already exists
overwrites the old secret in place (--force skips the prompt). There is
one credential per name.
Get codes
ykman oath accounts code            # every TOTP account at once
ykman oath accounts code github     # one account by name substring
code with no name runs the bulk path (CALCULATE ALL). Two kinds of account
are not computed there and show a placeholder instead:
- Touch-required accounts are listed but not calculated. Name them
explicitly (
ykman oath accounts code github) and the firmware waits for the press, then prints the code. This is deliberate: a bulk read can never make a touch account leak a code without the button. - HOTP accounts are never computed in bulk either (it would silently burn the counter). Name them to step the counter once.
The Yubico Authenticator GUI shows all TOTP codes live and re-derives them each period. Touch and HOTP entries get a tap-to-reveal button instead.
Touch-required accounts
ykman oath accounts add aws --issuer AWS --touch
# existing account → re-add with --touch --force, or toggle it in the GUI
With --touch, the firmware refuses to compute that account’s code until the
BOOTSEL button is pressed; a timeout or a declined press returns “security
status not satisfied” and nothing is computed. For HOTP this gate sits
before the counter advances, so a denied touch burns no counter. A refused
press leaves the account exactly where it was. The button is the same physical
press used by FIDO and OpenPGP UIF; only one prompt is outstanding at a time.
The OATH access password
By default the credential list and codes are readable by anything that can reach the CCID interface. An optional access password gates the applet:
ykman oath access change            # set or change the password
ykman oath access remember          # cache it for this host (keyring)
ykman oath access forget            # drop the cached password
How it works on-card: the password becomes an HMAC key (PBKDF2 over the
password, salted with the device serial, done host-side by ykman). On every
fresh connection the card issues a random challenge; the host must answer with
HMAC(key, challenge) before any account command is allowed. The card
answers the host’s challenge with the same key (mutual proof). Selecting the
applet again re-locks it. The compare is constant-time and full-length, so a
truncated or guessed response can’t brute-force its way in one byte at a time.
Footguns:
- The password gates listing and computing codes over CCID, not the secrets at rest. OATH blobs sit in plaintext flash. Unlike PIV and OpenPGP keys, they are not individually sealed. This password protects the live applet, not a flash image; at-rest confidentiality for OATH rests only on the RP2350 device-level protections (secure boot / BOOTSEL lockout, see threat-model.md), not on per-credential sealing.
- There is no recovery for a forgotten access password short of
ykman oath reset, which wipes every account with it. --touchper account and the access password are independent hardenings. Use either, both, or neither.
Manage
ykman oath accounts list                       # account names (extended list also flags which need touch)
ykman oath accounts list -P                    # include the period column
ykman oath accounts rename github GitHub:work  # current name → new name
ykman oath accounts delete github              # remove one account
ykman oath reset                               # wipe the OATH applet only
rename rewrites the name in place and keeps the same secret and counter;
renaming to a name that already exists is rejected. delete of an unknown name
is a no-op error. reset clears all accounts, the access password, and the OTP
password-PIN. Nothing outside OATH is affected (FIDO/PIV/OpenPGP survive). To
wipe the whole key instead, see rsk offboard.
Notes
- Secrets live in device flash (in plaintext: OATH blobs are not individually
sealed, unlike PIV/OpenPGP). Codes are computed on-card, so the secret never
returns to the host after
add. - OATH accounts are not covered by the seed backup and
do not come back on a backup key: they are sealed to this
chip, not derived from the FIDO seed. Keep your
otpauth://URIs/QRs somewhere safe, or re-enroll on loss. The device cannot export a secret once it is stored. - HOTP counters are persisted across reboots and continue from where they were. Touch-required HOTP accounts only advance the counter after the touch, so there are no drive-by increments.
- OATH interop (add → list → calculate → delete, plus TOTP crypto-verified
against RFC vectors, via both
ykman oathand Yubico Authenticator) is tracked in interop.md.
Troubleshooting
ykmanfinds no reader / “Failed to connect”: on Linux this is almost alwaysscdaemonholding the CCID interface after agpgcall. Apply thedisable-ccidline from linux.md and rungpgconf --kill scdaemon, then retry.- Codes are rejected by the site: TOTP depends on the host clock. The card
has no battery-backed time and trusts the timestamp
ykman/the GUI sends. Fix the host’s clock (NTP) and re-read. For HOTP, a code is rejected once the server counter has moved past yours; resync on the server side. - “Touch” account prints nothing under
accounts code: that’s expected. Bulk read skips touch accounts. Name the account so the firmware prompts for the press. - Forgot the access password: there is no unlock;
ykman oath resetis the only way out, and it deletes every account.
OTP slots — Yubico OTP, challenge-response, static passwords
The YubiKey “OTP” feature: four slots, each holding one credential, output by a
button press or read over USB. Program slots 1–2 with stock ykman otp. Slots
3–4 are two extra slots reached over the same protocol with a slot offset.
ykman otpneeds the opt-in Yubico flavor.ykmangates on the “Yubico YubiKey” reader name. Only the opt-inVIDPID=Yubikey5build presents it. The defaultRSKeybuild (VID:PID0x1209:0x0001, reader “RS-Key”) is invisible to it. The HID-keyboard typing of a slot’s output is identity-independent and works on either build. Only programming and reading slots overykmanneeds the Yubico flavor.
Not the RP2350 fuses. This page is the Yubico one-time-password feature. The chip’s One-Time-Programmable fuses (secure-boot key, master sealing key) are a different thing with the same three letters. See otp-fuses.md.
The device is also a USB keyboard: pressing the button types the selected slot’s output wherever the cursor is. That keyboard is a third USB interface (standard boot keyboard). It sits after the FIDO HID and CCID interfaces. If your OS asks about a new keyboard at first plug, that’s this one.
flowchart LR
    press["button press"] --> kbd["USB HID keyboard"] --> types["types the slot output"]
    ykman["ykman otp"] --> c1["CCID / HID frame"] --> s12["slots 1-2"]
    raw["slot-offset APDU"] --> c2["CCID"] --> s34["slots 3-4"]
Slot selection by clicks
The firmware runs a click counter: clicks landing within 1 second of each other count toward one gesture. The gesture types that slot when the window closes.
| Clicks | Slot | ykman otp |
|---|---|---|
| 1 (short) | 1 | yes |
| 2 | 2 | yes |
| 3 | 3 | slot-offset APDU only |
| 4 | 4 | slot-offset APDU only |
ykman otp only knows slots 1 and 2, the classic short/long-press pair. Slots
3 and 4 use the same wire protocol with a 1- or 2-step slot offset (the
firmware addresses all four as one contiguous block). A tool has to send that
offset itself. Most setups never need them. Everything below targets 1/2 unless
noted.
What each slot type does
Four credential types share the slots. Only some type on a press:
| Type | On button press | Over USB (ykman otp calculate) |
|---|---|---|
| Yubico OTP | types a 44-char modhex OTP | — |
| Static password | types the stored password | — |
| OATH-HOTP | types the 6/8-digit code | — |
| Challenge-response (HMAC-SHA1) | nothing | answers the challenge |
| Challenge-response (Yubico mode) | nothing | answers the challenge |
A challenge-response slot types nothing on a press. The button only gates the USB calculate when the slot was programmed touch-required. So a slot can hold a Yubico OTP or a static password or a HOTP secret or a challenge-response secret, not several at once.
Program a slot
ykman otp info                                                   # what's in each slot
ykman otp yubiotp 1 --serial-public-id -g -G                     # classic Yubico OTP (random ids + key)
ykman otp chalresp 2 --generate --touch                          # HMAC-SHA1 challenge-response
ykman otp static 1 --generate --length 38                        # typed static password
ykman otp hotp 2 --digits 6 'base32secret'                       # OATH-HOTP
ykman otp swap                                                   # swap slots 1 and 2
ykman otp delete 2                                               # clear a slot
Notes on the options:
--touch(chalresp) sets the touch-trigger bit: the USB calculate then waits for a button press and refuses without one. Touch-typing slots (Yubico OTP, static, HOTP) always need the press anyway. That’s the only way to fire them.yubiotp:-S/--serial-public-iduses the device serial as the public id,-g/--generate-private-idrandomises the private id,-G/--generate-keyrandomises the AES key. All three together give a self-contained random credential.--lengthon a static slot is the typed-password length, max 38 characters (the slot stores 38 password bytes).--length 38fills it. By defaultstaticonly uses the modhex alphabet (cbdefghijklnrtuv) so the password types the same on any keyboard layout.--keyboard-layout us(etc.) widens the character set at the cost of layout-dependence.- Reprogramming a slot is destructive. The new secret overwrites the old. There is no “read it back.” Yubico OTP and chal-resp secrets are random and exist only on the device once programmed (see Validation below for the exception).
- Access code: set one with
ykman otp settings <slot> --new-access-code. The firmware then refuses to overwrite, update, delete, or swap that slot unless the code is presented (ykman otp --access-code <hex> …, given before the sub-command). Lose the code and the only way out is a factory reset of the OTP applet.
ykman otp reaches the device over the HID frame protocol on the keyboard
interface (and over CCID). Both work without any PIN. OTP slots are not
PIN-protected, only optionally access-code-protected.
Challenge-response from software
ykman otp calculate 2 <hex-challenge> # HMAC-SHA1, returns the 20-byte HMAC
This is the KeePassXC / LUKS pattern: the database (or disk) key is mixed with
the slot’s HMAC of a fixed challenge. --touch slots wait for a press first.
The keyboard interface answers the same protocol, so tools written for YubiKeys
(“YubiKey challenge-response” in KeePassXC, ykchalresp, the pam_yubico
HMAC mode) work unchanged.
Those tools are the ykpers/ykcore family, and on Linux they talk to the key
over raw libusb rather than through the kernel HID stack. That path has two
requirements a stock YubiKey satisfies implicitly:
- A Yubico VID. KeePassXC filters on Yubico’s (and OnlyKey’s) vendor id and
a fixed PID list, so a default
0x1209build is invisible to it — build the firmware withVIDPID=Yubikey5(see build.md). - libusb access to the device. Install Yubico’s udev rules
(
69-yubikey.rules/70-yubikey.rules, packaged asyubikey-personalizationon most distributions); without them libusb cannot open the device at all.
ykman otp calculate is not affected by either — it goes through hidraw.
Since bcdDevice 0x085A the frame protocol also answers on the FIDO interface,
the way a YubiKey does, so a tool that addresses OTP by interface index finds it
whatever the enabled interface set looks like. Turning the keyboard interface off
in the phy record still takes it away from both.
Two challenge-response modes exist:
- HMAC-SHA1 is the common one. Variable-length challenges (
HMAC_LT64) are supported with the classic YubiKey trim quirk: a short challenge is padded by repeating its last byte, and a challenge that ends in its own last byte loses that tail. KeePassXC andykchalresp -Halready account for this. - Yubico mode is a 6-byte challenge, AES-encrypted with the slot key after mixing in the device serial. Rarely used. HMAC-SHA1 is what tools expect.
Yubico OTP validation
A Yubico-OTP slot types 44-modhex one-time passwords (a 6-byte public id in clear, then an AES-128-ECB block over the private id, a 16-bit usage counter, a session counter, an uptime stamp, two random bytes and a CRC). A validation server decrypts and replay-checks them.
- The usage counter advances every power-up and every session wrap, so a token never repeats across reboots: the standard replay defence.
- Public validation (YubiCloud) requires uploading the slot’s AES key to
Yubico.
--generate-keyprints the key, public id and private id at programming time. Capture them then, because they cannot be read back later. - Self-hosted validation (
yubikey-val, or a custom verifier) keeps the AES key on your own server. Nothing leaves the building.
Static passwords
A static slot types a fixed string on each press. Handy for a long machine
password or a prefix you append a moving code to. It is not a secret store:
anyone who can press the button gets the password typed out, and a static
password is replayable by definition. The string is typed as raw HID scancodes,
so it is keyboard-layout independent up to the characters ykman will accept.
OATH-HOTP slots
An OTP-slot HOTP credential types an RFC 4226 code (6 or 8 digits, --digits)
and advances its counter on each press. This is the typed HOTP, distinct from
the full OATH applet, which stores many TOTP/HOTP accounts and is
read by an authenticator app rather than typed. Use a slot when you want one
HOTP typed by a button. Use the OATH applet for a list of accounts.
Reading status / serial
ykman otp info               # slot 1/2 programmed? touch? type?
ykman info                   # device serial, firmware version, enabled apps
The serial that OTP reports is the YubiKey-style 8-digit serial derived from the
chip id, the same value ykman info shows. A serial derived from the same chip
id is mixed into Yubico-mode challenge-response, though it draws on more of the
chip-id bytes than the reported 8-digit value, so the two aren’t byte-identical.
Disabling the keyboard interface
If the extra keyboard is unwanted (some KVMs or login screens dislike a button
that types), ykman config usb --disable otp now genuinely turns OTP off:
ykman config usb --disable otp        # disables the OTP application (enforced)
ykman config usb --list               # confirm what is on
ykman config usb --enable otp         # reversible — turns it back on
The write persists to the Yubico management capability blob (EF_DEV_CONF) and
the firmware enforces it live (no replug): a button press then types
nothing, and Yubico / HMAC challenge-response is refused on both the keyboard
frame protocol and the CCID OTP applet.
One caveat: the keyboard USB interface still enumerates. Whether the HID
interface is present at all is decided at boot by a separate mask in the rescue
phy record (EF_PHY / USB_ITF_KB), which a capability-bit change does not
touch — so the OS still sees an (now inert) keyboard. To drop the interface
itself, clear the USB_ITF_KB bit in the rescue phy mask via the rescue
applet (stock ykman can’t do it). If accidental typing was the only worry,
--disable otp — or leaving the slots empty / behind an access code — already
stops the presses.
Troubleshooting
ykman otp infohangs or errors right after gpg/ssh used the device → scdaemon is holding the CCID interface.gpgconf --kill scdaemon, then retry. See linux.md and openpgp.md.- A press types nothing → the slot is empty, or it’s a challenge-response
slot (those never type).
ykman otp infoshows which. ykman otp calculatereturnsCONDITIONS_NOT_SATISFIED/ waits forever → the slot is--touch. Press the button.- Overwrite/delete refused → the slot has an access code. Pass it with
ykman otp --access-code <hex> …(before the sub-command), or factory-reset the OTP applet. - Slots 3/4 don’t show in
ykman otp info→ expected.ykman otponly enumerates 1 and 2. - KeePassXC on Linux says
Hardware key USB error: Pipe error, orykchalrespfails whileykman otp calculateworks → firmware older than bcdDevice0x0859enumerated the FIDO interface first, and these tools address the OTP interface as interface 0 unconditionally. Update the firmware. If the key isn’t listed at all, check the VID and udev requirements above. - A
--touchslot works fromykmanbut not from KeePassXC, and afterwards evenykinfofails for half a minute → firmware older than bcdDevice0x085Bstayed in the touch wait once a host had probed the slot and moved on, and answered “would block” to every command until it timed out. Update the firmware. A non-touch slot never hit this.
Notes and limits
- OTP slot secrets are not covered by the seed backup and not by a primary/backup-key pair. They’re sealed to this chip. Re-program the slots on a replacement board, or keep the AES keys / HOTP seeds you generated somewhere safe.
- Touch-triggered typing always requires the physical press. Only the challenge-response USB path honours each slot’s touch-trigger flag.
- No PINs here. Anything that can reach the USB interfaces can press-by-proxy a
typing slot and can run
calculateon a non-touch chal-resp slot. Make the sensitive ones--touch, and put an access code on slots you don’t want silently reprogrammed.
Seed backup — BIP-39 / SLIP-39
Hardware-wallet-style backup of the FIDO master seed. The 32-byte seed is
exported once and rendered as words. Later it can resurrect your deterministic
FIDO identity on a fresh board. Every non-resident credential (ssh ed25519-sk keys, classic 2FA registrations) derives from the seed. After a
restore the same key files and registrations keep working.
Not covered (sealed to the chip, not derivable from the seed): resident passkeys, OpenPGP keys, PIV keys, OATH accounts, OTP slots.
Two ways to stay recoverable
Seed backup is one strategy. A primary + backup device pair is the other. They are complementary:
- Back up the seed (this page): one identity, kept recoverable by its mnemonic. Restore it onto a replacement board to resurrect the same credentials. Simple, but it is a single secret, and resident passkeys / PIV / OpenPGP don’t come back.
- Primary + backup pair (backup-key.md): two independent keys with different seeds, both registered on every account. Lose one and the other already works. No restore, no shared secret to leak. The cost is registering both keys everywhere (and enrolling resident passkeys on each).
Many people do both: two devices and a written mnemonic for each.
Export (once, at setup)
rsk backup export --scheme bip39                       # 24 words
# or Shamir shares — any 2 of 3 reconstruct:
rsk backup export --scheme slip39 --threshold 2 --shares 3
Gates, all enforced by the firmware: an encrypted transport channel, a touch, the FIDO PIN (when set), and the setup window (below). Write the words on paper. The host that runs the export sees the seed, so do this on a machine you trust.
rsk backup finalize        # seals the export window — typed confirmation
rsk backup status
After finalize, export is refused forever (until a factory reset makes
a new seed). That’s the anti-exfiltration gate: malware on a later host
cannot quietly re-export your seed. Corollary: lost words cannot be
re-exported either, so pick a SLIP-39 share count with margin (2-of-3 minimum,
3-of-5 for the paranoid).

Restore (onto any RS-Key board)
rsk backup restore --scheme bip39          # prompts for the 24 words
# or: --scheme slip39                      # prompts for ≥ threshold shares
Touch + PIN gated. The incoming seed is re-sealed under the destination device’s own root. A restored board is cryptographically indistinguishable from the original for every derived credential. Restore overwrites the destination’s auto-generated seed (it warns; a fresh board loses nothing).
After restoring: your ~/.ssh/id_*_sk files log in again, 2FA
registrations answer again. Resident passkeys do not come back, so re-enroll
those.
The TUI
rsk-tui has the same export/restore/finalize flows interactively (BIP-39
only; SLIP-39 stays in the CLI), with the seed phrase revealed on-screen and
zeroized after.
Mechanics (for the curious)
The seed crosses USB only inside an ephemeral encrypted channel: P-256 ECDH →
HKDF-SHA256 → ChaCha20-Poly1305, fresh nonce per message. The mnemonic
encodings are entirely host-side. BIP-39 (24 words) and SLIP-39 (Shamir
T-of-N) both encode the same raw 32 bytes, so either reconstructs the seed.
The setup-window flag lives with the seed’s lifecycle: cleared when a seed is
generated (first boot, factory reset), set by finalize.
Backup key — a primary + backup pair
A single security key is a single point of failure. Lose it, break it, leave it at the office, or have it stolen, and you are locked out of everything it was your only key for. The fix is the one hardware-key vendors recommend: keep two keys, a primary you carry and a backup you store somewhere safe, and register both with every account. Lose one and the other already works, with no recovery dance.
This page is the why and the how. The seed-backup mnemonic (seed-backup.md) is a different, complementary safety net. The two are compared at the end.
Why two independent keys
The pair are two separate devices with different seeds, not one identity copied onto two sticks. That independence is the point:
- No single point of failure. A primary that is lost, bricked, or left behind doesn’t lock you out. The backup is already enrolled everywhere.
- No shared secret. Because the seeds differ, compromising one key tells an attacker nothing about the other. (Cloning the same seed onto both would make a single leak break both, the opposite of what a backup is for.)
- It is how WebAuthn is meant to be used. Every serious account lets you add more than one security key precisely so you can enroll a backup. You are using the platform’s built-in redundancy, not working around it.
- Resident credentials aren’t seed-portable anyway. Passkeys, PIV, and OpenPGP keys are sealed to the chip, so even with a seed backup you would re-enroll them on a replacement. Two live keys sidestep that entirely.
The model

Both keys are enrolled on every account. Day to day you use the primary. The backup sits in a drawer or a safe. If the primary is gone, the backup logs you in to remove the lost key and enroll a fresh replacement. No downtime, no restore.
Set it up — rsk pair
rsk pair walks you through it. It reads each device in turn (touch-free),
confirms they are two different physical keys, and prints the checklist:
rsk pair # plug in the primary, then the backup, when prompted
Then, working down the checklist:
- Give each device its own PIN (in your browser / OS security-key settings).
- Back up each seed separately. Two independent seeds means two different
mnemonics (seed-backup.md). Do
rsk backup exportwith each device, thenrsk backup finalize. - Register both keys on every important account. In each service’s security-key settings, add the primary and the backup. Don’t stop at the accounts you remember. Email and your password manager first, since they gate everything else.
- Store the backup key somewhere separate from the primary (a different building is ideal, since fire and theft take whatever is in one place).
- Test the backup by signing in with only it, once, before you rely on it.
Different seeds — on purpose
Each RS-Key generates its own seed on first boot, so two fresh keys are already
independent. You don’t have to do anything to make their seeds differ. The one
way to accidentally defeat this is to rsk backup restore the same mnemonic
onto both, which turns them into clones. Don’t. If you want the same identity on a
replacement board, that’s the seed-backup flow, not the pair flow.
rsk paircan’t cryptographically prove the seeds differ. RS-Key credentials are randomized (a fresh key handle per registration), so there is no stable seed-derived value to compare between two devices, and the device attestation key is per-chip, not per-seed. The wizard confirms two distinct physical devices and relies on the self-generated-seed property above. If you want to check by hand,rsk backup exportboth and compare the phrases (they must differ).
If you lose a key
Losing one of a registered pair is a routine event, not an emergency:
- Sign in with the surviving key. It is already enrolled everywhere.
- Remove the lost key from each account. In each service’s security-key settings, delete the missing authenticator so it can no longer be used.
- Get a new key and make it the new backup.
rsk pairagain with the survivor as the primary, then enroll the new one across your accounts.
A stolen key is gated by its PIN (a few wrong tries lock it), but removing it from your accounts is what actually retires it. Do that promptly.
This vs. the seed-backup mnemonic
| Primary + backup pair | Seed-backup mnemonic | |
|---|---|---|
| What it protects | live access, a second key already enrolled | one identity, recoverable later |
| Recover by | grabbing the backup key (no steps) | restoring the phrase onto a new board |
| Secret exposure | none shared, two independent seeds | the seed passes through the host at export |
| Covers passkeys / PIV / OpenPGP | enroll them on each key | no (sealed to the chip) |
| Cost | register both keys everywhere | write the words down, keep them safe |
They are complementary. The pair gives you redundancy with zero recovery effort. The mnemonic resurrects an identity onto a replacement when you only had one key. Many people do both: two keys, and a written mnemonic for each.
Soft-lock — at-rest seed lock
Optional hardening: with the lock engaged, the FIDO master seed exists in flash only encrypted to a 32-byte key that you hold (as BIP-39/SLIP-39 words or hex). A stolen board refuses every FIDO operation until that key is presented, even powered up, even running genuine firmware. Your identity becomes device + words, two factors.
This is the same idea as a wallet passphrase. It composes with (does not replace) the silicon protections: once provisioned, the OTP root and secure boot (production.md, otp-fuses.md) stop flash-dump and foreign-firmware attacks. The soft-lock additionally stops your own device in the wrong hands.
Needs firmware with soft-lock support (bcdDevice >= 0x0742). Older builds
answer rsk lock status with “firmware too old”. Check with rsk status.

Prerequisite: a FIDO2 PIN
enable and disable ride authenticatorConfig, which the firmware always
gates on a pinUvAuthToken with the acfg permission. So a FIDO2 PIN must
already be set, and you pass it with --pin. With no PIN configured the
command stops with “authenticatorConfig needs the acfg pinUvAuthToken”. Set
one first:
rsk fido set-pin # see fido2.md
unlock is the exception: it needs neither PIN nor touch (below).
Enable
rsk lock enable --pin 1234 # PIN + touch gated; typed confirmation
Generates a random 32-byte lock key, prints it once (default 24-word BIP-39), wraps the seed value with ChaCha20-Poly1305 under it into flash, and deletes the plaintext-sealed copy. Touch the device (BOOTSEL button) when prompted. Treat the key like the backup words: paper, not a file.
Choose how the key is rendered:
--scheme | What it prints | Reconstruct with |
|---|---|---|
bip39 (default) | 24 words | the same 24 words |
slip39 | Shamir shares (--threshold/--shares, default 2-of-3) | any threshold shares |
hex | 64 hex characters | the same hex |
rsk lock enable --pin 1234 --scheme slip39 --threshold 2 --shares 3
--key-out FILE also writes the raw key hex to a 0600 file. A test/CI
convenience, not for production: it defeats the point of holding the key only
on paper.
The wrap is over the seed value, independent of the at-rest format tag and of the kbase the plain file was sealed under. So locking and the OTP re-sealing (otp-fuses.md) stay orthogonal.
Daily use — unlock at power-up
rsk lock status            # locked? unlocked this session?
rsk lock unlock            # prompts for the 24 words; seed goes to RAM only
status prints four flags read straight from the device:
| Flag | Meaning |
|---|---|
sealed | the one-time backup-export window is closed (seed-backup.md) |
has_seed | a plaintext-sealed seed is on flash (false while locked) |
locked | the wrapped blob is what’s stored — an unlock is required |
unlocked | a RAM copy from this power cycle’s unlock is live |
The lock re-engages at every power cycle: the unlocked seed lives only in
RAM and is zeroized on unplug. While locked with no unlock this session, the
seed loader fails and the firmware errors out of every credential operation:
registration (makeCredential) and assertion (getAssertion/U2F) alike.
Browsers show a generic failure and ssh says the key refused, until you
unlock.
Unlock takes the key the same three ways and can run headless in a script:
rsk lock unlock --scheme bip39 --mnemonic "word1 word2 … word24"
rsk lock unlock --key-hex 0011…  # 64 hex chars
rsk lock unlock --scheme slip39  # prompts for shares, one per line, blank to finish
Unlock needs no PIN and no touch. Knowledge of the 256-bit key is the
authorization (it is verified by the AEAD decrypt succeeding). A wrong key
fails closed with unlock failed: 0x… (wrong key?) and leaves the device
locked. Unlocking a device that isn’t locked reports device is not locked.
Disable
rsk lock disable --pin 1234 # needs an unlocked session + PIN + touch
Disable proves you hold the key by requiring the seed already unlocked this
power cycle, then writes it back plaintext-sealed (device-root-sealed) and
deletes the wrapped blob. If you haven’t unlocked yet, pass the key and
disable unlocks first:
rsk lock disable --pin 1234 --mnemonic "word1 … word24"
rsk lock disable --pin 1234 --key-hex 0011…
Calling disable without an unlock prompts for the lock key (or pass
--mnemonic/--key-hex). Supply nothing valid and it fails with the lock
still engaged.
How it composes with seed backup
The soft-lock and the seed backup are independent (backup exports/imports the seed value, the lock wraps that same value), but their ordering matters:
- Back up before you lock. A mnemonic taken before ENABLE still restores the original identity onto a fresh board later.
- Restore is refused while locked.
rsk backup restore(firmwareBACKUP_LOAD) returns “not allowed” on a locked device. A restore next to a live wrapped blob would leave two competing seeds.disable(or a reset) first. - Export works once unlocked. With the seed unlocked this session,
rsk backup exportserves the in-RAM copy normally (subject to the one-time export window).
Lost the lock key?
Unrecoverable by design. The way forward is a FIDO factory reset, which
deletes the locked blob and generates a fresh identity (ykman fido reset,
which needs the opt-in VIDPID=Yubikey5 build, or any WebAuthn “reset security
key” UI on the default build). Replug the key first: a screenless build accepts
the reset only within ten seconds of a power-up (see
fido2.md). Your
seed backup, if you made one before locking, still
restores the old identity afterwards. Without it the old credentials
(ssh ed25519-sk keys, U2F registrations) are gone.
Honest caveats
- The flash log keeps the superseded plaintext-sealed record until natural compaction overwrites it. The at-rest guarantee hardens over time after ENABLE rather than instantly. (That lingering record is still sealed to the device root, so this only matters against an attacker who has also defeated the OTP tier; see threat-model.md.)
- A compromised host at unlock time cannot read the key from the wire (the channel is an ephemeral ChaCha20-Poly1305 tunnel) or the seed (never leaves the device). But while the device sits unlocked and plugged in, it can drive normal FIDO operations, like any session. Unplug when done.
- The lock protects the FIDO seed only. OpenPGP, PIV, and OATH keys are sealed to the chip independently and are not gated by it. To gate those, rely on their own PINs and on the OTP/secure-boot tier.
LED
The status LED is the device’s only display. On the reference board (the Waveshare RP2350-One), it’s a WS2812 addressable RGB on GPIO16.
Build-time knobs
Three hardware properties of the indicator are compile-time knobs set by build
flags. A fourth, MAX_LEDS, sets the upper bound for the PIO buffer. The actual
number of connected LEDs is configured at runtime via rsk hw --led-num (or
PicoForge) and must be ≤ MAX_LEDS.
| Knob | Default | When to change it |
|---|---|---|
LED_KIND | ws2812 | ws2812 (addressable RGB, default), gpio (plain on/off), pimoroni (3-pin PWM RGB), or none (no indicator). See build.md. |
LED_PIN | 16 | A board whose addressable LED is on a different GPIO (0..=29). |
LED_ORDER | rgb | A WS2812 board with swapped red/green: set grb (the WS2812B standard). The Waveshare RP2350-One is rgb; most other parts are grb. |
MAX_LEDS | 1 | A board with multiple daisy-chained addressable LEDs: set it to the chain length (max 64). Default 1 is a single onboard LED. The actual connected count is set at runtime with rsk hw --led-num. |
# example: build for a 4-LED board with standard GRB order
env MAX_LEDS=4 LED_ORDER=grb cargo build --release -p firmware
# then set the runtime count (persists across reboots):
rsk hw --led-num 4
Once built, a non-none build compiles all backends, so the pin, driver, wire
order, and LED count are runtime-changeable (no reflash) with rsk hw
(build.md). The build knobs set the boot defaults.
What the LED shows (colour, brightness, and the visual effect) is runtime-configurable separately, covered next.
Effects
Each of the four states can run one of several animated effects. The effect
determines how the LED(s) display the state’s colour and brightness. All
effects work with any number of LEDs. vapor and sparkle shine on a single
LED too. bounce and flow naturally reduce to a static colour or a single
pixel when there is only one LED.
Effects only render on the ws2812 backend (addressable RGB). The gpio and
pimoroni backends always use the classic on/off blink, regardless of the
effect setting. They lack per-LED control and pixel-level colour.
| Effect | ID | What you see | Suits |
|---|---|---|---|
legacy | 0 | Classic on/off blink (TIMING table) | Original blink behaviour |
vapor | 1 | All LEDs breathe together, smooth triangle-wave brightness | Idle (default) |
bounce | 2 | A wide hump of light glides back and forth with half-step interpolation | Touch (default) |
flow | 3 | Yellow→red gradient flowing left to right with a trailing wake | Processing (default) |
sparkle | 4 | Each LED flashes an independent random colour | Boot (default) |
Default mapping (multiple LEDs)
| State | Default effect | Default colour | Means |
|---|---|---|---|
| idle | vapor: gentle breathing | green | ready, nothing in flight |
| processing | flow: warm-colour flow | yellow→red gradient | handling an APDU / crypto op |
| waiting for touch | bounce: smooth bounce | yellow | press the button to confirm |
| boot | sparkle: random sparkle | red | the brief power-up state |

A few honest details:
- No dedicated error colour. The firmware does not light a distinct “error” state. A failed operation just drops back to idle. Read the host tool’s exit code, not the LED, for success or failure.
- The touch state needs the touch build. It is only ever shown on the
default touch build. A no-touch build (
--features no-touch) never enters it. The processing state still flashes during the operation either way (build.md). - Default brightness is gentle. 16 of 255 per channel, so the indicator is visible without being a flashlight. Turn it up if you want.
- Boot is brief. You normally see it only for the moment between power-up and the first idle, so don’t tune your eye to it.
This is not the BOOTSEL / picotool state. Holding the button while
plugging in puts the RP2350 in its ROM bootloader, where this firmware (and
therefore this LED engine) isn’t running, so the LED is dark or shows
whatever the ROM does. That mode is for flashing firmware and OTP, covered in
build.md and otp-fuses.md.
Customize
Colour & brightness
Per-state colour and per-channel brightness are configurable. The values
persist in flash (EF_LED_CONF) and apply live, no reboot:
rsk led --get                                  # print the current config
rsk led --status idle --color blue             # recolor a state
rsk led --status idle --brightness 64          # 0–255; 0 = that state goes dark
rsk led --status idle --color blue --brightness 64
touchcannot be switched off, and its colour is reserved. On a build without the trusted display the touch state is the only signal that the key is waiting for your consent. You can restyle it — colour, effect, speed, brighter — but the firmware normalizes four things on every write, whatever transport it came in on (rsk led,rsk led --transport fido, or a boot reload of the stored record):
--color offon--status touchbecomes the default yellow.--brightness 0on--status touchis raised to8.--speed 1is raised to2. At1the breathing effect renders an all-black frame every tick while the brightness byte still reads fine.- no other state may wear the touch state’s colour. One that does is reset to its own factory look, whatever its effect, brightness or speed. The rule keys on colour alone because a brightness or speed one unit off is identical to the eye, and the effect is no signal at all in
--steadymode or on a one-LED board.Every other state still goes fully dark on
--brightness 0.rsk led --getshows what the device is actually rendering, so read it back after a write that hits one of these rules.
There is one case where touch gives way instead. If the state wearing the touch
colour has that colour as its own factory colour, resetting it would not resolve
the clash, so touch reverts to its factory look (yellow, bounce). Only boot
(red) and idle/processing (green) can trigger that:
rsk led --status touch --color red      # sticks — unless boot is red
rsk led --status touch --color green    # sticks — unless idle or processing is green
rsk led --status boot  --color blue     # …then a red touch is legitimate and kept
What this does not promise. Two states in different colours can still be
hard to tell apart. On a single-colour (gpio) build hue collapses to lit or
unlit; red, green and yellow are mutually confusable under red-green colour
blindness; and on a one-LED board bounce, flow and steady mode all render the
same solid frame. What separates the states there is the per-state blink timing
(touch 1000/100 ms vs idle 500/500 ms), which no host write can change — but
--steady suppresses blinking altogether, so on a single-colour build it leaves
nothing to distinguish them. If the consent signal has to be unambiguous, use a
trusted-display build, which names the operation on screen.
Effect & speed
Each state’s effect and animation speed are configurable the same way:
rsk led --status idle --effect vapor          # change the effect
rsk led --status touch --effect bounce --speed 15  # custom speed (ticks per step)
rsk led --status processing --effect legacy   # revert to classic on/off blink
--speed 0 (or omitting --speed) uses the effect’s built-in default.
Steady / blink
--steady and --blink are global, not per-state: the firmware keeps each
state’s timing internally, but a single flag decides whether any of them
blink. --steady makes the whole indicator a solid lamp whose colour tracks
the current state. --blink brings the blink patterns back.
rsk led --status idle --color cyan --steady    # solid cyan at idle, no pulse
rsk led --blink                                # back to the blink patterns
rsk-tui has a “cycle idle color” action that steps the idle state through
the palette, plus “Read LED state”. For per-state colour, brightness, or the
steady toggle, use rsk led.
Selectors and values
| Flag | Values |
|---|---|
--status | idle, processing, touch, boot (default idle) |
--color | off, red, green, blue, yellow, magenta, cyan, white |
--brightness | 0–255 per channel (0 = off, except --status touch, see above) |
--effect | legacy, vapor, bounce, flow, sparkle |
--speed | 0–255 (0 = effect’s built-in default; 1 is raised to 2 on --status touch) |
--steady | solid colour, no blinking, global, affects every state |
--blink | the opposite: restore blinking |
Hardware wiring (rsk hw)
See the phy record spec for the full reference. The LED wiring
(pin, driver, wire order) lives in the phy record, shared with PicoForge:
rsk hw --led-pin 22                     # move the WS2812/gpio data pin to GPIO22
rsk hw --led-driver gpio                # switch to a plain on/off LED
rsk hw --led-order grb                  # fix a red/green swap on a GRB part
By default rsk hw speaks CCID (PC/SC). On a host where pcscd can’t read or
write the card, add --transport fido to do the same read-modify-write over the
FIDO HID transport instead. It is gated by a device touch and, if a PIN is set,
--pin (a pinUvAuthToken). rsk led takes the same flag. Wiring (rsk hw)
applies on the next boot, so re-plug the device. Colours (rsk led) apply live:
rsk hw  --transport fido --touch-timeout 45   # wiring; approve with a touch
rsk led --transport fido --status idle --color blue   # colours, applied live
--touch-timeout has a floor of 10 seconds. A shorter window can expire
while your finger is still on the button, and the next queued request would then
inherit that same press as its consent. rsk hw refuses anything below 10, and
the firmware raises it anyway if some other host writes the record directly.
Reset to defaults
rsk led --status idle       --color green  --brightness 16 --effect vapor
rsk led --status processing --color green  --brightness 16 --effect flow
rsk led --status touch      --color yellow --brightness 16 --effect bounce
rsk led --status boot       --color red    --brightness 16 --effect sparkle
rsk led --blink
Under the hood
rsk led talks to the firmware’s vendor applet over CCID
(tools/rsk/led.py, firmware/src/vendor.rs):
- SET LED (
INS 0x10) packs brightness intoP1and colour + the steady bit + the target state intoP2. When the caller sends 1–2 data bytes, they set the effect and speed for that state. - GET LED (
INS 0x11) returns the whole config block:[steady:1, (effect:1, color:1, brightness:1, speed:1) × 4](17 bytes).
The firmware writes the block to EF_LED_CONF and reloads it on every boot,
so your settings survive a power cycle but not an OpenPGP/FIDO factory reset
(those don’t touch this file). The led.rs module keeps per-status atomics
that the render task reads live. SET LED updates them immediately, then
persists the full block to flash.
The touch rules above live in the block codec (crates/rsk-led), not in any one
command handler, so they apply wherever a block is decoded: the CCID setter, the
FIDO CONFIG_WRITE LED target, and the boot reload. The CCID path persists the
normalized block; a FIDO CONFIG_WRITE stores your bytes as sent and normalizes
them on the way to the pixels, so CONFIG_READ can echo a record the device is
not rendering. rsk led --get (GET LED) always reports the rendered values.
For the wiring half (rsk hw), see the phy record spec. It
writes to EF_PHY via the rescue applet and applies at next boot.
Troubleshooting
- LED is dark and stays dark. Either the board has no addressable LED, or
the data pin / driver is wrong for your wiring. Fix it live with
rsk hw --led-pin N/--led-driver …(or rebuild with the rightLED_PIN/LED_KIND, build.md). If a known-good board goes dark mid-session, the firmware task is likely wedged, not the LED. - Red and green look swapped. Wrong wire order for your LED part. Flip it
with
rsk hw --led-order grb(or build withLED_ORDER=grb). See the RGB-vs-GRB note above. - Only the first LED lights up; the rest stay dark. The board has multiple
daisy-chained addressable LEDs, but the runtime LED count was never set.
Run
rsk hw --led-num <your count>to configure it (persists across reboots; the change applies after a warm reboot). If you need a higher buffer ceiling, rebuild withMAX_LEDS=<n>. rsk ledcan’t reach the device. It needs the CCID interface up (pcscdon Linux). Ifgpg --card-status/rsk statusalso fail, fix that first (linux.md).- An app looks frozen. Check for the long-on yellow touch state and tap the button. If the LED is idle-green and the app is still stuck, it isn’t waiting on the device.
Trusted display
Experimental. An RS-Key variant for a screen-and-touch RP2350 board (the reference target is the Waveshare RP2350-Touch-LCD-2.8). The screen turns the key into a trusted display: the operations that matter (approving a sign-in, typing a PIN) happen on the device’s own glass, not on the host. A compromised or phishing host cannot fake what you see or capture what you type. Concretely:
- An Approve / Deny prompt paints the real relying party for every
signature. A signature cannot be obtained without a physical tap on a screen
showing the true
rpId. - PINs are entered on-screen (a FIDO
clientPIN/UV, a device PIN, and the OpenPGP / PIV PINs over CCID) and never cross USB. - An on-device browser lets you inspect and prune credentials (delete a passkey, read the applet state) without a host.
The whole feature is dep:-gated. A standard key without a screen compiles
none of the UI or driver code (the gate asserts the rsk-ui crate is absent
from the default firmware image), so an ordinary build is byte-for-byte
unaffected.
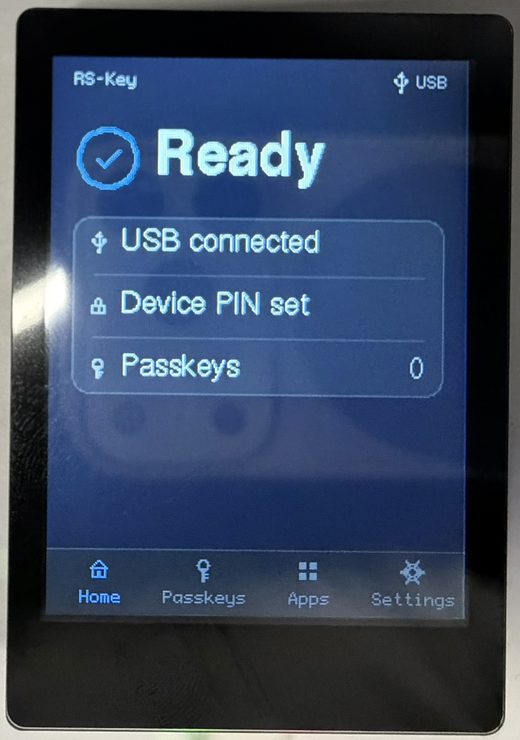
Building and flashing
The panel takes over the addressable-LED pin, so the display flavor is built
LED_KIND=none (a compile-time guard enforces this) with the larger flash the UI
assets want:
env LED_KIND=none FLASH_SIZE=16M cargo build --release -p firmware --features display
# or the hermetic package:
nix build .#firmware-display        # → result/firmware.uf2
GPIO16 (the WS2812 pin on a standard board) drives the backlight here.
WAKE_PIN (default 25, the board’s BAT_PWR button) both wakes the panel from
display sleep and, while awake, sleeps it on demand from any screen. A press
blanks the panel and (when a device PIN is set) locks the on-device UI, aborting
any host prompt it interrupts. See the full knob table in build.md;
the display-only knobs are WAKE_PIN / WAKE_ACTIVE_HIGH.
Flash it like any other image (BOOTSEL → picotool load, hardware.md).
Two notes:
- The build output is unsigned. On a secure-boot device you still
picotool seal --signit before loading (signing-keys.md, anti-rollback.md). The RP2350 boot ROM verifies the signature on boot. - You can reach BOOTSEL from the panel itself: Settings → Firmware → reboot to BOOTSEL (a deliberate hold). The reboot routes through the worker so live RAM secrets are scrubbed first.
What’s on screen
A bottom navigation bar carries four peer tabs, each captioned:
| Tab | What it shows |
|---|---|
| Home | A calm “Ready” and a status card: USB, whether a device PIN is set, and the resident-passkey count (cached, refreshed only at modal boundaries). |
| Passkeys | The resident credentials, one row per relying party. |
| Apps | A read-only browser for the OpenPGP / PIV / OATH applets. |
| Settings | Display, Security, Firmware, Audit log, Backup, Factory reset. |
Approve / Deny — the anti-phishing core
Any operation that needs user presence paints a trusted prompt naming the operation and the real relying party, and waits for a deliberate action:
- A WebAuthn registration shows a Save new passkey? card (relying party + account, Cancel / Save).
- A sign-in and the generic OpenPGP / PIV touch prompts share an approve
screen (shield + relying party + a hold-to-approve button). Deny refuses
with
OPERATION_DENIED.
Every prompt waits for the previous finger to lift before it will accept a tap, and a prompt that runs out of time is denied rather than approved — a finger resting on Save when the window expires cancels the registration, it does not confirm it. The release wait has a floor of its own, so shortening the presence timeout in the device config cannot shrink it away.
Because the device only knows the relying-party string (and its hash), it
shows that string verbatim, never a host-supplied brand logo. A relying-party id
too long for the box is clipped with a truncation marker, and the clip keeps
the registrable-domain suffix (a leading … ellipsis) rather than the head.
So a padded look-alike such as accounts.google.com.attacker.com can never hide
its real domain (…attacker.com) behind the cut. This holds on every screen that
shows an attacker-chosen rpId: the approve and enrollment prompts and the
Passkeys manager’s list, service-detail title and Confirm-Delete card. A
device-local nickname (which you set, not the host) keeps its head instead.
Entering a PIN on the trusted screen
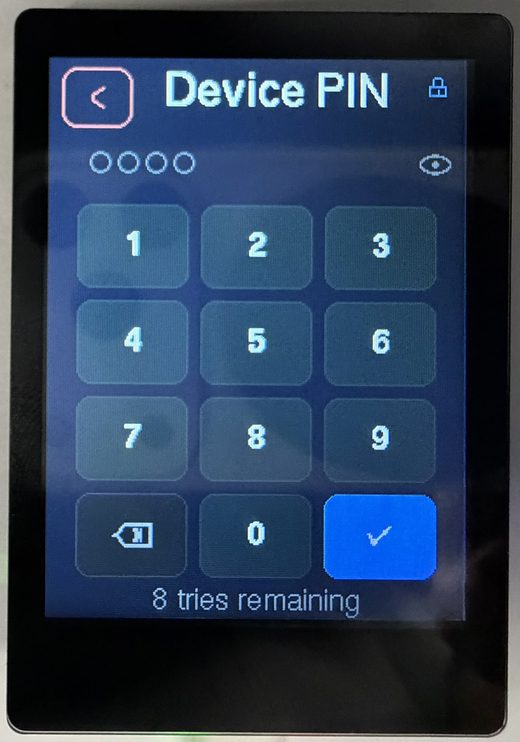
The panel has an on-screen numeric PIN pad: digits are masked, an eye toggle reveals them briefly so you can check before committing, and the minimum length shows as placeholder dots. Every PIN screen names which credential it is collecting in the header (Device PIN, FIDO PIN, PIV PIN / PIV PUK, or the OpenPGP PINs), so the independent PINs are never confused. The New / Confirm / current step rides in the caption beneath. The PIN never leaves the device.
Whichever way the PIN arrives — typed on the pad or sent by the host — the panel asks
before a pinUvAuthToken is issued (CTAP 2.1 §6.5.5.7 requires the consent on any
authenticator with a display). Declining ends the operation with OPERATION_DENIED
and costs no PIN retry, since the question comes before the PIN is checked. So
ykman fido and anything else needing a token waits on a tap here.
This backs four things:
- Built-in user verification. getInfo advertises
options.uv. A PIN typed on the pad mints apinUvAuthTokenviaclientPIN(getPinUvAuthTokenUsingUvWithPermissions), checked against the sameEF_PINthe hostclientPINpath uses. A platform can also skip the token:makeCredential/getAssertioncarryingoptions: {uv: true}collect the PIN on the pad directly (CTAP 2.1 §6.1.2 step 11.2), and that entry counts as the ceremony’s user presence, so the response setsupwithout the spec requiring a second gesture. The panel still asks: pad first, then the Approve / Deny card, because that card is the only screen naming the relying party — the pad carries a trusted, firmware-supplied title and never relying-party text. WithalwaysUvon, a request that brings nopinUvAuthParamtakes the same route instead of being refused withPUAT_REQUIRED. Declining on the pad ends the operation withOPERATION_DENIED— deliberately, since the code CTAP would have the device send instead (PUAT_REQUIRED) asks the host to prompt for the same PIN, which would make the refusal meaningless. A wrong PIN still falls back to the host path. - CCID secure PIN entry (pinpad). A display build advertises
bPINSupportand handlesPC_to_RDR_Secure, so GnuPG (OpenPGP PW1/PW3) and OpenSC (PIV PIN) collect the PIN on the trusted screen. The PIN never crosses USB in pinpad mode. Details and host-driver caveats: protocol.md §1.3. - U2F under alwaysUv. A screenless key has to switch CTAP1/U2F off once
alwaysUvis on, since a touch proves no verification. A pad with a PIN set is the exception CTAP 2.1 §7.2.4 allows, so U2F keeps working here — each register and authenticate names itself on screen (Register key? / Sign in?) and then collects the PIN on the panel. TurningalwaysUvon before setting a PIN still disables it; there would be nothing to verify against. - First-run onboarding. A fresh, PIN-less device offers a Set a PIN? screen
at first run. Declining is remembered (a flag in
EF_DISPLAY) so the offer isn’t repeated until a factory reset.
Passkeys
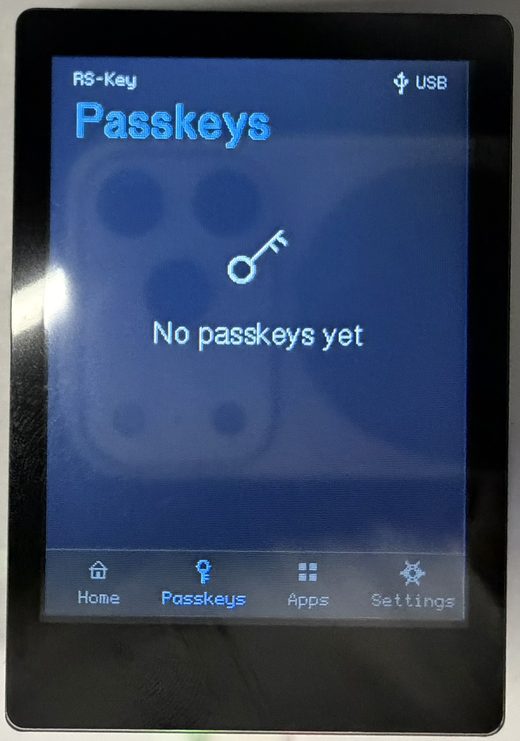
The Passkeys tab lists resident credentials by relying party (real rpId +
account count) and drills into a per-account detail where a passkey can be
deleted on-device (gated by the device PIN, then a hold), decrypted on the
device, never on the host. The detail’s pencil opens a character-wheel rename
that sets a short device-local nickname for the relying party, shown in place
of its rpId. The nickname is sealed at rest (a dedicated EF_RPNICK region),
wiped by a reset, and (unlike a host updateUserInformation) never re-seals the
credential, so the passkey keeps working. The trade-off: the nickname is
device-local and not seen by host credential managers.
Apps — a read-only credential browser
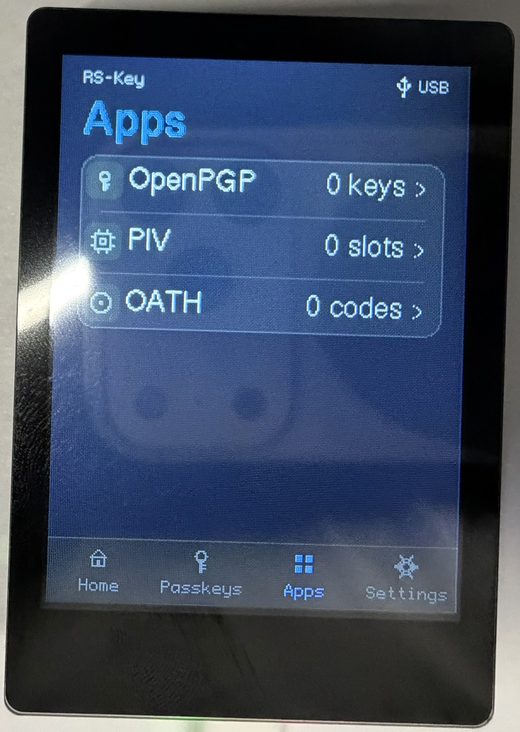
The Apps tab reads applet state without a PIN. No key material, PIN or public point is ever shown, and no OATH code is computed (the device has no clock).
- OpenPGP: the Signature / Encryption / Authentication slots with each one’s algorithm, the signature counter and PW1/PW3 attempts; a per-slot detail with the SHA-1 fingerprint and touch policy; and a Card holder row (name / login / URL / language).
- PIV: the 9A/9C/9D/9E slots with algorithm and PIN/PUK attempts, a per-slot detail (PIN/touch policy, key origin, cert presence), and a Retired & F9 row listing the populated retired key-management slots (82–95) and F9. From it, Generate key creates a key (EC P-256/P-384, Ed25519, X25519, or RSA 2048/3072/4096) into the next free retired slot, gated by the device PIN and a hold, restricted to empty slots (add-only, never overwrite). There is no management-key auth: physical presence at the panel is the authorisation.
- OATH: the stored credentials (label, TOTP/HOTP, a padlock when touch-gated), each with a detail (type, HMAC algorithm, digits, TOTP step).
Settings
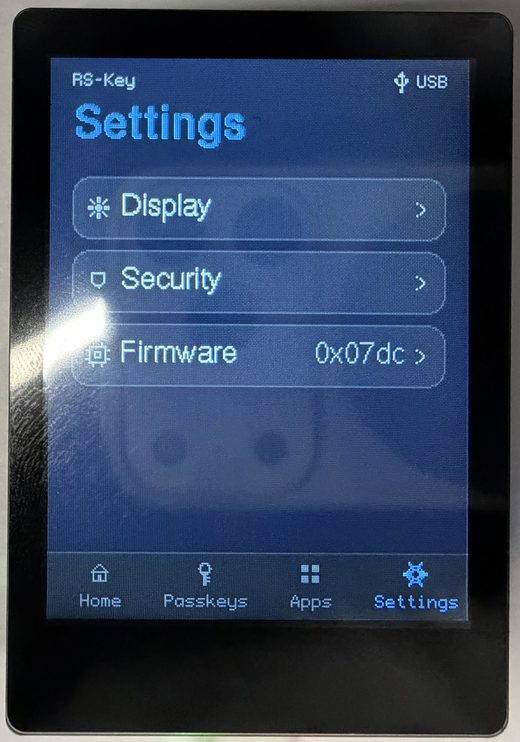
Grouped into three domains, plus the journal / backup / reset actions:
- Display: backlight brightness (PWM), the display-sleep timeout, and the
touch timeout, each adjusted live. All three persist across reboots:
brightness and sleep in an
EF_DISPLAYflash record; the touch timeout inEF_PHY’sPresenceTimeout, the same fieldrsk hw --touch-timeoutwrites, so the panel and the host tool stay in sync. - Security: set / change the device PIN and the FIDO clientPIN (each
chosen entirely on the panel), and a PIV PIN sub-menu: change the PIV PIN,
change the PUK, unblock a blocked PIN with the PUK, or protect the management
key. Protect mgmt key generates a random AES-256 management key, seals it
and marks it PIN-protected, the ykman
--protectscheme, so a host then uses the management key with just the PIV PIN (which alone grants management access, a trade-off the panel states and gates behind the device PIN and a hold). Any existing hostPivmanData(its PIN-change timestamp and other flags) is preserved (the obsolete derived-key salt is dropped, exactly as ykman does). - Firmware: the installed
bcdDevicebuild and chip serial, the real OTP secure-boot fuse state (it warns when secure boot is off rather than claiming a check it isn’t doing), and the hold-to-reboot into BOOTSEL for an over-USB update. - Audit log: the most recent device-journal events (sign-ins, passkeys added, PIN changes, lockouts, resets, power cycles), colour-coded, newest first.
- Backup. An honest view of the recovery-seed export window: whether a
seed is present and whether its one-time export has been sealed. While the
window is open, Show recovery (gated by the device PIN) paints a 24-word
BIP-39 phrase or a
T-of-NSLIP-39 share set on the trusted screen, derived on the device, never crossing USB, behind a hold + warning, wiped the instant they’re shown. Seal backup closes the window for good (until a factory reset). See seed-backup.md. - Factory reset: erases every applet’s data (FIDO, PIV, OpenPGP, OATH), scrubs the flash, and reboots to a blank device (gated by the device PIN, then a hold). Only the org attestation and the fused OTP / secure-boot state survive.
A display build is also exempt from the power-up window
that makes a screenless key refuse a host authenticatorReset more than ten
seconds after it was plugged in. That window exists to stop a wipe being approved
by a press collected under some other pretext; here the panel names the operation,
so a host reset is accepted whenever you confirm it on screen — no replug.
Security model
The device PIN (EF_DEVICE_PIN, its own sealed record + retry counter) gates the
on-device UI (unlock, on-device delete, factory reset) independently of FIDO.
The device boot-locks when a device PIN is set. A forgotten device PIN is
cleared only by a host authenticatorReset (the sole recovery, since the lock
gates on-device Settings). Every device-driven ceremony (a granted Approve, an
on-device delete, a factory wipe) ends on a brief success confirmation.
This is an experimental variant. Read threat-model.md and limitations.md for what the trusted display does and does not defend against.
See also
- Build options: the
displayfeature and its knobs. - Hardware: boards and flashing.
- Host protocol §1.3: CCID pinpad secure PIN entry.
- FIDO2 / WebAuthn · PIV · OpenPGP · Seed backup.
rsk-tui — the terminal cockpit
rsk-tui is a host-side dashboard for an RS-Key. It talks to the device
directly (CTAPHID over hidapi and the CCID applets over PC/SC), so it does not
shell out to rsk or any other process. It lives in its own workspace
(tools/tui), separate from the firmware, and links the host PC/SC and HID
stacks.
It is a companion to the rsk CLI, not a replacement: the cockpit covers the
safe, day-to-day reads and a few in-band actions (LED, seed backup, reboot,
audit, identity verify). Irreversible production rituals (secure-boot staging,
OTP fuses, factory resets, soft-lock, attestation import) stay in the CLI on
purpose. The cockpit points you at the exact command instead of doing them.

flowchart LR
    tui["rsk-tui (host process)"] -->|hidapi / CTAPHID| fido["Device — FIDO"]
    tui -->|PC/SC / pcscd| ccid["Device — CCID applets<br/>OpenPGP · PIV · OATH · OTP"]
Running it
In the dev shell rsk-tui is on PATH:
nix develop
rsk-tui              # interactive cockpit
Without Nix, run it from its workspace (the repo defaults to the firmware target, so name the host target explicitly; this is what the launcher does):
cargo run --release --manifest-path tools/tui/Cargo.toml \
  --target "$(rustc -vV | sed -n 's/host: //p')"
On Linux the CCID half needs pcscd + a polkit rule; see
linux.md. FIDO works as soon as the udev rules are in place. If
PC/SC is down, the cockpit still starts: the FIDO sections work and every CCID
field shows CCID unavailable rather than a fabricated value.
Flags
| Flag | Effect |
|---|---|
| (none) | interactive cockpit |
--demo, --mock | interactive cockpit against a simulated device, no hardware needed |
--once | print the gathered status once (human-readable) and exit |
--json | one-shot machine-readable status (JSON) and exit |
--selftest [PIN] | native backup export/restore round-trip (needs a no-touch build) |
-h, --help | usage |
--demo is handy for screenshots, docs, and trying the navigation without a
key plugged in. Demo data is clearly labelled [DEMO] and every simulated
action is prefixed [demo]; it never pretends to touch hardware.
--json and --once are the scriptable paths. Both gather one snapshot and
exit, so they fit a health check or a CI probe. --json emits a stable,
explicit object (identity, fido, backup, secure_boot, rollback,
applets, led, pgp, piv_meta, errors, …); --once is the same data formatted for a human. Either
honours --demo, so you can shape a pipeline against the mock first:
rsk-tui --json | jq '.secure_boot, .rollback'
rsk-tui --once --demo            # see the field layout without a key
--selftest drives the native MSE channel + clientPIN token + BIP-39 path
end-to-end: export a seed, re-derive its fingerprint, restore it, confirm the
fingerprint is stable, all without revealing the seed. It needs a no-touch
firmware build (the touch build would block waiting for a button press), and
takes the FIDO2 PIN as an optional positional argument if one is set.
A non-interactive snapshot of the simulated device (rsk-tui --once --demo)
gives a sense of what the cockpit reads:
[DEMO — simulated device]
device     : serial 37bebfdca282 · fw 5.7.4 · bcd 0x0759
transports : HID present  PC/SC present  CCID present
serial     : 37bebfdca282523b
firmware   : 5.7.4  bcdDevice 0x0759  sdk 3.4
fido       : U2F_V2, FIDO_2_0, FIDO_2_1  clientPin=true
backup     : sealed=false  has_seed=true
seed lock  : off
secure boot: ENABLED (not locked)  (enabled=true locked=false bootkey=0x1)
rollback   : not required  boot version 0/48
org attest : not installed
applets    : OpenPGP present  PIV present  OATH present  OTP present
openpgp    : 2 keys  serial 2a1b3c4d  retries PW1 3 RC 0 PW3 3
piv        : PIN 3/3 tries (default)
led        : steady  idle cyan  processing blue  touch green  boot white
Layout
┌ header: app · health · device identity · refreshed ─────────────┐
│ sections │ selected section: status fields + action menu        │
│  …       │                                                      │
├──────────┴──────────────────────────────────────────────────────┤
│ events: recent operations and errors                            │
├─────────────────────────────────────────────────────────────────┤
│ last result · key bindings                                      │
└─────────────────────────────────────────────────────────────────┘
The sidebar narrows and the event panel drops away on small terminals; the UI
keeps working down to a few rows. Status uses an OK / WARN / ERR / UNK / N/A
word plus a colored glyph, so it reads on a monochrome or color-blind terminal.
N/A is reserved for things the device supports but the TUI deliberately leaves
to the CLI. It is never a faked or unknown value. Set RSK_TUI_ASCII=1 (or run
in a non-UTF-8 locale) to force ASCII glyphs ([+] [!] [x] [?] [-] instead of
● ▲ ✖ ○ –); a UTF-8 LANG/LC_* is auto-detected otherwise.
Key bindings
| Key | Action |
|---|---|
Tab / Shift-Tab, ← / → | switch section |
↑ ↓ or j k | move selection in the action list |
Enter | run the selected action |
r | refresh device status |
/ | search actions across all sections |
? | jump to Help |
Esc | cancel a modal / input |
q or Ctrl-C | quit (terminal restored on exit) |
The status also auto-refreshes every few seconds while you are in the normal view, never while a modal is open, so a read can’t redraw over a PIN prompt or hammer the CCID bus mid-task.
Inside a modal the keys narrow to that modal: a text/PIN input takes characters +
Backspace, Enter submits, Esc cancels (and wipes the buffer); a yes/no
prompt takes y/n or Enter/Esc; a reveal panel dismisses on any key (a
shoulder-surfed secret clears fast); a message panel (audit output, LED state, a
verify report) scrolls with the arrows / j k / PgUp / PgDn / Home /
End and closes on Enter, Esc, q, or space. The / palette filters by a case-insensitive substring of the action label
as you type, ↑/↓ pick, Enter jumps to that action’s section and starts it.
Sections and what they do
| Section | Reads (safe) | In-band actions |
|---|---|---|
| Overview | identity (serial, fw, bcdDevice, sdk, aaguid), transports, backup/lock/secure-boot/rollback/attestation/flash | Refresh, Verify identity |
| FIDO | CTAPHID presence, versions, clientPIN, options | Count resident passkeys (PIN · credMgmt) |
| OpenPGP | applet presence, card serial, PIN retries, populated key slots (from 6E) | — |
| PIV | applet presence, PIN retries + default-PIN flag (from GET METADATA) | — |
| OATH / OTP | applet presence | — |
| Backup | seed / sealed / lock state | Export (BIP-39 · SLIP-39 2-of-3), Restore, Finalize |
| LED | LED mode + per-state color/brightness, with a live colour swatch | Read state, Cycle idle color |
| Audit | journal head + checkpoint key hint | Read journal, Verify identity |
| Reboot / Maintenance | device summary | Reboot → app, Reboot → BOOTSEL |
| Help | key bindings, section guide, safety model | — |
OpenPGP and PIV show a little more than presence, from unauthenticated reads in
the same gather: OpenPGP parses its 6E application-related data (card serial,
the PW1/RC/PW3 retry counters, and how many of the three key slots hold a key);
PIV reads the PIN’s GET METADATA (retries left, and whether the PIN is still the
factory default). OATH and OTP stay presence only. The full card contents
(individual keys, accounts) still need the applet’s own tooling, so those rows
point you at it: gpg --card-status (openpgp.md), ykman piv info, ykman oath accounts, and so on.
Verify identity issues a fresh 16-byte challenge, has the device sign it
with its DEVK-derived P-256 attestation key (vendor AUDIT_CHECKPOINT), and
verifies the ECDSA signature locally over tag‖head‖seq‖challenge. This is a
real cryptographic check, not a display of device-asserted bytes. On success it
prints an 8-byte fingerprint of the attestation public key. Record that
fingerprint: a later rsk inventory verify --expect-key <hex> (or rsk audit verify --expect-key …) pins it, so a swapped or cloned board fails the check
instead of quietly verifying. Verify needs a touch, the FIDO2 PIN if one is set,
and a provisioned OTP DEVK. Without the DEVK it says
no OTP DEVK provisioned — attestation unavailable rather than guessing.
Read journal dumps the tamper-evident audit log (vendor AUDIT_READ): a
hash-chained sequence of events (BOOT, MAKE_CREDENTIAL, GET_ASSERTION,
PIN_SET, BACKUP_EXPORT, CHECKPOINT, …) folded into an epoch, with the
running chain head. It is read-only (the device never lets the host rewrite
it) and asks for the FIDO2 PIN if one is set, or a physical touch if not. The full cross-check against the
signed head lives in rsk audit verify.
LED reads the four LED states the firmware drives (idle, processing,
touch, boot), each with a color and brightness, plus whether the idle LED is
steady or blinking. The section paints a colour swatch beside each state — a
background-filled block, so it shows with no block-glyph support, and the colour
name is printed too — refreshed live with the status. Cycle idle color steps the idle color through the palette
(red → green → blue → yellow → magenta → cyan → white, then wraps) and writes
it back; it is a cosmetic, unauthenticated setting, not a security control.
PINs in the cockpit
Every PIN the TUI asks for is the FIDO2 clientPIN (the same one
rsk fido set-pin manages), not an OpenPGP PW1/PW3 or a PIV PIN. It gates the
in-band actions that need it: Verify, Read journal, and seed Export/Restore (when
a PIN is set). If no clientPIN is set, those actions skip the prompt. OpenPGP and
PIV PINs are only ever entered in their own tools (gpg, ykman), never here.
CLI-only / unsupported in the TUI
These are surfaced as menu entries that, when selected, print the exact command to run. They are never performed from the cockpit:
- FIDO: set/change PIN (
rsk fido set-pin), list resident passkeys (rsk fido list-passkeys --pin …), factory reset (ykman fido reset) - OpenPGP / PIV / OATH / OTP: full card data and factory resets (
gpg --card-status,ykman piv info,ykman oath accounts,rsk openpgp reset,ykman piv reset, …). Theykmancommands gate on the “Yubico YubiKey” reader name, so they only see the device on the opt-inVIDPID=Yubikey5build;gpgandrskwork on the default RS-Key build. - Backup: SLIP-39 restore (recombining shares):
rsk backup restore --scheme slip39. SLIP-39 export is now in the cockpit (2-of-3 shares, via the in-treersk-slip39crate); other T-of-N splits stay in the CLI (seed-backup.md) - Maintenance (Reboot section): seed soft-lock (
rsk lock enable | unlock | disable), org-attestation import/clear (rsk fido attestation import | clear), secure-boot staging, OTP fuses. See production.md and otp-fuses.md
The FIDO section’s Count resident passkeys action reads the count over
credMgmt getCredsMetadata. It needs the FIDO2 PIN — there is no unauthenticated
way to read it — and reports how many passkeys are stored plus roughly how many
slots remain. Enumerating the passkeys themselves stays in the CLI: rsk fido list-passkeys --pin ….
Safety model — what is and is not logged
- Destructive or irreversible operations require a typed confirmation, not a
single keypress: export (
EXPORT), restore (RESTORE), finalize/seal (SEAL), reboot to BOOTSEL (BOOTSEL). The typed word must match exactly (case-sensitive); anything else cancels the action. Reboot to app uses a yes/no prompt. Finalize is refused outright once the window is already sealed. It explains rather than re-confirming. - PINs are masked on entry and never written to the event log. The log additionally redacts any live PIN/phrase substring as a backstop, and it is a bounded ring (the last 200 lines), so nothing accumulates on disk. It is only ever in memory.
- The seed is shown only after you confirm export. It appears once, in a modal, is zeroized from memory when you press a key, and never reaches the event log or any file. The same goes for a restore phrase you type in.
- Sensitive buffers (PIN, phrase, revealed seed) are wiped (
zeroize) on cancel, on submit, and on Ctrl-C.Ctrl-Cwipes the in-flight buffer before it quits, from any modal. - The terminal is restored on every exit path:
q,Ctrl-C, an I/O error, or a panic (device I/O can panic, so a panic hook leaves the alternate screen and raw mode first).
The seed backup flows here are exactly the BIP-39 export/restore/finalize of
rsk backup, just interactive: same touch + PIN + setup-window gates, same
forever-sealed semantics after finalize. Read seed-backup.md
for what a backup does and does not recover before you rely on it.
Architecture (for contributors)
tools/tui/src is split so rendering, state, and I/O stay separate and the UI
is testable without hardware:
model.rs: typed state (DeviceSnapshot,TransportStatus,Section,Action,ActionResult,EventLog, …) and--jsonserialization. No I/O.device.rs: native CTAPHID + PC/SC I/O behind aDeviceProvidertrait, withHardwareProvider(real) andMockProvider(--demo). Holds the native seed backup crypto: the MSE channel (P-256 ECDH → HKDF → ChaCha20-Poly1305) and the clientPIN protocol-two token (ECDH + HKDF + AES-CBC + HMAC).app.rs: app state, navigation, and the modal/confirmation flow.actions.rs: action dispatch + result handling (the one place that blocks on device I/O; it paints a “working — touch the device…” line and redraws before the blocking call so the prompt is visible).input.rs: key handling → state change +Flow.ui.rs: rendering only.theme.rs: styles, colors, ASCII fallback.
Because the UI is driven by a DeviceProvider, the whole cockpit (navigation,
confirmation flows, secret redaction, rendering) is unit-tested against the
mock with no device attached.
# fmt / clippy / test / build, host target (the merge gate runs these too):
H="$(rustc -vV | sed -n 's/host: //p')"
cargo fmt   --manifest-path tools/tui/Cargo.toml --check
cargo clippy --manifest-path tools/tui/Cargo.toml --target "$H" --all-targets -- -D warnings
cargo test   --manifest-path tools/tui/Cargo.toml --target "$H"
cargo build --release --manifest-path tools/tui/Cargo.toml --target "$H"
The --target "$H" is load-bearing: the repo’s .cargo/config.toml defaults to
the thumbv8m firmware target, and tools/tui is a detached workspace (note the
empty [workspace] table in its Cargo.toml) precisely so it builds for the
host instead. See build.md for the workspace layout.
Audit journal
A tamper-evident, on-device log of security events: boots, FIDO registrations and logins, factory resets, PIN set/change/lockouts, policy changes, seed backup and soft-lock activity.
rsk audit log              # export + print (add --pin if a PIN is set)
rsk audit verify           # log + DEVK-signed checkpoint (touch)
rsk audit verify --expect-key <hex>   # also pin the enrolled attestation key
log is a plain read. It pretty-prints the live window and the recomputed
chain head, no signature. It takes --pin on a device with a PIN, and a touch
on one with none (the read is never fully open). verify does the same read
and asks the device to sign the head. It is the command that actually proves
the log is real. Use log for a quick glance, verify when the answer matters.
What it records
| event | detail |
|---|---|
BOOT | first journal touch of each power cycle |
MAKE_CREDENTIAL / GET_ASSERTION / U2F_REGISTER / U2F_AUTH | first 8 bytes of the rpIdHash (only weakly pseudonymous, see Gating) |
RESET | factory reset (survives it — see below) |
PIN_SET / PIN_CHANGE / PIN_LOCKOUT | lockout aux: 0 = retries exhausted, 1 = per-boot block |
CFG_MIN_PIN | aux = new minimum; detail[0] = forceChangePin |
CFG_ENTERPRISE_ATT | no aux/detail (flag-only) |
LOCK_ENGAGE / LOCK_RELEASE | soft-lock engage/release |
BACKUP_EXPORT / BACKUP_LOAD / BACKUP_FINALIZE | seed-backup lifecycle |
ATT_IMPORT / ATT_CLEAR | org attestation provisioning |
CFG_ALWAYS_UV | alwaysUv toggled; no aux/detail (flag-only) |
CONFIG_WRITE | a device-config write over the FIDO vendor channel. aux = the target that opened the entry (0 dev-conf, 1 phy, 2 led); detail = repeats(2 LE) ‖ targets(1) (see below) |
AUDIT_CFG | journalling itself: aux 1 = turned on, 0 = turned off (that entry is the last one written, so the trail shows when it stopped) |
CHECKPOINT | every signed checkpoint is itself logged |
Each entry is a fixed 20 bytes:
seq(4) ‖ uptime_ms(4) ‖ event(1) ‖ aux(1) ‖ detail(8) ‖ rsvd(2). There is
no wall clock on the device. uptime_ms counts from the moment the key
attached to USB, not from power-on — boot spends seconds before that on TRNG
seeding and flash migrations, and none of it is time a host could have used.
Every power cycle opens with a BOOT entry, and the sequence number gives total
order. Wall-clock attribution is the host’s job (e.g. record when you ran
rsk audit verify).
For the FIDO operations — MAKE_CREDENTIAL, GET_ASSERTION, U2F_REGISTER,
U2F_AUTH — the detail field carries the first 8 bytes of the rpIdHash and
nothing else: no RP names, user handles, or credential IDs. That is deliberate:
the log answers “how was this key used and how often” without revealing which
sites. See gating below. Other events use detail for their own small
payload (CFG_MIN_PIN’s forceChangePin flag, CONFIG_WRITE’s run counters); none
of them records a site.
Config writes cost one slot per run
The journal is append-only with one bounded exception. CONFIG_WRITE is
ungated on the default build and is the only event a silent
host can drive on demand, so 128 of them would otherwise evict every other entry
from the 128-slot window. Instead a run of config writes folds into a single
entry: it keeps the seq and the timestamp of the first write of the run,
and its detail counts the rest — repeats(2 LE) ‖ targets(1), where targets is
a 1 << target mask of every record the run touched. rsk audit log renders it:
   seq      uptime  event              aux  detail
   201       8.2s  CONFIG_WRITE         1  300× write (phy+led)
Two consequences worth knowing:
- A run never folds across a power cycle, so the
BOOTentry between two runs is never swallowed. - A fold moves the chain head without advancing
seq_next. Seeing the sameseq_nextwith a different head is legitimate, not a tamper signal;verifyre-folds the exported window and still matches.
This bounds the flood, it does not remove it: a phy write latches a reboot, so a
host willing to make the key re-enumerate can still spend two slots per cycle
(a fresh BOOT plus a fresh run). Each cycle is a visible re-enumeration, and
building --features strict-config — which puts the write behind a touch and a
PIN token — is the complete answer.
A log run prints a header, the chain state, then the window:
window [72, 200)  —  128 entries, 72 folded into the epoch
epoch : 4f1c…           (the accumulator for evicted history)
head  : a93b…  (chain over the window — OK)

   seq      uptime  event              aux  detail
    72       3.4s  GET_ASSERTION        0  1a2b3c4d5e6f7081
    73     120.9s  MAKE_CREDENTIAL      0  9f8e7d6c5b4a3928
   …
How the tamper evidence works
The journal is a 128-entry flash ring. Each entry extends a SHA-256 hash
chain; when the ring is full, the oldest entry is folded into an epoch
accumulator (epoch' = SHA-256(epoch ‖ entry)) before its slot is reused, so
evicted history stays attested in aggregate even though its per-event details
are gone. The chain head is fold(epoch, window): the epoch run forward
through every entry still in the ring.
The chain is anchored, on an empty journal, at
SHA-256("RSK-AUDIT-GENESIS-v1" ‖ serial_hash), bound to the device so two
boards’ empty journals never share a head.
flowchart TD
    e["new event"] --> chain["SHA-256 hash chain (window)"]
    chain -->|ring full| fold["fold oldest into epoch accumulator"]
    fold --> reuse["slot reused"]
    chain --> head["chain head = fold(epoch, window)"]
rsk audit verify sends a fresh 16-byte random challenge. The device signs
"RSK-AUDIT-CKPT-v1" ‖ head ‖ seq_next ‖ challenge with an ECDSA P-256 key
derived (HKDF) from the OTP DEVK (production.md stage 1)
and returns the signature plus its 65-byte SEC1 public key. The host refolds
the exported window, verifies the signature over the message it reconstructs,
and checks that the signed head matches the refold. The challenge is what makes
the verdict fresh. A replayed old checkpoint signs a stale challenge and fails.
A successful verify prints the window, the head, and the attestation key with
a short fingerprint. The verdict depends on whether you pinned the key:
chain   : OK — head a93b…
sig     : OK — checkpoint over seq_next=201, fresh challenge
att key : 04a1b2…   (65-byte SEC1)
          fingerprint 9c4e7f12ab… — record this; pin later runs with --expect-key
verdict : chain + signature OK — the key is NOT pinned, so this does not prove
          which device signed it
With --expect-key the last line becomes
journal authentic ✓ (signed by the pinned key).
Meta updates are ordered so that a power cut at any point loses at most the newest event and never produces a false tamper verdict: when the ring is full the fold-and-advance meta is committed before the slot is reused.
Pinning the attestation key — --expect-key
The checkpoint key is deterministic and reset-stable (HKDF of the DEVK), so a given device always signs with the same public key. Record it once at provisioning, then pass it back on every later run:
rsk audit verify                         # first run: copy the printed "att key" hex
rsk audit verify --expect-key 04a1b2…    # afterwards: fail loudly on any mismatch
rsk audit verify --expect-key 9c4e7f12ab…   # the short fingerprint works too
A mismatch means the public key changed, which can only happen if the DEVK
changed. That means you are talking to a different device, or a clone that
was flashed without burning the same OTP. --expect-key takes either the full
65-byte SEC1 point (04 ‖ x ‖ y) or the 16-hex fingerprint, lower-case, and the
comparison is exact. The full key is the stronger pin. Stash it in your
provisioning record alongside the device serial.
Without a pin, verify proves nothing about identity. The public key it
checks against arrives in the same response it is checking, so an unpinned run
establishes only that the journal is internally consistent and self-signed — a
counterfeit signing with a key of its own passes it. The device refuses to sign
without an OTP DEVK, but a host cannot tell a DEVK-derived key from any other
P-256 point. Pinning is what turns “some key” into “your device”.
Reset semantics (privacy by design)
authenticatorReset does not erase the journal. It folds the whole
window into the epoch and deletes the per-event details, then logs the
RESET. A handed-over device therefore proves “N events happened, then a
reset” without revealing where it had been used. The chain (and the
checkpoint key, which is DEVK-derived) continue uninterrupted across resets, so
verify keeps working and the head still validates against the same
--expect-key.
Gating
| command | open device | PIN set |
|---|---|---|
audit log / AUDIT_READ | touch | pinUvAuthToken with the acfg permission |
audit verify / AUDIT_CHECKPOINT | touch | touch + acfg pinUvAuthToken |
AUDIT_READ(export). With a PIN set it needs a pinUvAuthToken carrying theacfg(authenticator-config) permission. With no PIN it needs a physical touch. The entries are only weakly pseudonymous. Adetailis a 64-bit rpIdHash prefix, never an RP name or user handle, but short enough to be dictionary-matched back to a domain. So the touch is what stops a silent host from harvesting a no-PIN device’s RP-usage history.AUDIT_CHECKPOINT. The same PIN gate plus a physical touch, and it refuses entirely without a provisioned OTP DEVK. An attestation that anyone could re-derive would be theatre. The signing step is what the touch protects. The read that precedes it isAUDIT_READ-gated as above.
If a PIN is set, both subcommands take --pin. The PIN is exchanged over the
standard CTAP pinUvAuth protocol (it is not sent in clear), and a wrong PIN
counts against the FIDO retry counter. Do not guess.
Troubleshooting
| symptom | meaning / fix |
|---|---|
device requires a PIN — pass --pin (status 0x36) | a FIDO PIN is set; add --pin <pin> |
checkpoint refused — no OTP DEVK provisioned (status 0x30) | dev board with no DEVK burned; verify cannot sign. log still works. See production.md |
denied — no touch within 30 s (status 0x27) | press the button when the LED blinks; rerun |
attestation key MISMATCH — this is not the enrolled device | --expect-key did not match: wrong device, or a clone flashed without your OTP |
signed head differs from the exported window | the journal changed between the read and the checkpoint. Rerun; if it persists, treat it as TAMPER |
checkpoint SIGNATURE INVALID — do not trust this journal | the signature did not verify under the returned key. Do not trust the log |
export length does not match the window | the exported entry bytes don’t match seq_next − start; a corrupt or truncated read |
The two “rerun first” verdicts are different. A head mismatch can happen benignly if an event landed between the read and the checkpoint (a login on another host, say). One rerun usually clears it. A signature failure or a key mismatch never has a benign cause. Do not retry your way past those.
What it does and does not prove
The log is written by the firmware, so its honesty is rooted in the boot
chain: with secure boot + the OTP master key (production.md,
otp-fuses.md) only your signed firmware can append to the
journal or wield the checkpoint key, and a flash dump cannot forge it. On an
unprovisioned dev board the journal still works as a debugging aid, but verify
is refused. There is no device-bound key to sign with, and a checkpoint without
one would prove nothing.
Two honest limits worth stating:
- The window is 128 entries. Older events are folded into the epoch and
their details are gone. You can prove they happened (the head still
covers them) but not read them back.
verifyregularly if you want a per-event record. The host transcript is your archive, the device is not. - There is no wall clock. The device cannot tell you when in calendar
time something happened, only the order and the milliseconds since that power
cycle’s USB attach. Pair the
seqandBOOTmarkers with your own host-side timestamps.
Enterprise attestation (org provisioning)
Out of the box, ordinary makeCredential returns fmt:"none" attestation.
Self-attestation conveys no trust beyond “none” per WebAuthn §6.5.2, and a
packed EdDSA self-attestation breaks ed25519-sk enrollment on Windows /
OpenSSH 10 (issue #26). The fido-conformance build keeps packed
self-attestation for the conformance suite. RS-Key does carry a per-device
self-signed certificate (a P-256 X.509 leaf with CN RSK FIDO2, built over the
seed at first boot), but it presents that only on U2F registration and
EA-level-2 requests. An organization can replace that device cert with its
own attestation key and certificate chain, so its relying parties can
verify “this credential was created on one of our keys”. This is the CTAP 2.1
enterprise-attestation (EA) feature.
This page is for the team that provisions fleet keys. If you do not work for an org that has provisioned yours, it is a no-op: nothing here changes how an unprovisioned key behaves, and EA is never served unless a managed platform explicitly asks for it.
The key + chain model
Two pieces of state make up an org attestation, stored separately on the device:
| Stored as | Holds | Sealing |
|---|---|---|
EF_ATT_KEY (0xCE10) | the org attestation P-256 private scalar | kbase-sealed, exactly like the master seed |
EF_ATT_CHAIN (0xCE11) | the DER certificate chain, leaf first (count ‖ (len ‖ der)*) | public material, stored plain |
The key signs each attestation; the chain is what relying parties walk back to your CA. The leaf’s public key must match the imported scalar. The device does not check this (framing only), so a key/chain mismatch surfaces as your own relying party’s first signature-verification failure, not an import error.
Provisioning
Generate an attestation CA and a leaf however your PKI does it. The leaf’s
subject public key must be the P-256 point of the private key you import; only
P-256 (secp256r1) keys are accepted. rsk rejects any other curve before
it touches the device.
# host-side, with your PKI:
#   org-att.pem    P-256 private key (PEM)
#   org-chain.pem  leaf cert first, then intermediates, then (optionally) the CA
rsk fido attestation import --key org-att.pem --chain org-chain.pem [--pin …]
rsk fido attestation status
--chain takes a PEM bundle (concatenated -----BEGIN CERTIFICATE-----
blocks) or already-concatenated DER. Limits, enforced host-side and again in
firmware:
| Limit | Value |
|---|---|
| Curve | P-256 only |
| Chain size | ≤ 2048 bytes total |
| Certs in chain | ≤ 4 |
status is ungated and prints whether a chain is installed plus the
SHA-256 of the packed chain (so you can confirm a fleet is on the right CA
without moving any secret):
$ rsk fido attestation status
org attestation : installed
chain hash      : 9f2c…
To roll back to the factory self-signed cert:
rsk fido attestation clear [--pin …]
What changes once a chain is installed
- makeCredential with
enterpriseAttestation1 or 2 (sent by managed platforms) returns a full attestation: signature by the org key,x5c= your chain (leaf first), and theepresponse flag (true). With an org key installed, both EA levels emit the org attestation. - U2F / CTAP1 registration attests with the chain’s leaf instead of the self-signed device cert (classic batch attestation: a U2F response carries exactly one certificate, so only the leaf travels).
- Ordinary makeCredential is untouched:
fmt:"none", no chain, no cross-site trackable identifier. EA fires only when the platform sets theenterpriseAttestationrequest field andenableEnterpriseAttestationis on (below).
Without an org chain (the default)
If no org key is provisioned, the request field still has an effect, per the spec:
| EA level | Without org key | With org key |
|---|---|---|
| (absent / 0) | none | none |
| 1 — vendor-facilitated | self-attestation | full org attestation |
| 2 — platform-managed | full attestation by the device key + self-signed RSK FIDO2 cert | full org attestation |
So a stock key already answers an EA-level-2 request with a real “basic” attestation, just under its own per-device cert rather than a shared chain. The device key and that self-signed cert are the same pair U2F register uses.
Enabling EA on the device (enableEnterpriseAttestation)
Importing the key is not enough. A makeCredential with the EA field is
honored only after enableEnterpriseAttestation (CTAP 2.1
authenticatorConfig, subcommand 0x01) has been issued. RS-Key has no rsk
command for this. It is the managed platform’s job (the OS/MDM/browser
stack that drives EA), and it requires an acfg pinUvAuthToken, i.e. a FIDO PIN
must be set. getInfo reports the current state in the ep option, which the
firmware mirrors straight from EF_EA_ENABLED:
# python-fido2, the same library `rsk` uses:
python3 - <<'PY'
from fido2.hid import CtapHidDevice
from fido2.ctap2 import Ctap2
info = Ctap2(next(CtapHidDevice.list_devices())).info
print("ep =", info.options.get("ep"))   # True once enableEnterpriseAttestation ran
PY
enableEnterpriseAttestation persists across power cycles. It is
written to flash (EF_EA_ENABLED), as CTAP 2.1 specifies. It is cleared only by
authenticatorReset (see below).
Transport and gating
The P-256 private scalar crosses USB ChaCha20-Poly1305-wrapped on the same ephemeral-ECDH channel (MSE handshake: P-256 ECDH → HKDF-SHA256 → ChaCha20-Poly1305) the seed backup uses. The chain is public certificate material and travels in the clear, MAC-covered by the PIN token like every subcommand parameter.
Import (0x09) and clear (0x0A) are gated exactly like a seed move:
channel + PIN (when one is set) + physical touch. On this board the touch
is the BOOTSEL button (build.md). On a device with no PIN the
import asks for a second, named confirmation first (“Replace attestation
identity?”): the PIN half of the gate is waived in that state, and one generic
touch should not hand over the identity every later U2F registration signs with.
status (0x0B) is ungated;
the chain it returns is public. Both mutations land in the
audit journal (ATT_IMPORT / ATT_CLEAR), and so does an
enableEnterpriseAttestation (CFG_EA).
rsk fido attestation import …    # → "touch the device (BOOTSEL) to authorise…"
rsk fido attestation clear …     # → "touch the device (BOOTSEL) to remove…"
On the device the key is sealed under the same kbase arms as the master seed. The seal tag records which arm wrapped it, so importing before or after the OTP burn both stay loadable. Burn the OTP master key before importing and the sealed attestation key is rooted in fuses, not just flash (otp-fuses.md).
Reset semantics
authenticatorReset wipes FIDO user state, but the org provisioning splits
across that line:
| State | Survives authenticatorReset? |
|---|---|
EF_ATT_KEY (org key) | yes: org-provisioned device identity, not user data |
EF_ATT_CHAIN (chain) | yes |
EF_EA_ENABLED (the enable flag) | no: wiped with PIN, credentials, counter |
So a factory reset leaves the org attestation installed but switches EA off:
the managed platform must re-issue enableEnterpriseAttestation before EA
fires again. The reset itself is recorded in the audit journal. Removing the key
and chain is the explicit, gated attestation clear. Nothing else clears them.
Privacy note
A shared org chain makes credentials linkable to the organization across its
relying parties. That is the entire point of EA, and why the spec gates it
behind both an explicit per-request field and a device-wide enable. Ordinary
(non-EA) makeCredential returns fmt:"none" and is unlinkable; the org chain is
served only on explicit EA requests.
Troubleshooting
attestation key must be P-256 (got …): the--keyPEM is the wrong curve. RS-Key attests with ECDSA P-256 only. Re-issue the org key on secp256r1.chain too large (… B, max 2048): trim the bundle. You rarely need the root CA inx5c; leaf + one intermediate is usually enough, and the leaf alone is all U2F can carry.device requires a PIN — pass --pin(status0x36): import/clear are gated; set a FIDO PIN first (rsk fido set-pin) and pass it.- An EA
makeCredentialcomes back self-attested (nox5c, noep). EitherenableEnterpriseAttestationwas never issued (checkoptions.ep), or it was cleared by a factory reset. Have the managed platform re-enable it. import failed: 0x33(PIN_AUTH_INVALID): the PIN was wrong, or its token lacked theacfgpermission. Re-run with the correct--pin(do not guess, wrong attempts burn PIN retries).- The import hangs at “touch the device…”: the physical touch never arrived. Press the BOOTSEL button while the prompt is up, then it completes.
AAGUID & metadata
Every FIDO2 authenticator model carries an AAGUID, a 128-bit identifier
that says “this is a Model X authenticator.” It rides inside the attested
credential data of every makeCredential. A relying party (RP) uses it to
look up the model’s Metadata Statement: a machine-readable description of
what the model can do and how it attests.
This page explains RS-Key’s AAGUID, the self-published Metadata Statement that ships in the repo, and (importantly) the line between what that buys you for free and what is gated behind FIDO certification.
RS-Key’s AAGUID
2479c7bf-6b30-5683-9ec8-0e8171a918b7
It is a UUIDv5, derived reproducibly so its provenance is self-evident:
python -c 'import uuid; print(uuid.uuid5(uuid.NAMESPACE_URL, "https://github.com/TheMaxMur/RS-Key"))'
# -> 2479c7bf-6b30-5683-9ec8-0e8171a918b7
An AAGUID is self-assigned. No central registration is required to pick
one. Earlier RS-Key builds inherited an upstream AAGUID (the bytes of
SHA-256("Pico FIDO2")), which meant the device claimed another project’s model
identity. As of firmware bcdDevice 0x075F it carries its own.
A few consequences worth knowing:
- One AAGUID for every flavor. It identifies the firmware model, not the USB branding, so the default pid.codes identity and the opt-in YubiKey-identity interop build report the same AAGUID. The YubiKey-identity build deliberately does not claim a real YubiKey AAGUID. That would be a forgery and would fail attestation anyway (it cannot chain to Yubico’s roots).
- Existing credentials keep working. The AAGUID only appears in attestation at registration time. Resident keys made on an older build still assert fine. Only new registrations report the new AAGUID. An RP that pinned the old AAGUID for attestation matching would need a re-enroll.
- Build-time override.
AAGUID=<uuid-or-32-hex> cargo buildbakes a custom AAGUID (build.rsvalidates it,consts.rsconst-parses it); omit the flag to keep the default above. A non-default build makes the checked-in Metadata Statement (and the drift guard below) no longer match — reserve it for a fork that ships its own metadata, not a cosmetic tweak.
The Metadata Statement
metadata/rs-key.metadata.json
is a FIDO Metadata Statement v3.1.1
describing the default build profile. It declares the AAGUID, the supported
authentication algorithms, the attestation type, key/matcher protection, and an
embedded authenticatorGetInfo that mirrors exactly what the device returns to
authenticatorGetInfo (CTAP 0x04).
| Field | RS-Key value |
|---|---|
attestationTypes | ["basic_surrogate"]: packed self-attestation, no cert chain |
attestationRootCertificates | []: none, by definition of surrogate |
authenticationAlgorithms | secp256r1 / ed25519 / secp384r1 / secp521r1 / secp256k1 (ECDSA + EdDSA) |
keyProtection | ["hardware"]: RP2350 flash/OTP, not a separate certified secure element |
matcherProtection | ["on_chip"]: the PIN is verified on the device |
attachmentHint | ["external", "wired"]: a USB roaming token |
upv | 1.0: matches the FIDO_2_0 entry the device advertises in versions |
A drift guard, tests/62_metadata_statement.py,
checks the statement against both the firmware source (the default AAGUID in
build.rs) and a live device (the embedded authenticatorGetInfo vs the real
one). Run it by hand. It is not in the hardware gate.
Two caveats baked into the statement
- ML-DSA is not expressible. RS-Key implements post-quantum credential types
(COSE
-48/-49, ML-DSA-44 / ML-DSA-65), but the FIDO Metadata Statement registry has no enum value for ML-DSA/Dilithium, so they cannot appear inauthenticationAlgorithms. They are visible only inside the embeddedauthenticatorGetInfo(and only on theadvertise-pqcbuild). A strict MDS consumer will not see the PQC capability. - One profile per statement. The build features
advertise-pqc(adds COSE-48to the algorithm list) andfips-profile(drops secp256k1, raises the PIN floor to 6) changegetInfo. The shipped statement describes the default build. A different profile needs its own statement.
What this does — and does not — get you
RS-Key works as a passkey/security key with the overwhelming majority of relying
parties without any of this. Self-attestation is accepted by GitHub,
Google, Microsoft consumer accounts, browsers, ssh, and any RP that does not
enforce attestation. The AAGUID and statement add a stable, honest identity
and a machine-readable capability description for tooling that wants one.
The hard boundary is attestation enforcement. Taking Microsoft Entra ID as the strict reference:
| Entra policy | What RS-Key needs |
|---|---|
| Attestation not enforced (the common case) | Nothing extra: none / packed-surrogate / a custom format ≤ 32 chars is accepted. RS-Key works today. |
| Attestation enforced | A packed attestation chaining to a root extracted from the FIDO MDS, the model’s metadata uploaded to the FIDO MDS, and a FIDO2 certification (any level). |
That second row is a deliberate non-goal here: official MDS listing and FIDO certification require FIDO Alliance membership, a certification lab, and money, none of which is a code change. The self-published statement is the part that is actionable: an RP or library that can import a local metadata file (rather than only trusting the MDS BLOB) can consume it directly. If RS-Key is ever certified, the statement is already authored and ready to submit.
See also: Enterprise attestation for the org-provisioned cert-chain path, and the interop matrix for what has actually been observed working on hardware.
Fleet tooling
Inventory, identity verification, and offboarding for a fleet of RS-Keys. Three commands cover the lifecycle:
| Command | Question it answers | Gates |
|---|---|---|
rsk inventory list | what is this key? | none — touch-free, PIN-free |
rsk inventory verify | is this the key we enrolled? | touch; --pin if set |
rsk offboard | wipe a returned key, keep proof | typed confirmation, up to 3 touches |
list reads only ungated state, so it is safe against a whole hub of keys.
verify is the enrollment anchor. offboard is destructive and is the only
one of the three that changes the device.
Inventory
rsk inventory list          # human-readable, one block per key
rsk inventory list --json   # one JSON object per line, for scripting
Walks every connected key over both transports. Prints one record per device with serial, firmware version, bcdDevice (the build counter), secure-boot state, flash usage, FIDO options, backup/soft-lock state, org-attestation state:
device 37bebfdca282523b  (ccid+hid)
  firmware   : 5.7.4  bcdDevice 0x0748  sdk 8.6
  secure boot: LOCKED  (bootkey 0x0)
  flash      : 16711/1572864 B used, 469 files
  fido       : U2F_V2, FIDO_2_0  clientPin=True
  backup     : sealed=False has_seed=True  seed lock: off
  org attest : installed  chain sha256 74d9f98c3fb0bb5c…
The serial is the RP2350’s OTP chip id, read from the rescue applet’s SELECT
response. It is unique per chip, unlike the USB descriptor serial (identical
across devices). Everything list reads is gate-free: no PIN, no touch, safe
to run against a hub full of keys.
secure boot decodes to one of three states: not enabled (a blank dev
board), ENABLED (the SECURE_BOOT_ENABLE fuse is set but the key pages are
not yet locked), LOCKED (fully sealed). The bootkey index is the active
key slot. See otp-fuses.md for what those fuses mean and
production.md for how they get burned.
With several keys connected the CCID and HID transports cannot be matched to
one another, so the records stay separate (tagged ccid / hid). The output
ends with a note: saying so. Plug keys in one at a time when you want a
single merged ccid+hid record per device.
The --json records
--json prints one object per line (JSON Lines, pipe it to jq, not
json.load). The fields present depend on which applets answered. A merged
record carries all of them:
| Field | Meaning |
|---|---|
transport | ccid, hid, or ccid+hid (merged) |
serial | RP2350 OTP chip id (CCID only) |
sdk | RS-Key rsk-sdk framework version (major.minor) from the rescue SELECT |
secure_boot | {enabled, locked, bootkey} |
flash | {free, used, kv_total, files, chip} (bytes) |
fw, bcd_device | firmware version string, build counter (HID) |
versions, client_pin | FIDO CTAP versions, PIN-set flag |
aaguid | the device AAGUID (hex) |
backup | {sealed, has_seed} — seed-export lifecycle |
lock | {locked, unlocked} — soft-lock state |
org_attestation | {installed, chain_sha256} |
error | populated if an applet threw mid-read |
A foreign PC/SC reader that does not answer the rescue SELECT is skipped, not
reported. list only emits records for things that identify as RS-Keys.
Dump a fleet sweep to a ledger keyed by serial:
rsk inventory list --json | jq -s '
  map(select(.serial)) | INDEX(.serial)' > fleet-$(date +%F).json
Flag any key not on the current firmware (replace with your floor):
rsk inventory list --json \
  | jq -r 'select(.bcd_device and (.bcd_device < "0x0759"))
           | "\(.serial // .product)\tstale \(.bcd_device)"'
Identity verification
rsk inventory verify                            # print the fingerprint (touch)
rsk inventory verify --expect-key 66573f74ca06359a   # pin it (--pin if set)
rsk inventory verify --expect-key 04ab…   # or the full 65-byte SEC1 pubkey
Challenge-response against the device’s attestation key: the host sends a
fresh 16-byte challenge, the device signs it (vendor AUDIT_CHECKPOINT) with
the ECDSA P-256 key derived from its OTP DEVK, and the host verifies the
signature. The printed fingerprint (SHA-256 of the public key, first 16 hex
digits) is the same one rsk audit verify prints. One identity anchor for
both workflows.
sequenceDiagram
    participant H as Host
    participant D as Device
    H->>D: fresh 16-byte challenge
    D-->>H: ECDSA-P256 signature (OTP-DEVK key) + public key
    H->>H: verify signature, match fingerprint vs record
--expect-key accepts either form printed by a prior run: the 16-hex
fingerprint or the full hex att key (65-byte uncompressed SEC1 point).
Either matches. The full key is the stronger pin since the fingerprint is a
truncated hash.
This only proves identity once the device has a provisioned OTP DEVK. On an
unprovisioned dev board there is no device-bound key and verify is refused.
The error messages map to the vendor status:
| Symptom | Status | Meaning |
|---|---|---|
device requires a PIN — pass --pin | 0x36 | a FIDO PIN is set; add --pin |
refused — no OTP DEVK provisioned | 0x30 | blank board, no device key (production.md) |
denied — no touch within 30 s | 0x27 | press the button when the LED blinks |
attestation key MISMATCH | — | not the enrolled device (or a clone without the OTP DEVK) |
SIGNATURE INVALID | — | the device could not prove identity at all |
Enrollment: when you hand a key out, run rsk inventory verify once and
record serial + fingerprint (or the full att key). Any later verify with
--expect-key <fingerprint> (or the full SEC1 public key) proves you are
talking to that physical chip. A clone without the OTP DEVK cannot answer.
Every verify is itself journaled as a CHECKPOINT event, so the device’s
audit log shows each time it was checked.
verify has no --json (only inventory list does), so at provisioning time
capture the two lines from its plain output, or just paste them into your
record by hand:
rsk inventory verify | sed -n 's/^\(serial\|fingerprint\) *: //p'
Offboarding
rsk offboard                       # guided, typed confirmation, a replug, ~3 touches
rsk offboard --report ret-42.json  # choose the receipt path
rsk offboard --no-receipt          # wipe only — no preflight, no receipt file
rsk offboard --verify ret-42.json  # re-check a saved receipt, no device
Decommissions a returned key: wipes the OTP slots, OATH credentials, PIV (block PIN+PUK, then factory reset), OpenPGP (block PWs, then factory reset), the FIDO seed/passkeys/PIN, and the org attestation, then signs a final audit checkpoint over the post-wipe journal window and saves it as a JSON receipt. It needs both interfaces (CCID for the applet wipes, FIDO HID for the reset and the signature). If either is missing it refuses before touching anything.
The receipt needs the audit journal, which is off by default. The RESET
event that makes the receipt mean anything is a journal entry, so on a device
where journalling was never enabled there is nothing to sign — and
after the wipe there is no way back. rsk offboard therefore probes the journal
state before the confirmation prompt and refuses, pointing at rsk audit enable. Enable it at provisioning time, or pass --no-receipt to wipe with no
attestation at all — that flag skips the preflight, the checkpoint touch and the
receipt file, so the run leaves no record of any kind.
The wipe is interrupted once, on purpose. The FIDO reset is only accepted
within ten seconds of a power-up (fido2.md), and by the
time the four CCID applets are wiped the key has been plugged in for far longer. So
rsk offboard sends the reset, and when the device refuses it prints an
unplug/replug prompt and retries in the fresh window:
the key refuses a reset this long after power-up (CTAP 2.1 §6.6):
UNPLUG it now and plug it straight back in — it must be the only
FIDO key attached, and the reset lands within 10s of
power-up. Waiting up to 60s…
Plug the same key back in and nothing else: the tool takes the first FIDO device
it finds, and the USB serial is a constant, so it cannot tell two RS-Keys apart.
With a second key attached the wait simply times out and the run aborts cleanly
rather than resetting the wrong device. A trusted-display key never sees the
prompt — it is exempt from the window — and neither does firmware older than
0x0854.
The order is fixed and each step reports its own result:
| Step | What it does | Records on success |
|---|---|---|
| OTP | writes an all-zero config to slots 1–4 (the protocol’s “delete”) | ok |
| OATH | sends the OATH RESET command | ok |
| PIV | exhausts PIN + PUK retry counters with two distinct wrong values, then factory RESET | ok |
| OpenPGP | rsk openpgp reset (TERMINATE + ACTIVATE) | ok |
| FIDO | CTAP authenticatorReset — replug, then touch | ok |
| org attestation | clears the chain if one was installed — touch | cleared / none |
| receipt | signs a checkpoint over the post-wipe journal — touch | signed |
The PIV step blocks the PIN and PUK with two different wrong values
(00000000 then 11111111, eight tries each) before the reset, so even a
device whose real PIN happened to be one of those still ends up with a dead
retry counter. The reset then always succeeds regardless of the original
credentials.
The receipt is a cryptographic statement that this device (attestation
fingerprint) had its FIDO applet factory-reset (the signed window contains the
RESET event). It is split along that trust boundary: attested is what the
device signed plus the inputs needed to re-derive it, host_observations is
what the tool saw and the device never vouched for.
{
  "receipt_version": 2,
  "signed": true,
  "reset_attested": true,
  "notes": [],
  "attested": {
    "signed_head": "…", "seq": 414, "signature": "…",
    "attestation_pubkey": "04…", "fingerprint": "66573f74ca06359a",
    "challenge": "…", "epoch": "…", "entries": "…"
  },
  "host_observations": {
    "device": "37bebfdca282523b",
    "timestamp": "2026-06-13T14:22:09-04:00",
    "steps": {"otp": "ok", "oath": "ok", "piv": "ok", "openpgp": "ok",
              "fido_reset": "ok", "org_attestation": "cleared"},
    "journal_window": [{"seq": 412, "event": "RESET", "...": "..."}]
  }
}
attested.epoch and attested.entries are the raw journal window the signature
covers. Without them a reader can check the signature but cannot tie it to any
particular window, so the RESET claim would rest on a decoded list anyone could
hand-edit. Receipts written before this format (receipt_version absent) dropped
them, which is why --verify refuses those outright rather than pretending to
check them.
The default receipt path is offboard-<serial>-<YYYYMMDD-HHMMSS>.json in the
working directory. --report overrides it. The file is always written, even on a
partial failure or when a post-wipe check fails: a failed step leaves its error
string in steps, a failed check appends a {"code", "detail"} entry to notes
and clears reset_attested, the report still saves, and rsk offboard then exits
non-zero so a script notices.
Re-checking a receipt
rsk offboard --verify ret-42.json --expect-key <fingerprint-from-enrollment>
Offline, no device: it re-folds entries from epoch, requires the result to
equal the signed head, requires that bound window to contain the RESET event,
then checks the ECDSA P-256 signature over
"RSK-AUDIT-CKPT-v1" ‖ signed_head ‖ seq (LE32) ‖ challenge. --expect-key
takes the 16-hex fingerprint or the full SEC1 point; without it the run still
verifies the chain and the signature but says so — the key comes from the receipt
itself, so an unpinned check cannot tell you which device signed.
Pin the fingerprint you recorded at enrollment, from your inventory record —
not the one printed in the receipt you are checking. Pinning a receipt’s own
attested.fingerprint compares it against itself and proves nothing. rsk offboard says as much when it prints the re-check line at the end of a wipe.
The steps are host observations. The journal has no event type for PIV, OATH,
OpenPGP or OTP, so four of the five wipe steps are not attestable in principle;
only the FIDO reset is. --verify prints that caveat on every run.
Why it needs no PIN
No PIN is needed anywhere in the flow. Every wipe path is deliberately reachable without credentials (the PIV/OpenPGP paths block the PINs first, which is the spec’s own anyone-can-reset design; OATH and FIDO have resetting paths of their own), so a key that comes back with unknown PINs can still be offboarded. What it cannot do is impersonate: nothing in the wipe path can read or export secrets, and the receipt’s signature still requires the device’s own OTP DEVK. A wipe tool cannot forge it.
Footguns and partial wipes
- OTP slots protected by an access code are the one exception. They
refuse the PIN-free delete (
SW 6982), and the receipt’shost_observations.steps.otprecords exactly which slots stayed (e.g.slots [2] protected by access codes — NOT wiped). A follow-uprsk offboardafter recovering the code, or a fullrsk-wipeflash nuke, covers that case. - The CCID wipes are idempotent. A failed FIDO reset is recorded in
stepsand the run still writes the receipt for what was destroyed, then exits non-zero. Re-runrsk offboard; the applet wipes already done are harmless to repeat. no-sessioninnotesmeans the key was never replugged (or never came back) within the timeout, so there was no FIDO session left to sign with. The receipt is written anyway, unsigned, with the CCID steps that did complete andfido_resetrecording the abort — the applets are gone either way, and an irreversible step must not end with no artifact. Re-run to finish the FIDO half.- Unsigned receipt. On a board with no OTP DEVK the wipes still happen but
the checkpoint is refused (
0x30). The report saves with"signed": falseand ano-devknote. That is expected on dev boards, not a fault. no-reset-eventinnotesmeans the signed window did not contain theRESET, so the receipt does not certify a wipe (reset_attestedis false and the command exits non-zero). The wipe still happened and re-running cannot produce the missing event. The usual cause is journalling being off, which the preflight now catches before anything is destroyed; the other is the journal ring having evicted theRESETpast the export window.head-mismatchinnotesmeans the signed head did not fold from the window the device exported. Treat that as tampering or a broken device, not as a retryable error.
See also
- audit.md: the journal and
rsk audit verify; same attestation key and fingerprint asinventory verify. - attestation.md: the org-attestation chain that
offboardclears andlistreports. - seed-backup.md / backup-key.md: back up before you offboard if the key holds a recoverable seed.
- production.md, otp-fuses.md: burning
the OTP DEVK that makes
verifyand the signed receipt possible. - linux.md:
pcscd/scdaemonsetup so the CCID interface is visible to the inventory and offboard flows.
FIPS-style profile (fips-profile)
An opt-in build flavor that bakes a locked, FIPS-style algorithm policy into the image. Nothing is removed from the codebase or from the default build. Without the flag the firmware is byte-for-byte the usual one. With it, the policy is part of the signed image. Once secure boot is enabled the device runs nothing but that signed image: a policy you cannot toggle off at runtime, because there is no runtime knob to toggle.
cargo build --release -p firmware --features fips-profile
# or the reproducible Nix target (same flag):
nix build .#firmware-fips
# then sign + flash as usual (production.md)
A profile, not a validation. Nothing here is FIPS 140-3 validated: no CMVP certificate, no validated module boundary, no tested entropy source. This profile restricts the device to FIPS-approved algorithms and documents exactly where the line is drawn. If your compliance regime needs a certificate number, this is not it. If it needs “the device will not negotiate a non-approved algorithm,” this is exactly it.
What the profile locks
The flag wires through to two crates only: the FIDO applet
(rsk-fido/fips-profile) and the PIV applet (rsk-piv/fips-profile). Every
gate below is a compile-time cfg, so the restricted path is the only path
compiled into the image.
| Area | Default build | fips-profile build | Gate |
|---|---|---|---|
| FIDO algorithms | ES256, EdDSA, ES384, ES512, ES256K, (ML-DSA-44/-65) | drops ES256K (secp256k1 — never NIST-approved) from both the advertised list and credential negotiation | getinfo.rs, makecredential.rs |
| FIDO minimum PIN | 4 | 6 (and setMinPINLength can only raise it, never lower it), plus trivially guessable PINs refused — a single repeated digit or a ±1 run like 123456 (the strong-pin policy) | consts.rs, clientpin.rs, config.rs |
| Seed backup | one-time export window | export refused — non-exportable key material; restore (BACKUP_LOAD) still works, so keys may migrate into a profile device, never out | vendor.rs |
| PIV management key | 3DES or AES | no new 3DES keys (SP 800-131A); an existing 3DES key still authenticates so a reflashed device can migrate itself to AES | piv/lib.rs |
| PIV RSA | 1024 / 2048 | no RSA-1024 generation or import | piv/keygen.rs |
Two things worth reading carefully:
- ES256K leaves on both sides.
getInfo’salgorithmslist no longer carries-47, so a relying party never offers it. Even if a client asks for-47anyway,makeCredentialmaps it to “unsupported” and declines. There is no path to a new secp256k1 FIDO credential. - RSA-1024 is blocked on two independent gates: the generation template
parser (
piv/keygen.rs:48) and the separate import path (piv/keygen.rs:242), which does not go through that parser. So neitherykman piv keys generate ... RSA1024nor importing an external 1024-bit key onto a slot succeeds. Both return6A 80(incorrect data).
What deliberately stays
- Ed25519 / X25519: approved by FIPS 186-5 (EdDSA) and SP 800-186.
ssh ed25519-skkeeps working, and so do Ed25519/cv25519 OpenPGP keys. - NIST P-256 / P-384 / P-521 FIDO and PIV keys. The whole point of the profile is to keep these and drop the curve that was never on the list.
- ML-DSA-44 / ML-DSA-65: FIPS 204. The post-quantum path is the point,
and the profile does not touch it. (Whether they are advertised in
getInfois the separateadvertise-pqcflag. Capability is on either way; see build.md.) - HMAC-SHA-1 in OATH HOTP/TOTP: RFC 4226 mandates it, and HMAC-SHA-1 (unlike bare SHA-1 signatures) remains approved.
- The whole OpenPGP applet, unchanged. The profile is FIDO + PIV. It does not narrow OpenPGP key attributes. If you want only approved curves there, that is a card-edit policy choice (openpgp.md), not something this flag enforces. State it honestly to anyone relying on the profile.
- Existing credentials still work. A secp256k1 credential created by a
default build still asserts after you reflash with the profile. The gate
is on
makeCredential(creation), not ongetAssertion(login). Same shape everywhere: an existing 3DES management key still authenticates (you can use it to set an AES one), existing RSA-1024 PIV keys still sign and decrypt. The profile gates creation and import, never your ability to keep using what is already on the device.
Migrating a device into the profile
Because the profile blocks creation but not use, an in-place migration is mechanical:
# 1. flash the profile image (signed, per production.md)
# 2. replace any non-approved long-lived keys:
ykman piv access change-management-key --algorithm AES256 --generate --protect
ykman piv keys generate 9a pub.pem            # re-issue any RSA-1024 slots as
                                              # ECC P-256 or RSA-2048
# 3. FIDO: re-register any sites that hold a secp256k1 credential with an
#    ES256 / EdDSA passkey; the old credential keeps working until you do.
ykmanneeds the opt-inVIDPID=Yubikey5build. It gates on the “Yubico YubiKey” reader name, which the default RS-Key build (0x1209:0x0001) does not present. Build that flavor for theykmancommands here and under Verifying below, or drive the device withrsk/rsk-tuion the default build.
There is no “convert” command. You generate a new approved key and retire the old one through normal applet flows. The old 3DES/RSA-1024/secp256k1 material lingers only as long as you let it.
Verifying a device runs the profile
ykman fido info        # Minimum PIN length: 6
ykman info             # firmware version, applet capabilities
A profile build shows Minimum PIN length: 6. The absence of -47 (ES256K)
is not something ykman fido info prints. It lists the AAGUID, options,
PIN retries and minimum PIN length, but not the COSE algorithms array. To
confirm secp256k1 is gone you need a raw getInfo dump (e.g. fido2-token -I
or python-fido2): read the 0x0A array and confirm -47 is absent.
That advertisement is evidence, not proof on its own. A default build can have its minimum PIN raised to 6 by hand, which makes the PIN field alone ambiguous. The proof is the image signature. Combined with secure boot, the firmware’s own signature is the policy attestation: the fuses boot only your signed profile image, and that image is the only code present, so “the device enforces the profile” reduces to “the device booted, and your signature is the only one it accepts.”
flowchart TD
    src["Source (one tree)"] --> def["Default image"]
    src --> fips["fips-profile image"]
    fips --> sign["Sign + flash"]
    sign --> sb["Secure boot fuses<br/>boot only your key"]
    sb --> dev["Device runs only<br/>the signed profile"]
    dev --> att["getInfo + signature<br/>= the attestation"]
Why compile-time, not a runtime switch
A runtime “FIPS mode” toggle is one admin command away from not being FIPS mode, and one malware-driven APDU away from being turned off without you noticing. A compile-time profile under secure boot is a different object: the restricted menu is the only code in the image, the image is signed, and the fuses only boot your signatures. Changing the policy means signing and flashing a different image. That is exactly the auditable, physical event you want a policy change to be, rather than a silent state flip.
This mirrors how the rest of RS-Key’s hardening works: every knob is compile-time, and the irreversible posture lives in OTP fuses, not in mutable runtime state.
Honest limits
- No CMVP certificate, no validated boundary. Read the first callout again: this is an algorithm policy, not a validation. The limitations and threat model pages apply unchanged.
- The entropy source is the RP2350’s, untested against SP 800-90B. A validated module needs a validated RNG. This profile does not provide one.
- OpenPGP and OATH are not narrowed by the flag. If your policy needs
approved-only algorithms there too, you enforce that through the applets’
own configuration, not through
fips-profile. - “Approved algorithm” ≠ “approved usage.” The profile keeps you from negotiating a disapproved primitive. It does not audit key sizes, rotation, or how you use the device. That part is on you.
Related
- build.md: all compile-time flags, including the
.#firmware-fipsNix target. - production.md: signing and the secure-boot fuse sequence that seals the profile in place.
- seed-backup.md: the seed export/finalize flow on a default build (and why the profile refuses it).
- piv.md, fido2.md, openpgp.md: the applets the profile narrows (and the one it leaves alone).
Production setup — signed boot + OTP master key
⚠️ EXPERIMENTAL. IRREVERSIBLE. BRICK RISK. Everything on this page burns one-time-programmable fuses or changes what the chip will ever boot again. A mistake can permanently brick the board or permanently lose your enrolled credentials. Read the whole page before running anything. The tools refuse to act without typed confirmations and support
--dry-run. Use it.
Out of the box, RS-Key’s at-rest encryption roots in a key derived on the device and stored sealed in flash. That stops casual key extraction. But a motivated attacker who steals the board can dump flash over BOOTSEL and grind offline. The production path closes that in two independent stages:
- OTP master key (MKEK): fuse a random 32-byte key into RP2350 OTP page 58 and re-root all at-rest sealing in it, then hard-lock the page so neither BOOTSEL nor non-secure code can ever read it. A flash dump alone is now worthless.
- Secure boot: fuse your public-key fingerprint and the
SECURE_BOOT_ENABLEbit so the bootrom runs only images you signed. Attacker-flashed firmware (the remaining way to read the OTP key) no longer runs.
A third, optional stage builds on those: anti-rollback, so that old images you signed (with bugs you have since fixed) stop booting too. It has its own page: anti-rollback.md.
Each stage is usable alone. Together they are the full story. All are driven
from the host. The firmware never burns a fuse behind your back. The two
exceptions are rows that physically cannot be written from BOOTSEL
(bootloader-read-only OTP pages): the page-58 lock and the
ROLLBACK_REQUIRED flag, each applied by the firmware on explicit command. The
fuses these stages write are explained in otp-fuses.md.
flowchart TD
    d["Default<br/>flash-derived root · any image boots"]
    d --> s1["Stage 1 — OTP master key<br/>burn page 58 · migrate · lock"]
    s1 --> s2a["Stage 2 — secure boot<br/>load-key · harden (non-enforcing)"]
    s2a --> s2b{{"ENABLE<br/>the one irreversible bit"}}
    s2b --> s2c["lock key slots + fuse pages"]
    s2c --> s3["Stage 3 — anti-rollback<br/>(optional)"]
    s2b -. "a correctly-signed UF2 can always be re-flashed over BOOTSEL" .-> rec["BOOTSEL recovery"]
Before you start
- Make a seed backup first if you haven’t:
rsk backup export(guides/seed-backup.md). It is the only thing that survives a board swap. The production path is exactly when you start caring about that. - Plan for the signing key. Stage 2 generates an ECDSA key. Losing it bricks the board for new firmware. Decide now where you’ll keep it durably.
- Understand the substrate. These stages write OTP fuses. otp-fuses.md explains what is irreversible and why.
- Rehearse. Every step supports
--dry-run, which prints the exactpicotoolcommands without touching anything.
Stage 1 — OTP master key
What it does: writes a random DEVK (device attestation key) and MKEK (master sealing key) plus anti-imaging chaff into OTP page 58, ECC-verified, then locks the page. On the next boot the firmware notices the provisioned key and migrates everything already on the device (FIDO seed, PIV keys, OpenPGP key wraps, PIN verifiers) under the new root. Your enrolled credentials survive. That is the point of the migration layer.
At-rest hardening pass. The migration re-seals each secret under the new root. But the flash store is append-only, so the old chip-serial-sealed copies linger until their page is reclaimed. To stop a flash dump from recovering them, that same first post-burn boot runs a one-shot compaction that physically scrubs the credential partition. It is a multi-second stall that runs before the device re-attaches to USB, so on that one boot the device stays dark a little longer than usual. Don’t cut power during it. It runs once (a flash marker gates it) and re-runs if interrupted.
New deployments: burn OTP before you enroll. A seed generated after the burn is sealed under the fused root from birth, so no chip-serial-sealed copy ever exists and the hardening pass has nothing to scrub. The migrate-in-place path above is for hardening a device you have already been using.
rsk reboot bootsel               # picotool needs the chip in BOOTSEL
rsk otp burn --dry-run           # preview every step
rsk otp burn                     # typed confirmation; keys are generated and FORGOTTEN
picotool reboot -a               # back to the app; migration runs at boot
rsk otp lock-page58              # firmware applies the page-58 hard lock (typed confirm)
Facts to internalize first:
- The burn tool generates MKEK/DEVK randomly and forgets them. There is no copy to lose, and none to back up. The fuses are the key.
- After the burn, the device attestation public key changes (it now derives from the fused DEVK). FIDO/PIV identities survive. The rescue attestation key does not. That is expected, not data loss. If you use audit or fleet verification, re-record the device’s fingerprint afterward (guides/fleet.md).
- The lock is the half that matters for at-rest. Burning the MKEK without
lock-page58leaves the key fused but still readable over BOOTSEL. The flash dump is not yet worthless. Runlock-page58to actually close it. - After
lock-page58,picotool otp geton page 58 fails with a permission error forever. Only the secure-mode firmware can read the keys. That failure is the lock working. - A seed backup (
rsk backup) made before or after is unaffected. Backups carry the seed value, which gets re-sealed under whatever root the device has. - Never flash a
FAKE_MKEKtest build onto a provisioned board. It migrates the data under a fake, greppable key and orphans it (build.md).
Stage 2 — secure boot
What it does: the RP2350 bootrom verifies an ECDSA (secp256k1 + SHA-256) signature on every image against a fingerprint fused into OTP. Unsigned or foreign-signed images do not boot. The chip falls back to BOOTSEL, where you can always drag a correctly-signed UF2 (recovery path).

The permanent consequences:
- Every future flash must be signed with your key. The dev loop becomes
build →
picotool seal --sign→ flash. - Losing the signing key bricks the board for new firmware (the current signed image keeps booting). Back the key up before enabling enforcement.
DEBUG_DISABLEis burned along the way. SWD is gone (flashing is BOOTSEL anyway).
2a. Generate a signing key (once, off-repo)
mkdir -p ~/.rs-key-secrets && cd ~/.rs-key-secrets
openssl ecparam -genkey -name secp256k1 -noout -out secure_boot_key.pem
openssl ec -in secure_boot_key.pem -pubout -out secure_boot_pub.pem
chmod 600 secure_boot_key.pem
# BACK IT UP somewhere that survives this machine.
This key is the root of trust for the board’s whole life. Treat it like the most
important secret you have here: if you lose it after enable, you can never
flash new firmware to that board (the running image keeps booting). It is also
what makes key rotation
possible later, so a single, well-kept key with a backup is the goal. The full
key lifecycle is in signing-keys.md: passphrase protection
(and the decrypt-for-seal step it implies), backup, one fresh key per
board, rotation, and recovery.
2b. Sign and prove a signed image boots (before any fuse)
picotool seal --sign --hash firmware.uf2 firmware-signed.uf2 \
    ~/.rs-key-secrets/secure_boot_key.pem ~/.rs-key-secrets/otp_secureboot.json \
    --major 1 --minor 0 --rollback 1
picotool info firmware-signed.uf2        # must say "signature: verified"
# BOOTSEL, then flash + confirm the device works:
picotool load -v firmware-signed.uf2 && picotool reboot   # or drag it onto the RP2350 drive
The arguments:
secure_boot_key.pem: your signing key. It signs the image.otp_secureboot.json:sealwrites the boot-key fingerprint here. You fuse it into OTP withload-keybelow.--major/--minor: an image version (major.minor) stamped into the RP2350 boot metadata. It is a plain version label, distinct from the firmware version RS-Key reports (5.7.x, build.md) and from the rollback version. The bootrom can use it to prefer the newer of two images in an A/B setup. RS-Key ships a single image, so here it is effectively a label. Keep1 0.--rollback: the anti-rollback version, a separate counter (not the image version). It is harmless before anti-rollback is enabled, and having a version in every sealed image from day one makes that stage cheap. What it means and how to choose it: anti-rollback.md.
picotool info firmware-signed.uf2 must report signature: verified. The
firmware’s image definition is already secure-boot compatible. The sealed UF2
carries the signature block.
2c. Burn, staged
rsk secure-boot splits provisioning so every irreversible write is proven
by a real boot before the next. The only true point of no return is one
bit:
rsk secure-boot status      # read the current fuse state any time
rsk secure-boot load-key    # 1. boot-key fingerprint + KEY_VALID   (non-enforcing)
rsk secure-boot harden      # 2. DEBUG_DISABLE + glitch detectors   (non-enforcing)
rsk secure-boot enable      # 3. SECURE_BOOT_ENABLE = 1  ← the brick bit
rsk secure-boot lock        # 4. revoke unused key slots + lock the fuse pages
Each step has --dry-run and a typed confirmation. Between steps, reboot and
confirm the device still works. After enable, verify the negative case:
drag an unsigned UF2. The bootrom must reject it and fall back to BOOTSEL.
Re-drag the signed one to recover.
lockand key rotation: a decision to make now. Thelockstage revokes the three unused boot-key slots (KEY_INVALID), maximizing hardening against an attacker who tries to inject their own key. It also forecloses key rotation, the escape valve if you ever exhaust the 48-step anti-rollback budget (you rotate to a new signing key and revoke the old one). If you want to keep that valve, don’t run the fulllock. Leave a slot. The trade-off is in anti-rollback.md. Most users should run the fulllock. You will almost certainly never reach the ceiling.
The new flash workflow (forever)
cargo build --release -p firmware
picotool uf2 convert target/thumbv8m.main-none-eabihf/release/firmware -t elf firmware.uf2
picotool seal --sign --hash firmware.uf2 firmware-signed.uf2 \
    ~/.rs-key-secrets/secure_boot_key.pem ~/.rs-key-secrets/otp_secureboot.json \
    --major 1 --minor 0 --rollback 1
# BOOTSEL (hands-free: rsk reboot bootsel), then:
picotool load -v firmware-signed.uf2 && picotool reboot   # or drag it onto the RP2350 drive
The --rollback value is your board’s current floor (see
anti-rollback.md). 1 is the usual starting value.
To seal an image others can independently verify, build it with
nix build .#firmware instead of the dev-shell cargo build. That path is
bit-for-bit reproducible from the source tree
(build.md), so anyone can rebuild
at your release commit and confirm the payload you signed.
Stage 3 — anti-rollback (optional)
This stage stops your own older signed images from booting, so a bug you have since fixed can’t be re-introduced by downgrading. Read anti-rollback.md first. It is the full model: how the floor works, the 48-burn budget, when (and whether) to raise it, what to do at the ceiling, and the new-board case. This section is only the steps to turn it on.
The mechanism is two RP2350-native pieces: a per-image rollback version
(--rollback N at seal time) checked against a 48-bit OTP thermometer, and the
ROLLBACK_REQUIRED fuse that makes that check mandatory. Until the fuse is
burned, versionless images boot and the feature is off.
Turning it on
- Seal and flash firmware with a rollback version (start at
--rollback 1), reboot, and confirmrsk secure-boot statusreportsboot version 1/48. If it still reads0/48, stop and investigate. Never burn the fuse on an unproven setup. - Re-seal
rsk-wipeat the same version. The recovery escape hatch must stay bootable. - From the running firmware:
rsk otp rollback-require(typed confirmation;--dry-runreports state without burning). The firmware refuses unless secure boot is enabled, so it can only run from an image that itself passed the rollback check, and the “fuse before a versioned image” footgun can’t happen. - Negative-test: drag any versionless signed UF2. The bootrom must refuse it and fall back to BOOTSEL. Re-drag the current image to recover.
After it’s on
- Every
picotool sealmust include--rollback <your floor>. A versionless sealed image no longer boots (fail-closed). You find out at flash time and recover by re-sealing. - To raise the floor and close a downgrade-fix, seal one step higher
(
--rollback <floor + 1>). The default is not to raise it. When, why, and the budget math are all in anti-rollback.md. - A board that has burned to floor N never boots an image below N again. No undo.
Everything about whether to bump, the 48-budget, the ceiling, key rotation, and moving to a new board lives in anti-rollback.md.
Recovery and failure cases
| Situation | What happens / what to do |
|---|---|
| Bad or wrong flash | BOOTSEL stays enabled — drag a correctly-signed UF2 to recover. |
| Unsigned / foreign-signed image (secure boot on) | Bootrom refuses it, falls back to BOOTSEL. Drag your signed image. |
| Lost the signing key (secure boot on) | The current signed image keeps booting, but you can never flash new firmware. There is no recovery for the key — back it up before enable. |
| Image sealed below your rollback floor | Refused at boot → BOOTSEL. Re-seal at ≥ your floor. |
| Image sealed above your floor by accident | It boots and burns the thermometer up to it, spending budget irreversibly. Seal at exactly your floor unless you mean to raise it. |
rsk-wipe won’t boot after enabling anti-rollback | Re-seal it at your current floor — the recovery image must carry a version too. |
| 48-step rollback budget exhausted | Key rotation, or a new board — see anti-rollback.md. |
Page 58 read fails after lock-page58 | That’s the lock working — only secure firmware can read the keys now. |
| Replacing the board entirely | Provision the new chip with a new signing key; restore your FIDO identity with rsk backup restore. Resident passkeys / OpenPGP / PIV don’t migrate — see anti-rollback.md. |
Deliberate choices
- USB BOOTSEL stays enabled. It is the only reflash and the only recovery path (no debugger). It cannot bypass signature enforcement, and after the page-58 lock it cannot read the OTP keys. Disabling it (the datasheet’s full checklist) would turn every bad flash into a permanent brick.
- No image encryption. The code is open source. There is nothing secret in the image (secrets live sealed in flash, rooted in OTP). The RP2350 also has no transparent XIP decryption. Encrypted boot requires fitting the image in SRAM, which a ~1.7 MB image does not.
Residual risks (still open after all stages)
- XIP TOCTOU: the image executes from external QSPI flash. Hardware that swaps or emulates the flash chip between the bootrom’s signature check and execution can subvert it. Decap/side-channel-class attack, out of scope.
- A host compromised while the device is plugged in can drive normal operations (as with any security key). See threat-model.md.
Signing keys (secure boot)
Once secure boot is enabled, a single key you hold is the root of trust for the board’s whole life: it signs every image the board will run. This page is the full key lifecycle: what the key is, how it relates to the other on-chip keys, and the correct flow to generate, back up, provision, use, rotate, and (if it comes to it) recover it.
⚠️ This key is the most important secret in the production path. Lose it after
enableand you can never flash new firmware to that board again. Read the backup section before you generate anything.
The keys on an RS-Key, and which one this is
Three different key concepts live on a provisioned board. Don’t conflate them:
| Key | Where it lives | Who holds it | This page? |
|---|---|---|---|
| Secure-boot signing key | private key on your host; only its fingerprint is fused in OTP | you | yes |
| MKEK / DEVK (master sealing / device attestation) | OTP page 58, generated on-device and forgotten | nobody; the fuses are the keys | no (production.md stage 1) |
| Per-applet secrets (FIDO seed, PIV/OpenPGP keys) | sealed in flash under the MKEK | the device | no (threat-model.md) |
The signing key is the only one you generate, hold, and must keep. The MKEK/DEVK are random and unrecoverable by design. The signing key is the opposite: you keep it, and keeping it is the whole job here.
Architecture — the trust chain
You sign images with the private key. The board never sees it; OTP holds
only a fingerprint (SHA-256 of the matching public key). The signed image
carries its public key plus an ECDSA signature. The bootrom checks both at
every boot:
flowchart TD
    priv["Private key<br/>(offline, backed up)"] -->|signs| seal["picotool seal --sign"]
    seal --> img["Signed image<br/>public key + ECDSA signature"]
    img -->|BOOTSEL flash| board["Board"]
    board --> rom{"bootrom: SHA-256(image's public key)<br/>matches a fused, valid slot?"}
    rom -->|no| reject["refuse → BOOTSEL"]
    rom -->|yes| verify["verify the ECDSA signature"]
    verify --> boot["boot the image"]
    slots["OTP boot-key slots (4)<br/>fingerprints + KEY_VALID / KEY_INVALID"] -. anchors .-> rom
Two consequences fall out of this shape and explain everything below:
- The board only ever holds the public fingerprint, so a stolen board can’t yield your signing key, but the board also can’t help you recover it.
- The bootrom matches against any valid slot and ignores which key signed, beyond the fingerprint. That is what makes key revocation a downgrade defense (see anti-rollback.md).
1. Generate (one fresh key per board, off-repo, ideally offline)
The RP2350 bootrom verifies secp256k1 + SHA-256, so the key must be secp256k1. Protect it with a passphrase. That is the difference between a stolen backup being your signing key and being ciphertext:
mkdir -p ~/.rs-key-secrets && cd ~/.rs-key-secrets
# generate, then encrypt at rest with a passphrase (openssl prompts you to set one):
openssl ecparam -genkey -name secp256k1 -noout \
  | openssl ec -aes256 -out secure_boot_key.pem
# derive the public key (prompts for the passphrase to read the private key):
openssl ec -in secure_boot_key.pem -pubout -out secure_boot_pub.pem
chmod 600 secure_boot_key.pem
Use a long, unique passphrase and back it up separately. Losing the
passphrase loses the key as surely as losing the file. If you would rather not
use one, drop the | openssl ec -aes256 … pipe and write the key straight out
(-out secure_boot_key.pem): simpler, but then any copy of the file is the
key. Either way, generate it on a machine you trust (ideally offline/air-gapped)
and never commit it. The hermetic nix build path deliberately keeps the key
out of the build sandbox (build.md);
signing is always a separate, local step.
One key per board, one board per key. Generate a brand-new key for every chip you provision and trust only it on that board. A new device is signed with a new key. Never carry an old board’s key onto a new one. That rule is also what keeps a replacement board’s rollback floor safe: the old images are signed by the old key, which the new board does not trust (anti-rollback.md).
2. Back it up — before you fuse anything
This is the step people skip and regret. After enable, the fused fingerprint
is permanent and only this key can sign images the board will boot. So:
- Make at least two durable copies, on media that survive this machine (and each other), e.g. an encrypted USB stick kept offline, plus a printout of the PEM in a safe.
- Encrypt it at rest. A passphrase-protected copy, or a copy held on a separate hardware token, is worth the friction.
- Keep it off networked machines. The host that signs only needs the key for
the few seconds of
picotool seal. - There is no recovery from the device. It holds only the public fingerprint. If every copy of the private key is gone, the board’s current signed image keeps booting but you can never flash it again.
If you reserve a slot for rotation you get one escape hatch later. Even so, treat the key as un-loseable.
3. Provision — fuse the fingerprint (slot 0)
picotool seal writes the fingerprint into the otp_secureboot.json it
produces. rsk secure-boot load-key fuses it into boot-key slot 0 without
enabling enforcement yet:
# seal once to produce the otp.json (also see production.md, stage 2b):
picotool seal --sign --hash firmware.uf2 firmware-signed.uf2 \
    ~/.rs-key-secrets/secure_boot_key.pem ~/.rs-key-secrets/otp_secureboot.json \
    --major 1 --minor 0
rsk secure-boot status                          # bootkey present: False
rsk secure-boot load-key ~/.rs-key-secrets/otp_secureboot.json   # fuses slot 0
load-key is non-enforcing: unsigned images still boot until enable. It
refuses if a key is already present, so it is a one-shot for slot 0. (If your key
is passphrase-protected, decrypt it to a temp file for this seal too, exactly as
in step 4.) The rest of the staged ritual
(harden → enable → lock) is in production.md.
4. Daily use — sign every flash
After enable, every image must be sealed with this key. picotool reads only
an unencrypted PEM (it has no passphrase prompt), so a passphrase-protected
key (recommended) is decrypted to a temporary file just for the seal and removed
straight after:
# decrypt for the seal only — best on a RAM-backed dir so the plaintext never
# touches disk; openssl prompts for the passphrase:
( umask 077; openssl ec -in ~/.rs-key-secrets/secure_boot_key.pem -out /tmp/sk.pem )
picotool seal --sign --hash firmware.uf2 firmware-signed.uf2 \
    /tmp/sk.pem ~/.rs-key-secrets/otp_secureboot.json --major 1 --minor 0
rm -P /tmp/sk.pem        # overwrite + delete (Linux: shred -u /tmp/sk.pem)
# BOOTSEL, then:
picotool load -v firmware-signed.uf2 && picotool reboot   # or drag it onto the RP2350 drive
If your key has no passphrase, pass ~/.rs-key-secrets/secure_boot_key.pem
straight in as the <key> argument and skip the decrypt / rm lines.
The rsk-wipe recovery image must be sealed with a currently valid key too,
or it won’t boot on a secure-boot board. After a rotation
it must be re-signed with the new key. The full flag meaning is in
production.md;
if anti-rollback is on, add --rollback (anti-rollback.md).
Key slots and validity
The RP2350 has four boot-key slots, each holding one fingerprint, plus
KEY_VALID / KEY_INVALID masks that say which slots the bootrom trusts:
- The bootrom accepts an image whose public key matches any valid, non-revoked slot.
- The
lockstage (production.md) setsKEY_INVALIDon the three unused slots. Maximum hardening, but it also removes any room to add a key later. - Reserving a slot vs. full lock-down is a decision you make at provisioning time. It is the same trade-off as the anti-rollback escape valve, laid out in anti-rollback.md. Most users should take the full lock. Reserve a slot only if you specifically want a future rotation path.
5. Rotate a key
You rotate when you want a new signing key to take over and the old one to stop being trusted. The two real reasons: a suspected key compromise or the anti-rollback budget ceiling (a new key revokes the old, killing old signed images by signature; see anti-rollback.md).
The flow, in order (never revoke the old key until the new one is proven):
- Generate a new key
K2(section 1) and back it up (section 2). - Provision
K2’s fingerprint into a free, un-revoked slot:rsk secure-boot load-key --slot <free> K2-otp.json. - Re-sign the current firmware with
K2, flash it, and confirm it boots (the board now validates it viaK2). - Revoke the old key
K1:rsk secure-boot revoke <K1-slot>. Old images signed only byK1now fail secure boot.
rsk secure-boot rotate K2-otp.json runs steps 2–4 as a guided flow: it
provisions the next free slot, then stops and tells you to flash and prove K2
before you revoke K1. It never revokes for you while only one key is proven.
Tooling. Rotation is driven by
rsk secure-boot, not hand-rolledpicotool otpwrites:load-key --slot Nprovisions any of the four slots,revoke <slot>retires one (refusing to revoke your last valid key), androtate <new.json>walks the whole flow: provision a free slot, then it tells you to flash and prove the new key before revoking the old one. It only works if you reserved a slot (didn’t run the fulllock, which leaves the key pages bootloader-writable); on a fully-locked board the commands refuse, and a fresh board is the only path. With four slots you can rotate roughly three times before they’re spent.
Loss and recovery — the cases
| Situation | Outcome |
|---|---|
Lost the key before load-key | No harm. Regenerate. Nothing is fused yet. |
Lost it after load-key, before enable | Enforcement is still off, so the board boots unsigned images and keeps working, but slot 0 is now fused to a key you don’t have. Provision a different slot for a new key, or treat the board as not worth securing. |
Lost it after enable | The key itself is unrecoverable, and the current signed image keeps booting forever. After a full lock, the unused slots are revoked and the key pages are locked, so you can never flash new firmware: a new board. If instead you reserved a free slot, you can still provision a new key into it and flash again (the bootrom never asks for the old key): rsk secure-boot load-key --slot <free> does it, no hand-rolled picotool needed. |
| Key compromised (someone else has it) | Rotate to a new key and revoke the old (needs a reserved slot), or move to a new board. The old key can sign images your board still trusts until it is revoked. |
| Replacing the board | Provision the new chip with a new key; restore your FIDO identity with rsk backup restore. See anti-rollback.md. |
Best practices, in one place
- secp256k1, generated offline, passphrase-protected at rest, never in the repo or a build sandbox.
- ≥2 durable, encrypted, offline backups (before you fuse anything).
- One fresh key per board for its life: a new board gets a new key, never the old one. Rotate only on compromise or the rollback ceiling, and only if you reserved a slot.
- Sign
rsk-wipewith the same key as your firmware (keep the recovery hatch bootable). - Decide lock-down vs. a reserved rotation slot up front. It can’t be changed
after
lock.
OTP fuses (RP2350)
The “production” hardening in RS-Key comes down to writing the RP2350’s OTP: the OTP master key, secure boot, and anti-rollback. This page explains what OTP is, why it is irreversible, how RS-Key writes it, and exactly which rows it touches. Read it before production.md. It is the substrate everything else stands on.
“OTP” here means One-Time-Programmable fuses on the chip, not the Yubico one-time-password feature (guides/otp.md). Different thing, same three letters.
What OTP is
OTP is a block of on-chip memory made of antifuses: writing a bit physically and permanently changes the silicon. A bit goes 0 → 1 and never back. There is no erase, no reset, no “factory default”. For OTP, factory is wherever you left it. Every chip has its own OTP. Nothing about it is shared between boards.
This is the whole point. The value of OTP for a security key is exactly that it cannot be undone: a key fused here can’t be un-fused, a secure-boot bit can’t be cleared, a rollback floor can’t be lowered. Hardening that you could reverse would be hardening an attacker could reverse too.
⚠️ Every write on this page is permanent. A mistake can lock you out of reading a value forever, or brick the board for new firmware. The tools refuse to act without typed confirmations and support
--dry-run. Use it.
Layout: pages, rows, and reliability copies
OTP is addressed in rows (24 bits each), grouped into pages of 64 rows
(so page N starts at row N × 0x40; page 58 begins at row 0xE80). Page
granularity matters because read/write locks are applied per page, not per
row.
A single antifuse can be marginal, so the values that the bootrom and firmware depend on are stored redundantly:
- RBIT-3: the value is written into three consecutive rows, and the reader takes the bitwise 2-of-3 majority. An interrupted burn that set only one copy doesn’t count. Two copies do. The secure-boot flags, the boot-key fingerprints, and the rollback rows are all RBIT-3.
- ECC: other pages store an error-correcting code alongside the data.
Who can write OTP, and when
Two paths write OTP, and the difference is central to how RS-Key stays safe:
- BOOTSEL /
picotool: with the board in BOOTSEL you can read and write OTP directly from the host. This is how the bulk of provisioning happens (the master key, the secure-boot key, the enable bits). - Secure firmware (the rescue applet): a handful of rows must be written by
the running, secure-boot-validated firmware, not from BOOTSEL. Two cases:
- rows that are made bootloader-read-only by a page lock (so BOOTSEL can no
longer write them) but stay secure-writable. The page-58 lock and the
ROLLBACK_REQUIREDflag are applied this way, byrsk otp lock-page58/rsk otp rollback-require, each guarded by an exact magic payload so a stray APDU can never trigger them.
- rows that are made bootloader-read-only by a page lock (so BOOTSEL can no
longer write them) but stay secure-writable. The page-58 lock and the
Each OTP page lock is a byte encoding three independent levels: LOCK_BL
(bootloader), LOCK_NS (non-secure), LOCK_S (secure), each of read-write /
read-only / inaccessible. That three-way split is what lets a page be
unreadable to BOOTSEL but still readable/writable by secure firmware (see
page 58 below).
What RS-Key burns
These are the rows RS-Key provisions, grouped by the stage that writes them. The
authoritative source is the code (tools/rsk/otp.py, tools/rsk/secureboot.py,
crates/rsk-rescue/src/rollback.rs). The table is the map.
| Region | Rows | What it holds | Written by |
|---|---|---|---|
| Page 58 | 0xE80… | DEVK (device attestation key), MKEK (master sealing key), anti-imaging chaff | rsk otp burn (BOOTSEL) |
| Page-58 lock | 0xFF5 | makes page 58 BOOTSEL-unreadable, secure read/write | rsk otp lock-page58 (firmware) |
| Boot key | 0x80… | SHA-256 fingerprint of your secure-boot public key (slot 0 of 4) | rsk secure-boot load-key |
BOOT_FLAGS1 | 0x4B | KEY_VALID / KEY_INVALID (which key slots are live / revoked) | load-key, lock |
CRIT1 | 0x40 | SECURE_BOOT_ENABLE, DEBUG_DISABLE, GLITCH_DETECTOR_ENABLE/SENS | harden, enable |
BOOT_FLAGS0 | 0x48 | ROLLBACK_REQUIRED (bit 11) | rsk otp rollback-require (firmware) |
DEFAULT_BOOT_VERSION | 0x4E, 0x51 | the 48-bit rollback thermometer (two 24-bit rows) | the bootrom, on boot |
| Page 1/2 locks | 0xF83, 0xF85 | make the flag + key pages bootloader-read-only | rsk secure-boot lock |
A few notes that matter:
- Page 58 is read-write to secure firmware even after the lock. The lock
value (
0x3C3C3C) sets BL and NS to inaccessible but leaves S read-write. So only secure-mode firmware can ever read the MKEK/DEVK again, and a BOOTSEL flash dump cannot. - The MKEK/DEVK are generated randomly and forgotten.
rsk otp burndoes not keep a copy. The fuses are the key. There is nothing to back up and nothing to lose. - The rollback thermometer is advanced by the bootrom, not by a host write, when a higher-version image boots. See anti-rollback.md.
- Pages 1 and 2 stay bootloader-read-only after
lock(0x141414), not inaccessible. The bootrom must read the keys and flags on every boot. They remain secure-writable, which is how the firmware appliesROLLBACK_REQUIREDafter the pages are otherwise locked down.

Anti-imaging chaff
Page 58 stores the keys in its low half and the bitwise complement of
every key row in its high half: DEVK at 0xE80…0xE8F with its complement at
0xEA0, MKEK at 0xE90…0xE9F with its complement at 0xEB0 (offset 0x20 =
half a page). The firmware never reads the high half. It plays no part in key
reconstruction (firmware/src/otp_keys.rs reads only the key rows). It exists for
one reason.
The cheapest invasive OTP read demonstrated against this antifuse family
(IOActive, RP2350 Challenge 1, see threat-model.md) recovers
the bitwise OR of two physically paired bitcell rows, not the rows
individually. Raspberry Pi’s mitigation is to put the key in one half of a page
and its complement in the opposite half, so each physical pair reads
OR(b, ¬b) = 1, a uniform all-ones pattern that carries no key bits. The
low-half / high-half placement here is exactly that scheme, and it neutralises the
demonstrated readout.
This defeats the demonstrated OR-read. IOActive note that a more advanced attack might separate the paired (even/odd) rows with additional effort, which would read the key half directly, and a plain complement does not stop that. Raspberry Pi have said a forthcoming application note will describe a storage scheme mitigating both the current attack and that hypothetical one. If it prescribes more than complement-in-opposite-half, revisit this.
Reading OTP
OTP is readable until a lock says otherwise:
rsk secure-boot status        # decodes the secure-boot + rollback rows for you
picotool otp get -r -n 0x48   # raw row read (BOOTSEL), if you want the bytes
rsk inventory list / rsk status surface the human-readable state. Once page
58 is locked, picotool otp get on it fails with a permission error forever.
That failure is the lock working, not a fault.
Honest limits
- OTP is not a secure element. It hardens against software- and BOOTSEL-level attacks, and the anti-imaging chaff above neutralises the demonstrated passive-voltage-contrast OTP readout. But the antifuses are still on a general-purpose die: a funded lab with a focused ion beam can image them, and that (like laser fault injection and power/EM analysis) is out of scope (threat-model.md). The antifuse readout is not fixed by any silicon stepping. Use A4 for the fault and boot-ROM fixes (our own boards are A2, the stepping broken in the public challenge).
- It is finite. The rollback thermometer is 48 bits for the board’s life. There are 4 key slots. Neither resets. See anti-rollback.md.
- It is per-chip. None of this carries to another board. A new board is a fresh, blank OTP.
Anti-rollback
Secure boot (production.md) refuses foreign images. Every image you signed stays valid forever. The first time a release fixes an exploitable bug, your previous signed image becomes a hole: an attacker with the device drags your old, signed UF2 over BOOTSEL and attacks the bug you already fixed. Anti-rollback closes that downgrade path.
This page is the model and every case. The operational steps to turn it on are in production.md, stage 3; the fuses it touches are in otp-fuses.md. It is optional. Until you enable it, nothing here applies.
Read this whole page before enabling it. Anti-rollback burns one-time fuses. Once enforced, it changes which images your board will boot. None of it is reversible.
Two independent axes
The single most important idea: an old, vulnerable image can be refused by two different mechanisms. They do not depend on each other.
| Axis | What it refuses on | Budget per chip |
|---|---|---|
| Version | a rollback counter in OTP (“don’t boot below my floor”) | 48 steps |
| Key | the signature (“don’t boot if signed by a key I don’t trust”) | 4 key slots |
While you have version budget, the first axis does the work. When it runs out, the second takes over. A fresh chip with a fresh key resets both. The rest of this page is those two axes and what happens at their limits.
Axis 1 — version (the rollback floor)
Two different numbers
- Firmware version (
v0.3.1, semver): “which build is this”, changes every release. - Rollback floor: a number on your board. It refuses to boot anything below it. You move it, rarely, by hand.
RS-Key does not assign project-wide “epoch” numbers. There is only your own floor, on each board, and you manage it.
How it works in hardware
The floor lives in RP2350 OTP as a 48-bit thermometer (its value is the number of burned bits). At boot the bootrom (not our firmware) compares the image’s rollback version against your board’s floor:
- image version below the floor → refused, fall back to BOOTSEL;
- equal → boots;
- above → boots and immediately burns the thermometer up to the image’s version.

The whole mechanism has an on/off fuse, ROLLBACK_REQUIRED. Until it is burned,
images carrying no rollback version boot regardless (anti-rollback has no
teeth). You burn it from firmware:
rsk secure-boot status      # shows ROLLBACK_REQUIRED and the boot version N/48
rsk otp rollback-require     # fuse ROLLBACK_REQUIRED (requires secure boot enabled)
⚠️ Burning the thermometer is irreversible. OTP is one-time-programmable: a bit goes 0→1 and never back. See otp-fuses.md.
Budget: 48 steps per chip, for the board’s whole life
The thermometer is 48 bits, so the floor can advance 48 times over the entire life of that board, and never again. That is not “48 releases”. It is 48 burns. Treat each advance as spending an irreversible, finite resource.
The project flags downgrade-fixes; you decide
Because secure boot is rooted in your own signing key, there are no project-signed images. Every owner signs and chooses their own floor. So the project’s only job is to mark, in the changelog, which releases fix a downgrade-exploitable bug:
| Release | downgrade-fix? |
|---|---|
v0.2.0 (OATH features) | no |
v0.3.0 (PIN-bypass fix) | yes |
v0.4.0 (PIV slots) | no |
v0.5.0 (signature-check fix) | yes |
When you build firmware, you check: were there downgrade-fix releases since my last build? If so, it is your call:
- Raise the floor (close those bugs): seal with
--rollback <your counter + 1>. The board burns up to it. Your older images below it stop booting. - Leave it (you accept the risk): seal with
--rollback <your current counter>. Everything still boots, nothing burns.
The default is not to burn. Raising the floor is a deliberate act tied to a specific security release, not routine.
If you don’t burn, the downgrade attack stays possible. Your old signed image will still boot. That is a fine, conscious trade-off (you keep your 48-budget and don’t orphan working images), but it is your choice of risk, not a default-protected state.
Why +1 is enough
The floor only needs to sit above your own vulnerable builds. Every build
you made was sealed at a version ≤ your current counter. So raising the floor to
counter + 1 cuts off your entire build history below it in a single bit.
There is no absolute number to “catch up” to.
A bonus falls out of this: “decline, decline, then raise once when you decide to care” spends fewer bits than raising the floor on every release, for the same protection, because all your older builds sit below the one bump.
Concretely:
rsk secure-boot status         # read your floor, say "boot version 2/48"
# build the fixed firmware, then seal it one step higher:
picotool seal --sign --hash firmware.uf2 firmware-signed.uf2 \
    ~/.rs-key-secrets/secure_boot_key.pem ~/.rs-key-secrets/otp_secureboot.json \
    --major 1 --minor 0 --rollback 3        # 3 = counter (2) + 1
# flash it; on boot the floor burns 2 → 3, and every image sealed ≤ 2 is now refused
One caveat for correctness: you must seal the fixed firmware strictly above the version you used for the vulnerable build. In practice that is
counter + 1. If you accidentally seal the fixed image at the same version as a vulnerable one, the floor didn’t rise and you are not protected.
Your floor is per-board
The floor is private to each board. It equals the highest version that that board has booted. It depends only on your burns, not on how many releases exist. Different boards carry different floors. This is normal and needs no coordination. The one rule: a board will not boot an image below its own floor. You cannot go back down past a floor you’ve burned.
At the ceiling (floor = 48)
The thermometer is full, but you can still update forever. You seal every future image at version 48 and it boots. You lose only the growth of version-based downgrade protection: a new release can no longer out-version a previous one (there is no 49th step). The device works. Secure boot still holds. From here, downgrade protection moves to axis 2.
Axis 2 — key (the signature)
How the bootrom checks a signature
- OTP holds not the key but a fingerprint (
SHA-256(public key)) in a boot-key slot. - A signed image carries, inside it, the full public key plus an ECDSA signature (secp256k1 + SHA-256) over the image hash.
- At boot the bootrom hashes the public key from the image and compares it to the fused fingerprints. No match → refused, before it even checks the signature. Match → it verifies the ECDSA signature with that key → boots.
This can’t be forged: an attacker can’t sign for a key they don’t hold, and they can’t make a different public key hash to a fused fingerprint (SHA-256).
Key revocation = downgrade defense without the thermometer
When the version budget is spent, you switch axes. For each new downgrade-fix:
- sign the fixed firmware with a new key K2;
- confirm it boots;
- revoke the old key K1 (
KEY_INVALID).
The old vulnerable image, signed by K1, now fails secure boot by signature. The version counter is not involved. RP2350 has 4 key slots, so this buys roughly 3 more rounds on top of the 48.
A decision you must make before the ceiling
Key revocation needs a free key slot reserved at provisioning time. Today
rsk secure-boot lock (stage D) revokes all three unused slots. After that
there is nowhere to rotate to. So this is a genuine trade-off, made up front:
Full lock (current default) | Reserve a slot for rotation | |
|---|---|---|
| Hardening against attacker key injection | maximum | the free slot is reachable by an attacker with physical access who can burn fuses |
| Escape valve at the 48 ceiling | none (new chip only) | ~3 key rotations |
Detail: after
lock, the key pages stay secure-writable (the firmware must still writeROLLBACK_REQUIREDand the page-58 lock), so a future firmware command could in principle provision a key into a free, un-revoked slot even after lock. That command does not exist yet.
When the 48 budget is exhausted — the ladder
- Rotate the key on the same board (~3 rounds, if you reserved a slot). Old images die by signature.
- New board + new key (next section): a fresh 48, and the whole old history is dead by signature.
- Accept the residual: secure boot still holds. A downgrade is then only possible to an attacker with physical access and one of your old signed artifacts. Document it; for most threat models this is acceptable.
This is the RP2350’s hard limit, not an RS-Key flaw. Any firmware on this chip has the same ceiling (48 versions + 4 keys). There is no software trick around it: a software rollback counter in the firmware would be weaker. It runs after the bootrom already booted the (possibly vulnerable) image, and its store would live in flash, which the same attacker can rewrite.
Prevention beats cure. 48 genuine downgrade-exploitable fixes on a single
chip is beyond even commercial keys over a decade. If you are approaching the
limit, you are almost certainly flagging as “downgrade-fix” releases where
booting the old image gains the attacker nothing. The real discipline is: floor
+1 only when the old image is a working exploit.
Moving to a new board
A fresh chip gives a fresh 48 and fresh 4 slots. You provision a new signing key (yours, backed up) and trust only it on the new board.
Why the new board’s floor is 1, not a repeat of every old risk
This is the subtle part. Starting a new board at floor 1 can look like you are re-accepting every downgrade risk you defended against on the old board. You are not. The protection didn’t disappear. It moved from the version axis to the key axis:
- the old vulnerable images are signed with the old key;
- the new board trusts only the new key, so those images are refused by signature;
- and there are no vulnerable images signed with the new key. You signed only the current, fixed firmware with it.
So there is nothing below floor 1 (on the new key) to block. Floor 1 is safe precisely because no image exists that is both (a) vulnerable and (b) signed by a trusted key.
The rule that makes this work: an image is dangerous only if it is both signed by a trusted key and exists as a file. On the new board, old vulnerable images are signed by an untrusted key, and the new key has signed only the fixed firmware.
⚠️ Required condition: the new board trusts only the new key. If you also provision the old key on the new board, the old vulnerable images pass the signature check again and floor 1 will not stop them. New board ⇒ fresh key, old key not carried over.
What migrates, what doesn’t
- Migrates: your FIDO identity, via seed backup
(
ssh ed25519-sk, 2FA registrations), withrsk backup restore. - Does not migrate: resident passkeys, OpenPGP and PIV keys, sealed to the old chip, not derivable from the seed. Re-enroll those.
How to verify all of this
rsk secure-boot status              # fused boot-key fingerprint, ROLLBACK_REQUIRED, boot version N/48
picotool info firmware-signed.uf2   # the image's key fingerprint — compare to the fused one
Negative tests are the real proof:
- an unsigned UF2 → bootrom refuses it, falls back to BOOTSEL;
- an image below your floor → refused (the version axis works);
- an image signed by the old / a foreign key → refused by signature (the key axis works).
Cheat sheet
- Firmware version ≠ rollback floor. The project assigns no epochs. The floor is on your board and you control it.
- The project only flags a release as a downgrade-fix; you decide and you burn.
- Raise = your board’s current counter + 1. Default: don’t burn.
- Don’t burn ⇒ downgrade is possible (your conscious risk).
- Budget is 48 per chip; burning is irreversible.
- At the ceiling, updates still work; protection moves to key revocation.
- A new chip + new key is a clean restart at floor 1; the old history is dead by signature, not by version.
Threat model
What RS-Key defends against, what it deliberately does not, and the honest residuals in between. The defenses compose in tiers: each one assumes the ones before it.

Assets
The FIDO master seed (every non-resident credential derives from it), resident passkeys, OpenPGP private keys and their DEK chain, PIV private keys, OATH secrets, OTP slot secrets, PINs.
Attackers, strongest defense first
1. A hostile host (malware on the computer)
Everything arriving over USB is attacker-controlled: CTAPHID frames, the CCID bulk stream, ISO-7816 APDUs, CTAP2 CBOR. Defenses:
- Memory safety.
no_stdRust end to end. The parsers and applet dispatch are safe code. The handful ofunsafesites are enumerated and justified in unsafe.md. - Fuzzing. Every parser and every applet’s full dispatch path has a
cargo-fuzztarget (30+). See testing.md. - Protocol gates. PINs/UV with retry counters and lockout, physical-touch requirements on FIDO operations and OpenPGP UIF, OATH access codes, PIV management-key auth.
- What a hostile host can do: drive any operation you have authorized while the device is plugged in and unlocked (sign, decrypt, assert). A security key authenticates presence and possession, not the intent of every byte the host sends. Touch requirements bound the rate.
- Device config is UNGATED on the default build. The shipped default is the
full-ykman/YubiKey-compatible admin surface: a hostile USB host can silently
rewrite the DeviceInfo / enabled-applications / USB identity — over CCID
Management
WRITE CONFIG, the FIDO vendorCONFIG_WRITE, and the CTAPHID (0x43) and OTP-HID (0x15) transport writes — with no touch or PIN, and can trigger a device-wide factory reset (that one keeps a presence gate). The USB identity (serial, strings) is cosmetic — never proof a device is genuine, attestation is (§3). The enabled-applications mask is enforced, though: a disabled application’s applet stops answering (PIV/OpenPGP/OATH/OTP over CCID, FIDO2/U2F over CTAPHID, the OTP keyboard), so a hostile host can turn one off. That is a reversible denial-of-service, not a confidentiality or integrity break — the Management applet, the FIDO vendor command, and the OTP-HID identify/config slots are never gated, so any single transport can re-enable it, and no secret is exposed. If you need config writes gated on the operator, build/flashfirmware-strict-config, which restores the presence/PIN gates and refuses the ungated transport writes (build.md). It is not the runtime flash flagEF_HARDENED. - The residual gap is intent. The trusted-display flavor closes it. Because
a standard key attests presence and possession, a malicious page can silently
drive an authorized key over WebUSB to phish a real sign-in (demonstrated
against YubiKeys in Chrome).
The trusted-display flavor paints the true
rpIdon the device’s own screen and gates each signature on a tap there, so a compromised host cannot fake what you approve. Qubes OS’s CTAP proxy tackles the same gap in software, mediating CTAP through a trusted VM.
2. A thief with the powered-off device (at-rest)
- All key material is sealed in flash: FIDO seed and PIV keys under
AES-256-CBC/GCM keyed by a device key (
kbase= HKDF of the chip serial and the OTP master key once provisioned), OpenPGP keys under the PIN-wrapped DEK chain. - OTP master key (production.md stage 1): with the MKEK fused and page-58 hard-locked, a flash dump (even with BOOTSEL access and the chip id) does not reproduce the sealing key. Without the burn, the sealing key derives from on-chip state an attacker with full flash + chip access could reconstruct. The burn is what makes at-rest real.
- The seals give confidentiality, not authenticity. Records written before the burn are keyed from the public chip serial alone, and those pre-OTP arms stay readable afterwards so a provisioned device keeps working across the upgrade. So an attacker who can write flash (BOOTSEL) can forge a record that opens under one, and the boot migration then re-seals it under the fused root. Reading the flash still tells them nothing. Closing this needs a fuse-rooted latch on the migration window; audit run-27 #8 has the analysis.
- Soft-lock (guides/soft-lock.md): optionally, the seed at rest is additionally wrapped with ChaCha20-Poly1305 under a 32-byte key only you hold (BIP-39/SLIP-39 words). A stolen device (even running genuine firmware) refuses every FIDO operation until that key is presented over an encrypted channel at power-up. Device + words, two factors.
- Caveat: superseded records linger. The flash log is append-only, so
re-sealing or deleting a secret leaves the old copy on flash until its page
is reclaimed. Two cases differ in how much that matters:
- The OTP-burn migration supersedes the pre-OTP seed, which was sealed
under the chip-serial-only root (no fuse secret). Left alone, a flash dump
plus the chip id would recover it, bypassing the burn. So it is not
left to lazy healing: the first boot after provisioning runs a one-shot
compaction (
Fs::compact, gated by theEF_HARDENEDmarker, crash-safe) that drives a full GC lap over the credential partition and physically erases every superseded pre-OTP record before the device re-attaches to USB. - The soft-lock transition leaves the same kind of lingering record, but on a provisioned device it is already sealed under the fused root (moot against anything short of a fused-key compromise), so soft-lock’s at-rest guarantee simply hardens over time as natural compaction overwrites it.
- The OTP-burn migration supersedes the pre-OTP seed, which was sealed
under the chip-serial-only root (no fuse secret). Left alone, a flash dump
plus the chip id would recover it, bypassing the burn. So it is not
left to lazy healing: the first boot after provisioning runs a one-shot
compaction (
- The FIDO seed is never PIN-wrapped at rest (a deliberate design
decision). UP-only operations (
ssh ed25519-sk, U2F, no-PIN assertions) must work from a cold boot with no PIN presented. So a PIN-keyed at-rest copy adds no protection an attacker couldn’t bypass via the always-loadable copy, while breaking those flows. At-rest strength is the kbase (tier above), not the PIN.
3. An attacker who can flash their own firmware
- Secure boot (production.md stage 2): the bootrom refuses unsigned images, so no foreign code ever runs to read the OTP key in secure mode. Glitch detectors are fused on along the way.
- Anti-rollback (anti-rollback.md, optional): with
ROLLBACK_REQUIREDfused, images below your board’s rollback floor (or carrying no version at all, i.e. anything sealed before the feature) no longer boot. A kept copy of an old signed release with a since-fixed bug stops being a downgrade path. - Before secure boot is enabled, this attacker wins against the OTP tier: their firmware reads the MKEK exactly like ours does. That is why the production page calls the two stages one story.
- The USB/smartcard identity (VID/PID, manufacturer, product, OpenPGP AID
vendor) is fully host-configurable at runtime via the phy record and is not an
authenticity signal: a phy write that sets the Yubico VID makes a stock key
present a full Yubico identity, and the manufacturer/product strings are also
settable outright (phy tags
0x0F/0x09), so any VID can carry any vendor name. On the default build these config writes are ungated (no touch, no PIN — see §1);firmware-strict-configre-gates them. Treat the identity as cosmetic, never as proof a device is genuine — attestation (device-key / org cert) is the authenticity mechanism, and it is unaffected by any config write.
4. Physical / lab attacks — OUT OF SCOPE
Decapping, microprobing, advanced fault injection beyond the RP2350’s glitch detectors, power/EM side channels, and the XIP TOCTOU: interposing on the QSPI bus to serve the genuine image to secure boot’s verifier and a tampered one to the CPU, since nothing binds checked bytes to executed bytes and the image is too large to verify-in-place from SRAM. An in-package-flash part (RP2354) leaves no discrete flash chip to tap, raising a reliable swap to decap-class effort. The RP2350 is not a secure element and RS-Key does not pretend otherwise. If your threat model includes a funded lab, buy a certified key.
5. Network
None. The device speaks USB only. There is no radio and no IP stack.
Flash snapshot rollback (the PIN-counter reset)
Reported by Token2 (issue #37,
advisory PDF).
An attacker with brief physical access and BOOTSEL runs picotool save to snapshot the
whole flash, guesses PINs until the wrong-PIN counter locks, then picotool loads the old
snapshot to reset the counter and repeats. That is unlimited offline PIN guessing. It
defeats every applet’s retry counter — FIDO clientPIN, PIV PIN/PUK, OpenPGP PW1/PW3, OATH —
since all are ordinary flash records with no external freshness binding.
The gap is freshness, not confidentiality or authenticity. Secure boot accepts the restored image (it is genuine and signed); the at-rest seal decrypts it (same chip). Neither notices a rollback. RS-Key’s firmware anti-rollback (anti-rollback.md) versions the firmware image, not the flash data, so it is blind to the swap too. The clean fix is a monotonic counter in tamper-resistant NVM that the firmware checks on boot — exactly what a secure element has and the RP2350 lacks. Its OTP is write-once antifuse (a few dozen one-way bits for the board’s whole life), so it cannot back a retry counter that must reset to eight on every correct PIN. We cannot close the rollback itself on this silicon; we raise its cost:
- OTP-seeded PIN verifier (always on after the OTP burn). The stored verifier is
HKDF(serial_hash, HMAC(kbase, pin)), withkbaserooted in the fused OTP master key (production.md stage 1). A flash dump does not contain that key, so it cannot brute-force the PIN offline — the guessing must run on the device, one try at a time. strong-pin/fips-profilebuilds (opt-in). Raise the clientPIN floor to six code points and refuse the most guessable PINs (a repeated digit, a123456-style run), so the on-device search space is at least a million. By Token2’s estimate an automated attack runs ~34 days at six digits and ~10 years at eight, against ~8 hours at four (build.md).- Soft-lock (opt-in). The FIDO seed is wrapped under a key only you hold (guides/soft-lock.md), so a brute-forced PIN yields nothing until you present it. It covers the FIDO seed; the PIV, OpenPGP and OATH counters stay rollback-resettable.
The durable defense on a general-purpose MCU is PIN entropy, plus the soft-lock second factor for the FIDO seed. A device left in an attacker’s hands, protected only by a short PIN, is not safe here. This is the same boundary as “anyone with the device and your PIN is you”.
Platform silicon: the RP2350 security challenges
Raspberry Pi has publicly stress-tested the RP2350 die. The results bound RS-Key’s physical-attack posture.
Challenge 1 broke the A2 stepping (results). The task was to extract an OTP secret from a board running secure boot. The winning attacks:
- Aedan Cullen: voltage glitch on the
USB_OTP_VDDrail, reading OTP secrets out of the guarded path (erratum E16) (writeup, talk). - Marius Muench: a glitch plus a boot-ROM flaw, bypassing secure boot to run unsigned code.
- Kévin Courdesses: laser fault injection corrupting the boot-time signature check (erratum E24) (writeup).
- IOActive: focused-ion-beam (FIB) plus passive voltage contrast (PVC), reading the antifuse array directly: the bitwise OR of two physically paired bitcell rows (writeup).
The first three are comparatively cheap fault / boot-ROM attacks. The IOActive
readout needs FIB-class lab equipment (a tool worth hundreds of thousands of
dollars, one to two days per target) and applies to every device built on the
Synopsys dwc_nvm_ts40* antifuse IP on TSMC’s 40 nm node, an antifuse property,
not an RP2350-specific defect.
The A4 stepping fixes the fault and boot-ROM attacks in silicon, but not the antifuse readout (announcement). A4 closes the boot-ROM errata (E20/E21/E24, including the laser signature bypass) in a new boot ROM, the OTP power-glitch (E16) through changes to the wrapper circuitry around the OTP macro, and the GPIO errata (E9, E3). The antifuse-array PVC readout is explicitly not fixed in A4. Raspberry Pi’s guidance is to mitigate it by how secrets are stored in OTP, the chaffing RS-Key applies (see otp-fuses.md). A third challenge (power side-channel analysis of the secure-boot AES) is open with no break reported (challenge 2).
What this means for RS-Key. Our development boards are A2: the broken stepping, kept as the conservative worst case. The firmware is A4-compatible, and A4 is recommended for the fault / boot-ROM attacks above. Against the antifuse readout (which no stepping fixes), RS-Key applies the chaffing mitigation directly (otp-fuses.md). What remains out of scope is unchanged: a funded lab with FIB/PVC, laser fault injection, or power/EM analysis against a device in hand. No software or provisioning choice on a general-purpose die closes those. That is what a dedicated secure element is for (limitations.md).
Seed backup (the deliberate exception)
A FIDO authenticator’s pitch is non-exportable keys. The wallet-style backup
is a conscious trade for recoverability, gated accordingly. Export moves the
seed over an ephemeral encrypted channel (P-256 ECDH → HKDF →
ChaCha20-Poly1305), and requires (all at once) physical touch, the FIDO
PIN/UV token when a PIN is set, and the one-time setup window: after an
explicit finalize, export is refused until a full reset regenerates a new
seed. Malware cannot exfiltrate the seed silently or later. Restore re-seals
the seed under the destination chip’s root. The host driving a backup
necessarily sees the seed plaintext. Do it on a machine you trust.
Scope: the deterministic identity only (resident passkeys, OpenPGP, PIV are
not covered).
On the trusted-display flavor the host need not be in that trust path: the
device can render its BIP-39 recovery phrase on its own screen (the seed is
turned into words on-device and never crosses USB), so a backup can be taken
without trusting any host. That trades the host-observation surface for a
physical/visual one. The words are briefly on the panel (shoulder-surf, camera).
It is gated to keep that surface small: it requires a device PIN set and
re-entered, a deliberate hold past an explicit “no one watching” warning, runs
only inside the same one-time window (and seal closes it), is disabled on the
fips-profile (non-exportable) build, zeroizes the seed/words from RAM on exit,
and auto-clears the panel after a short idle.
sequenceDiagram
    participant U as You
    participant H as Host
    participant D as Device
    U->>D: touch + PIN/UV (when set)
    H->>D: ephemeral P-256 ECDH
    D-->>H: seed over HKDF → ChaCha20-Poly1305 channel
    Note over H: the host necessarily sees the seed in the clear
    H-->>U: BIP-39 / SLIP-39 words
    U->>D: finalize → export refused until a full reset
Zeroization
Key-grade material in RAM is wiped (zeroize, volatile writes) when its use
ends: session state and PIN/UV tokens on drop, transient key copies at end of
scope including error paths, and the transport/exchange buffers as soon as a
message completes (requests carry PINs and imported keys). Accepted
residuals: Copy temporaries inside RustCrypto curve arithmetic, digest
internals, and heap temporaries inside the rsa crate. Short-lived,
library-internal, not wipeable without forking the crates.
Supply chain & process
cargo audit+cargo deny(advisories, license allow-list, source policy) andgitleaksrun inscripts/check.shand the pre-commit hook.- Dependencies are pinned (
Cargo.lock). The git dependencies are restricted to the embassy organization. - One known-unfixed advisory is accepted deliberately: RUSTSEC-2023-0071
(Marvin timing side channel in
rsa), the OpenPGP RSA backend. It is mitigated by per-operation base blinding on every private-key path (PKCS#1 v1.5 sign, decipher, and the raw fallbackrsa_raw). Rationale indeny.toml. The constant-time audit verified that this blinding leaves no unblinded private-exponent path.
Post-quantum notes
ML-DSA-44 (COSE −48) and ML-DSA-65 (COSE −49) FIDO2 credentials (both the
in-tree rsk-mldsa crate) with hedged signing (32 fresh DRBG bytes
per signature; the hedge and expanded keys are zeroized). rsk-mldsa streams
the FIPS 204 matrix A on the fly so ML-DSA-65’s keygen+sign fit the RP2350
stack. It is hand-written, so its constant-time posture is a source-level
claim (branch-free reductions, masked norm checks, no secret division), not
proven at machine code. It is checked byte-for-byte against NIST ACVP KATs,
with Kani proofs over the reductions and rounding. ML-DSA-87 (−50) is out of
reach on this chip (keygen overflows the stack; its makeCredential response
also overruns the CTAPHID message ceiling). ML-KEM-768 is compiled in as
scaffolding but nothing calls it until a CTAP PQC PIN/UV protocol exists.
None of these has a third-party audit yet, the same standing as the rest of
the RustCrypto stack, tracked via cargo-audit/deny.
Reporting
This is an experimental hobby project. If you find a security issue, please report it privately to the maintainer rather than opening a public issue.
Limitations — what RS-Key does not do, and why
Each gap below comes with its reasoning. “Not yet” and “never” are marked. The project as a whole is experimental and unaudited. The threat model covers the security boundary. This page covers feature and hardware gaps.
Cryptography
-
brainpoolP512r1 (OpenPGP): not offered. brainpoolP256r1 and P384r1 are supported (advertised in DO
0xFA, generate / keytocard / sign / decrypt), but no Rust arithmetic for the 512-bit brainpool curve exists yet, so the applet neither advertises nor generates it. Status: until a crate exists. -
X448 / Ed448 (OpenPGP): not offered, same reason. RustCrypto coverage of Curve448 is thin and unaudited. Cv25519/Ed25519 plus the NIST curves and secp256k1 cover practical use. Status: until a serious crate exists.
-
RSA-3072/4096 on-card generation is slow. The prime search dominates the cost: rejecting hundreds of composite candidates, each one asm-modexp-bound. Both cores run the search with the modexp hot path in SRAM (architecture). Typical timings, measured on the reference board (single-core → dual-core):
key before after RSA-2048 ~8.9 s ~4–6 s RSA-3072 ~35 s ~22 s RSA-4096 ~65 s ~50 s The total is set by how many candidates a given draw happens to need, which is random. The per-keygen spread is wide (17 s to 124 s seen at 4096) because that count varies, not because the silicon does. Per candidate the throughput is ~6.9 ms across both cores.
The lever is fewer candidates reaching the modexp: a deeper small-prime sieve. (The Baillie–PSW that confirms a survivor, asm strong Miller–Rabin plus a software Lucas test, runs only a handful of times per keygen, so it doesn’t move the total.) Depth is set by the measured cost ratio: one strong-MR modexp is ~35 ms (1024-bit) / ~239 ms (2048-bit) against ~11 µs / ~23 µs for one trial division, so it pays to sieve by every prime up to ~3.1k / ~10.5k, far past the old flat 256-prime (≤1619) sieve. Depth now scales with key size (448 primes at RSA-2048 … 1280 at RSA-4096), and the sieve runs incrementally: a candidate stream
n, n+2, n+4, …from a random odd start, each residuen mod pᵢstepped by one add instead of re-derived by a Horner pass (OpenSSL/GMP do the same). The primality decision is untouched, so key strength is unchanged. Same-device A/B (per-candidate cost, which divides out the prime-search-luck variance): depth-scaling took RSA-2048 7.84 → 6.48 ms/candidate and RSA-4096 36.0 → 26.2 ms versus the old flat 256-prime sieve, and the incremental step took those a further 6.48 → 5.28 ms (−18.5%) and 26.2 → 20.9 ms (−20.4%). The device streams keepalives throughout, so tools wait it out. Import is fast. Status: inherent to the hardware class; the parallel-scan share is at the two-core limit, the sieve at the measured modexp:division ratio and now incremental. -
ML-KEM is scaffolding: compiled, tested, unused. No CTAP PIN/UV protocol number for PQC key agreement exists yet to implement. Status: waiting on standards.
-
PQC interop is limited by client support: ML-DSA-44 (COSE −48) and ML-DSA-65 (−49) credentials work and verify on-device. Their signatures verify under OpenSSL and Yubico’s python-fido2, but no browser or mainstream WebAuthn library negotiates these COSE ids against security keys yet. Released Firefox versions abort getInfo if the algorithm is advertised (hence the
advertise-pqcbuild flag, default off; capability stays on regardless). ML-DSA-87 (−50) does not fit the RP2350 (stack + CTAPHID message size). These are the ML-DSA schemes, not a FIPS-validated module.
Backup & migration
- The seed backup covers the deterministic identity only. Non-resident
credentials (
ssh ed25519-sk, most 2FA registrations) derive from the master seed and survive a restore onto a new board. Not covered: resident passkeys (stored records, not derivable), OpenPGP private keys, PIV private keys, OATH secrets, OTP slots, all sealed to the source chip. A board swap means re-enrolling those. Status: by design; a full at-rest export would gut the at-rest story. - A finalized backup window stays closed until a factory reset regenerates the seed. Lost words cannot be re-exported. Pick a generous SLIP-39 share count. Status: by design (anti-exfiltration gate).
Hardware / physical
- No secure element. The RP2350’s OTP fuses, glitch detectors and secure boot are real, and RS-Key adds anti-imaging OTP chaffing on top. But decap, microprobing, FIB imaging, advanced fault injection and power/EM side channels remain out of scope. The public RP2350 hacking challenge broke the A2 stepping. The A4 stepping fixes the boot-ROM and OTP power-glitch attacks in silicon, but not the antifuse-array readout (mitigated only by how secrets are stored: the chaffing RS-Key applies). Our development boards are A2. The firmware is A4-compatible and A4 is recommended. Status: never. These are silicon properties, not firmware ones; closing them fully is what a dedicated secure element is for.
- The at-rest seals are not authenticated against a flash writer. They keep a
flash dump from yielding key material, which is what the OTP burn buys. They
do not stop someone who can write flash over BOOTSEL from planting a record:
the pre-OTP key base derives from the public chip serial, and those arms stay
readable after the burn so an already-provisioned device survives the upgrade.
The boot migration then re-seals the planted record under the fused root.
Status: needs a fuse-rooted latch that closes the migration window once the
device is provisioned; the analysis is audit run-27 #8, the decision is the
maintainer’s because it makes
lock-page58load-bearing for boot correctness. - XIP TOCTOU residual: secure boot verifies the image in external QSPI flash, then executes from it. Nothing binds the bytes that were hashed to the bytes later fetched, so hardware interposing on the QSPI bus can serve the genuine image to the verifier and a tampered one to the CPU. The clean fix (copy the image into SRAM, verify, run verified-in-place) does not fit: the ~1.7 MB image plus working RAM far exceeds the 520 KB SRAM. There is also no runtime flash authentication in hardware. Part selection is the real lever: an in-package-flash device (RP2354) stacks the flash die on the QSPI bus inside the package, so there is no discrete flash chip to clip an emulator onto and a reliable interposer needs decap-class access. RS-Key is developed and tested on external-flash RP2350 boards, so RP2354 is a recommendation here, not a configuration the project has validated. Status: never on an external-flash board; decap-class effort on RP2354.
- No TrustZone-M secure/non-secure split. Considered and rejected: the embassy ecosystem has no TrustZone support, so it would mean hand-rolling SAU/IDAU configuration, NSC veneers and dual images (the project’s single biggest item) to defend mainly against parser memory corruption, which safe Rust plus fuzzing already address. Physical attacks are orthogonal to TrustZone. Status: revisit only with ecosystem support.
- Anti-rollback is opt-in and coarse:
picotool seal --rollbackplus theROLLBACK_REQUIREDfuse (anti-rollback.md). The OTP thermometer has 48 steps for the board’s life, so the rollback floor is raised for security-relevant releases only. Until the fuse is set, any previously-signed image still boots. Status: shipped (optional). - No image encryption: pointless for open-source code (no secrets in the image; secrets live sealed in flash), and the RP2350 has no transparent XIP decryption anyway. Status: never.
Protocol / compatibility
- The default USB identity is RS-Key’s own (
0x1209:0x0001on the pid.codes FOSS VID, manufacturerRS-Key, productRS-Key Security Key, reported firmware 5.7.4), not a YubiKey masquerade. We no longer ship Yubico’s identifiers by default. A YubiKey identity (0x1050:0x0407, reader nameYubico YubiKey …) exists only as the opt-inVIDPID=Yubikey5build flavor (build.md), built for local interop testing and never distributed. Distributing hardware with Yubico’s identifiers is not OK. The trade-off:ykman, Yubico Authenticator and the stock Yubico udev rules gate on theYubico YubiKeyreader name / VID0x1050, so on the default RS-Key build they do not see the device. Use them against theVIDPID=Yubikey5flavor, or add a udev rule matching VID0x1209. FIDO2/WebAuthn,ssh -sk,gpg/OpenPGP, OpenSC/PKCS#11 and the project’s ownrsk/rsk-tuitools are identity-independent and work on the default build. - OpenPGP secure messaging is not implemented (rarely used by clients; PINs gate everything in practice).
- One physical button on the base build. Touch = the BOOTSEL button, and there is no fingerprint reader, so UV is the PIN and “number matching” style UV is impossible. The trusted-display flavor (guides/display.md) adds a screen for on-device PIN entry and per-signature relying-party approval, but still no biometric UV.
Operational
- The flash log heals lazily: deleting/superseding a record (e.g. enabling the soft-lock) leaves the old record in the log until compaction naturally overwrites it, so most at-rest guarantees harden over time rather than instantly. (On a provisioned device the superseded copy is sealed to the fused root.) The one record that is not left to lazy healing is the pre-OTP seed superseded by the OTP-burn migration. It is sealed under the chip-serial-only root, so the first boot after provisioning scrubs it eagerly with a one-shot full-GC-lap compaction.
- The board is the security boundary: anyone with the device and your PIN is you. Same as every security key.
unsafe audit
The firmware is no_std Rust. Safety of the parsers and applet logic is the
core defensive property, so every unsafe is enumerated here: its
justification, why a safe alternative does not work, and how the risk is
contained. Adding a new unsafe requires updating this page. (Safe Rust rules
out memory-corruption bugs in this code. It is not a security audit; see the
threat model.)
Runtime sites: 15. Eight in the firmware proper (main.rs + presence.rs):
the interrupt-handler pair (2), the Send impl, the heap init, and the four
GPIO-pin steals (the presence button, the LED power-enable rail, the nuisance
USR LED, and the display build’s wake button). Two for the per-core prime sieves,
three in the RSA assembly FFI, two in the standalone flash-wipe tool.
flowchart TB
    subgraph fw["firmware/src/main.rs + firmware/src/presence.rs"]
      a["interrupt executor (×2)"]
      b["Send for SendUsb"]
      c["heap init"]
      d["GPIO pin steal ×4 (presence, LED power, USR LED, display wake)"]
    end
    subgraph kg["firmware/src/core1.rs"]
      e["per-core prime sieves (×2)"]
    end
    subgraph asm["rsk-rsa-asm"]
      f["modexp / sign_crt / modexp_pub FFI (×3)"]
    end
    subgraph wipe["rsk-wipe"]
      g["raw flash erase/program (×2)"]
    end
The unsafe lives only in plumbing. None of it is in a parser, applet, crypto
wrapper, or the filesystem.
Firmware (firmware/src/main.rs, firmware/src/presence.rs)
1–2. The high-priority interrupt executor
#![allow(unused)]
fn main() {
#[interrupt]
unsafe fn SWI_IRQ_1() {
    unsafe { EXECUTOR_HIGH.on_interrupt() }
}
}
USB and the transports run on an embassy InterruptExecutor so they preempt
long synchronous work (RSA keygen, flash GC) and keep the bus alive. The
handler itself is unsafe fn (hardware interrupt ABI). The on_interrupt()
contract (call only from the interrupt the executor was started on) is upheld
by construction: EXECUTOR_HIGH.start(SWI_IRQ_1) is the only starter and this
is the only caller.
Safe alternative: none; this is embassy’s documented pattern for a second
executor.
Containment: two lines, no data touched.
3. unsafe impl Send for SendUsb
embassy_usb::UsbDevice is !Send only because it holds a list of
&mut dyn Handler control-request handlers. Our only stateful handler is a
zero-sized type whose state is Sync (critical-section-guarded statics). The
device is moved into exactly one task on the interrupt executor and never
touched from anywhere else: exclusive ownership after the move.
Safe alternative: none while the USB device must live on the interrupt
executor and embassy keeps the trait object !Send.
Containment: the wrapper is private, constructed once, and the invariant
(single task, single executor) is structural.
4. Heap initialization
#![allow(unused)]
fn main() {
unsafe { HEAP.init(core::ptr::addr_of_mut!(HEAP_MEM) as usize, HEAP_SIZE) }
}
A 64 KiB heap exists solely for the rsa crate’s big integers (the only
allocating dependency). init’s contract (call once, with exclusive access
to the region) is met: it runs once at the top of main, on a dedicated
static buffer used by nothing else.
Safe alternative: none; every embedded allocator initializes this way.
Containment: one call, before any allocation can happen.
5–8. GPIO pin type-erasure (presence button, LED power rail, USR-LED-off, display wake, ×4)
#![allow(unused)]
fn main() {
let any = unsafe { AnyPin::steal(pin) };
}
Four build-configurable GPIOs are chosen by number at build time rather than as
a concrete PIN_n type, so each must be converted to embassy’s type-erased
AnyPin: the optional PRESENCE_PIN=<gpio> presence button
(ButtonPresence::new_gpio, presence.rs), the optional LED_POWER_PIN
enable pin driven high to power a gated LED rail (the LED block in main.rs),
the optional USR_LED_PIN driven to a nuisance onboard LED’s OFF level and held
(the boot block in main.rs), and — display builds only — the optional
WAKE_PIN button that wakes the panel from display sleep (the panel block in
main.rs). AnyPin::steal is unsafe because the caller must
guarantee unique ownership of that hardware pin — a match over p.PIN_0..=PIN_29
(as the LED data pin uses) is impossible here, since it would double-move the
peripheral set the LED block already claims.
Safe alternative: none for a runtime/number-selected GPIO; the safe
constructors require a statically known pin type.
Containment: each is gated by pin-range validation and the single-owner
invariant from main — none of the presence pin, the LED-power pin, the
USR-LED pin, nor the wake pin is ever handed to another driver, and compile-time
assert!s reject a
build that collides LED_POWER_PIN or USR_LED_PIN with the LED data pin or a GPIO
PRESENCE_PIN (and refuse USR_LED_PIN outright on a display build, whose panel
owns those pads) or a WAKE_PIN in the LCD/touch range (10..=18),
as an LED/presence collision already panics at boot.
Firmware dual-core keygen (firmware/src/core1.rs)
9–10. The per-core prime sieves
#![allow(unused)]
fn main() {
static mut CORE0_SIEVE: IncrementalSieve = IncrementalSieve::new();
static mut CORE1_SIEVE: IncrementalSieve = IncrementalSieve::new();
// …
let sieve = unsafe { &mut *core::ptr::addr_of_mut!(CORE1_SIEVE) }; // core1
let sieve = unsafe { &mut *core::ptr::addr_of_mut!(CORE0_SIEVE) }; // core0
}
The dual-core keygen runs one running small-prime sieve per core (each ~5 KiB
of residues, too large to live on core1’s stack beside the Baillie-PSW
bignum frames, so they are static). Each is single-core-exclusive:
CORE0_SIEVE is taken &mut only inside run_rsa_search (core0),
CORE1_SIEVE only inside search (core1), and the two cores never touch the
same sieve. So the &mut never aliases and there is no cross-core race.
Each keygen calls scrub() through the reference before use, forcing a fresh
window and wiping any prime left from the previous job.
Safe alternative: none that is free. A Mutex/critical-section cell would
add a lock on a provably-uncontended access, and the sieve is reused across
jobs so it cannot be a stack local. (Edition-2024 forbids implicit &mut to a
static mut, hence the explicit addr_of_mut!.)
Containment: two call sites, one per core; the partition (which core touches
which sieve) is structural, and the data is non-secret (small-prime residues of
a candidate, scrubbed at the top of every keygen). A wrong residue can only let
a composite through to the strong-MR/Lucas test, which still rejects it.
RSA assembly FFI (crates/rsk-rsa-asm/src/lib.rs)
11–13. The modexp / CRT-sign calls
On-card RSA key generation needs hundreds of modular exponentiations over
1024–2048-bit candidates. The pure-Rust path was ~7× too slow on the
Cortex-M33 (minutes per key, CCID timeouts). The crate wraps the vendored
C+ARM-assembly routines behind three unsafe FFI calls — modexp_priv
(keygen), sign_crt (the CRT private-key operation) and modexp_pub (the
public-exponent side of blinding and the fault check) — each with fully owned,
length-checked buffers on both sides.
Safe alternative: tried (num-bigint). Functionally correct, unusably slow.
Containment: both ends fail closed. Key generation is KAT-gated — a power-on
known-answer self-test must pass or it refuses to run — and every signature is
Bellcore-fault-checked (out^e == base) by the caller, so a miscompiled or
corrupt routine cannot emit one. Inputs/outputs are fixed-size stack buffers
zeroized after use. On the host the crate substitutes a pure-Rust fallback, so
all host tests exercise the same API safely.
Flash wiper (rsk-wipe/src/main.rs)
14–15. Raw flash erase/program in a critical section
The wiper’s entire job is to erase the flash the firmware lives on, from a
RAM-resident image. It calls the ROM flash-erase/program routines inside
critical_section::with(|_| unsafe { ... }): interrupts off, XIP disabled,
nothing else running.
Safe alternative: none; erasing the chip out from under yourself is
inherently unsafe and is the tool’s purpose.
Containment: rsk-wipe is a separate opt-in UF2 you flash deliberately; it
never ships inside the firmware.
Build-time (not runtime)
crates/rsk-rsa-asm/build.rs:unsafe { env::set_var(...) }forces the ARM cross-compiler for the vendored C. Build scripts are single-threaded at that point (the call is host-side, never in the image).- Edition-2024 declarations:
#[unsafe(link_section = ".start_block")]on the two bootrom image-definition statics andunsafe extern "C"on the linker-symbol/FFI declaration blocks. These mark declarations the compiler cannot check. The symbols are addresses read viaaddr_of!, never dereferenced as data.
What is not here
No unsafe in any parser, applet, crypto wrapper, or the flash filesystem.
The attacker-facing surface is entirely safe Rust, and cargo clippy -D warnings plus the fuzz targets (testing.md) keep it that way.
Constant-time / timing side-channel audit
This is a source-level constant-time and timing side-channel audit of the
RS-Key firmware (Rust, no_std, RP2350 / Cortex-M33). Its scope is every
secret-dependent comparison, branch, memory access, and private-key arithmetic
operation that an attacker holding the device can probe over USB (CCID /
ISO-7816 APDUs and CTAPHID / CTAP2): PIN/PUK/password verifiers, the FIDO
pinUvAuthToken MAC, OATH and OTP access codes, RSA private operations, and the
hand-written rsk-rsa-asm keygen primitives.
What this is and isn’t. This is a source/disassembly audit: it establishes that the generated machine code has no secret-dependent branch / early-exit / index on the audited paths. It is not a measured timing study and does not replace an instrumented hardware harness (TVLA / Welch t-test). See Coverage & limits.
Summary
42 candidate sites were examined. 3 were real findings, all fixed (no high/critical). The core authentication surface is sound. The project’s hand-rolled constant-time comparison is genuinely constant-time as compiled for the production target. The PIN/MAC/verifier paths compare one-way derived verifiers, not raw secrets. The defects were concentrated in two places the canonical helper did not reach: an unblinded RSA private-exponent exponentiation on an OpenPGP fallback path, and two raw short-circuiting comparisons of the OTP slot access code with no rate limit.
Methodology
Six analysis lenses were applied across the workspace. Each candidate was then
put through adversarial verification (default-to-false; a finding survives
only if a concrete secret → observable path is demonstrated at exact
file:line with the exploitation model stated), and a completeness critic
pass caught sites a single lens would miss. Several constant-time refutations
were corroborated by disassembling the actual on-device LTO firmware ELF and
by standalone thumbv8m compiles at the production opt-level=s and at
opt-level=3.
- Hand-rolled constant-time comparator definitions.
- Secret-vs-attacker comparisons that bypass the comparator.
- Secret-dependent control flow / variable work between match and mismatch.
- Secret-indexed memory access / data-dependent arithmetic.
- Crypto-primitive usage (are the CT-by-design RustCrypto primitives wrapped non-CT? is the hand-written modexp safe?).
- Status-word / error-path / response-latency oracles.
Findings (fixed)
| Severity | Location | Issue | Fix |
|---|---|---|---|
| Medium | crates/rsk-openpgp/src/keys.rs (rsa_raw) | Unblinded RSA private-exponent modexp. rsa_sign fell through to a raw m^d mod n for any input that is not a recognized DigestInfo or standard-length hash (reachable via PSO:CDS and INTERNAL AUTHENTICATE). Unlike the mainline sign/decipher paths, this fallback applied no blinding. A Marvin-class private-key timing path the documented residual did not cover. | The raw operation is now base-blinded (m·rᵉ)ᵈ·r⁻¹ mod n with a fresh random r, so the variable-time exponentiation runs on a base unrelated to caller input. A unit test pins rsa_raw == m^d mod n and proves the result is independent of the blinding factor. |
| Medium | crates/rsk-otp/src/lib.rs (cmd_configure) | Non-constant-time compare of the 6-byte OTP slot access code via slice !=, a position-of-first-mismatch leak. Reachable over CCID and HID with no PIN gate and no retry counter, so the leak collapses brute force from ~2⁴⁸ to ~6·256 probes. The access code authorizes overwriting a slot’s key material. | Replaced with the constant-time rsk_crypto::ct_eq. |
| Medium | crates/rsk-otp/src/lib.rs (cmd_update) | Second, byte-identical instance of the same non-CT access-code compare on the slot-update path. | Same fix. |
Constant-time confirmed
The assurance result. Sites checked and found correct:
- The canonical comparator
rsk_crypto::ct_eqis constant-time. Public length-equality early-return, then a full-width OR-accumulate with no in-loop branch on the accumulator. Verified in the on-device LTO ELF: the inlined copies lower to a loop whose only branch is governed by the public length counter. The secret accumulator is reduced branchlessly. Reproduced from source atopt-level=sandopt-level=3. - PIN/PUK/password verifier compares are CT and structurally non-amplifiable. Every verifier site compares 32-byte HKDF/HMAC-derived verifiers, not raw secret bytes. Even a hypothetical position oracle would reveal avalanche-hash bytes, not PIN digits, and the “10ᵏ → k·10” counter-defeat does not apply.
- The
pinUvAuthTokenMAC verify, OATH access-code/HOTP verifies, and PIV mutual-auth all route through the constant-time comparator (PIV against a single-use per-session challenge, not the persistent management key). - The RSA sign/decipher mainline is blinded (verified through
rsa0.9.10’sblind/unblindaround the secret-exponent CRT modexp), and with the fix above, so is the raw fallback. - RustCrypto primitives are CT-by-library and not wrapped non-CT: k256, ed25519-dalek, x25519-dalek, ML-KEM/ML-DSA, and the HMAC/HKDF/SHA-2 KDF.
- Keygen primality primitives are not an attacker oracle: they operate on RNG-generated, single-use, never-disclosed candidates. Production keygen uses the branchless incremental sieve.
Defense-in-depth applied
The five hand-rolled comparators (one canonical plus four byte-identical
duplicates across the applet crates) were consolidated onto the single
rsk_crypto::ct_eq, and a core::hint::black_box barrier was added before its
final reduction. The comparator was already constant-time on the audited
toolchain. The barrier pins that property so a future LLVM/rustc cannot fold the
accumulate into an early-exit branch. It does not change the code generated
today.
Documented residuals
- RUSTSEC-2023-0071 “Marvin” timing channel in the
rsacrate, accepted as mitigated by per-operation base blinding on all private-key paths (the finding above closed the one path the blinding did not previously cover). See threat-model.md. rsk-rsa-asmkeygen modexp secret-indexed window lookup: a genuine secret-dependent memory-access pattern over bits of the generated prime, but it is keygen-only, one-shot, and not USB-timing-observable. On the cacheless Cortex-M33 there is no microarchitectural channel. Exploitable only via physical EM/power capture of a single keygen event, already out of scope (threat-model.md). Optional hardening: build the asm with a constant memory-access pattern.
Coverage & limits
Covered: all hand-rolled comparator definitions and call sites; every
PIN/PUK/password/MAC/verifier comparison across FIDO, PIV, OpenPGP, OATH; OTP
slot access-code compares; HOTP/TOTP; RSA private sign/decrypt/raw paths; the
rsk-rsa-asm C/asm modexp, sieve, and primality primitives; secret-indexed
lookups; and status-word/error-path oracles.
What a source/disassembly audit cannot prove:
- No measured timing distributions. This shows the code has no secret-dependent branch/early-exit/index. It cannot rule out a microarchitectural channel (e.g. XIP-flash stall variance, data-dependent multiplier latency). A definitive statement needs an instrumented timing harness on hardware with a statistical leakage test (TVLA / Welch t-test).
- Compiler stability is empirical, not contractual. The comparator is
constant-time under the audited toolchain. The
black_boxbarrier pins it, but the guarantee remains “verified on this build.” - Physical side channels (power/EM/fault) are explicitly out of scope and unverified here, including the keygen access pattern and any DPA on the secure-boot AES, both already noted in the threat model.
- Third-party crate internals (RustCrypto,
rsa/num-bigint-dig) were audited only at the usage boundary. Their own CT properties are inherited from upstream and the documented RUSTSEC residual.
Architecture
How the firmware is put together, for contributors and the curious. For what the design does and does not defend against, see the threat model.
The big picture
A composite USB device with three interfaces, seven smart-card applets and one storage layer. Day to day everything runs on one RP2350 core. The second wakes only to parallelize RSA keygen (below):
flowchart TD
    subgraph irq["Interrupt executor"]
      fido["FIDO HID<br/>(0xF1D0, CTAPHID)"]
      ccid["CCID<br/>(class 0x0B, APDU)"]
      kbd["Boot keyboard<br/>(OTP typing)"]
    end
    fido --> worker
    ccid --> worker
    kbd --> worker
    subgraph thread["Thread executor"]
      worker["worker task<br/>owns flash + TRNG"]
      worker --> applets["Applets<br/>FIDO2/U2F · OpenPGP · PIV · OATH<br/>OTP · mgmt · vendor + rescue"]
    end
    applets --> fs["flash KV store<br/>(rsk-fs over sequential-storage)"]
Two executors. USB and the transports live on a high-priority
InterruptExecutor. The applet dispatch lives on the low-priority thread
executor, in a single worker task that owns the flash and the TRNG outright.
Long synchronous work (on-card RSA generation, flash compaction, a touch
wait) blocks only the worker, while the interrupt executor keeps the bus
enumerated, streams CCID/CTAPHID keepalives, and animates the LED. No
mutexes: ownership does the synchronization.
Why (mostly) one core. The async executor provides the concurrency that
the upstream design used a second core and hand-rolled queues for. Core 1 is
kept out of the transport path and has exactly one job: during on-card RSA
generation both cores race the prime search. Independent random candidates,
each core with its own DRBG stream, feed one shared two-prime pool
(firmware/src/core1.rs). Measured, RSA-2048 generation drops from ~8.9 s to
~4.3 s mean (2.07×).
Three details make that work:
- The Fermat-filter modexp (C + asm) executes from SRAM. Two cores running it from XIP throttle each other on the shared flash cache (~40% per core, measured).
- The key returns the moment the pool completes; core1’s last candidate finishes in the background.
- A core1 that ever stops answering latches the engine into single-core mode
rather than stalling the worker (
INS 0x12on the vendor applet reads the engine’s counters and flags).
Outside keygen, core1 parks in WFE, and embassy-rp pauses it around every flash erase/program, so its XIP fetches never collide with flash writes.
Boot sequence
Getting to that runtime state has a strict order. The bootrom verifies the
signed image, then the firmware provisions and recovers all persistent state
(OTP keys, the KV store, the phy record, the TRNG, the seal migrations and the
one-shot at-rest scrub) before it asserts the USB pull-up. That ordering is
load-bearing: builder.build() starts host enumeration, and the task that
answers control transfers must be spawned with no blocking work in between, or
the host enumerates a mute device and times out. That is the “blink red / not
recognised until several replugs” report that motivated attaching to the bus
only after everything else is ready.

Crates
The workspace splits along a strict dependency gradient: the firmware binary
is thin glue over the applet crates, which build on a handful of host-tested
platform libraries. The per-crate detail is in the table. The shape is:

| Crate | Contents |
|---|---|
firmware | the only crate that touches the HAL: board bring-up, USB descriptors, executors, the worker, OTP fuse access, LED, BOOTSEL touch |
rsk-sdk | APDU parsing (cases 1–4, short + extended), BER-TLV, status words, the Applet trait + dispatcher |
rsk-fs | the flash filesystem: 16-bit file ids over two sequential-storage KV partitions (main + high-churn counters), ACLs, metadata records |
rsk-crypto | one wrapper over RustCrypto: hashes, HMAC/HKDF, AES-CBC/CFB/GCM, ChaCha20-Poly1305, PIN KDFs, HMAC-DRBG, ML-DSA-44/-65 (rsk-mldsa) / ML-KEM, base64url, CRC |
rsk-mldsa | stack-optimized ML-DSA (FIPS 204) for ML-DSA-44/-65: streams the matrix A on the fly (one polynomial resident, not the full k×l) so ML-DSA-65 fits the RP2350 stack where the by-value fips204 crate’s -65 overflowed it. no_std, no alloc, no unsafe; checked byte-for-byte vs NIST ACVP KATs, with Kani proofs over the reductions and rounding |
rsk-usb | the CTAPHID reassembler/framer and the CCID state machine, transport-agnostic and fully host-testable |
rsk-fido | FIDO2 (CTAP 2.1) + U2F: credentials, clientPIN (protocols 1+2), credManagement, extensions (hmac-secret, credProtect, credBlob, largeBlobs, minPinLength), enterprise attestation, seed backup + soft-lock vendor commands |
rsk-openpgp | OpenPGP card 3.4: DO model, PW1/RC/PW3, import/generate, PSO, AES PSO, certs — EC + RSA-2048/3072/4096 |
rsk-piv | PIV: 24 key slots + F9 attestation, management-key auth, generate/import/sign/ECDH, on-card X.509 via a hand-rolled backward DER writer |
rsk-oath | YKOATH protocol: TOTP/HOTP, touch-required accounts, access codes |
rsk-otp | Yubico OTP slots ×4: CCID command surface + the keyboard frame protocol and typed-ticket generation |
rsk-mgmt | the YubiKey management applet (DeviceInfo, interface toggles) served over both CCID and CTAPHID |
rsk-rescue | recovery/provisioning applet: identity, phy config record, flash info, secure-boot status, attestation key, reboot, the one OTP-lock write |
rsk-rsa-asm | vendored C/ARM-asm modular exponentiation behind one FFI fn (host build uses a pure-Rust fallback) |
rsk-led | the EF_LED_CONF codec for the status-LED config block, shared by the firmware and the rsk led host tool |
rsk-ui | the trusted-display UI model (operation prompts, untrusted relying-party-string sanitizing, Allow/Deny button geometry); compiled only into the display build |
Everything except firmware is hardware-agnostic and runs the full test
suite on the host (testing.md).
Flash layout

Two KV partitions at fixed offsets (firmware/memory.x): the main store, and
a small separate partition for the per-operation counters so their churn
never forces compaction of long-lived records. Files are 16-bit ids. Each
applet owns disjoint ranges (FIDO 0x10xx/0xCxxx/0xCFxx/0xD0xx, OpenPGP DO
mirrors, PIV 0xD1xx/0xD2xx, OTP slots 0xBBxx, phy/rescue 0xE0xx) and a
reset wipes exactly its own predicate, never a range shared with another
applet.
Key sealing at rest: kbase = HKDF(serial_hash, otp_master_key) keys
AES-CBC for the FIDO seed (tagged formats: plain vs OTP-rooted generation)
and AES-GCM for PIV keys. OpenPGP keys sit under the PIN-wrapped DEK chain.
When the OTP master key gets provisioned later in a device’s life, a boot
pass and lazy PIN-verify hooks migrate every sealed object to the new root
without losing data. Until that burn the root derives from on-chip state
alone, which an attacker with full flash and chip access could reconstruct.
threat-model.md covers what at-rest sealing does and does
not buy before provisioning.
One sealed object worth spelling out is the FIDO credential box. It doubles as
the opaque credential ID a relying party stores, so its size caps the reported
maxCredentialIdLength (748):

The 42-byte resident id carries a version byte at offset 8, a reserved
header byte outside the [10..42] HMAC chain, so it never changes the id’s
entropy. It is 1 (v2) for every resident credential created since RS-Key
0x0806: a v2 credential derives its signing key, hmac-secret and largeBlobKey
from this stable id, so an updateUserInformation reseal (which draws a
fresh box IV) no longer rotates them and the relying party’s stored public key
keeps verifying. Resident credentials from older firmware carry an implicit 0
(v1) and keep deriving from the box, so an already-provisioned device stays
compatible across the upgrade.
Capacity — why the flash is mostly empty
The KV store is 1.5 MB by default whatever the FLASH_SIZE, so a larger flash only
grows the code region, most of which no firmware writes (build.md). That
is deliberate. (A 2 MB board is the one exception: it shrinks the main partition via
KVMAIN to leave room for code — still far more than a key ever fills.) A security key’s maximum logical state is small and hard-capped:
MAX_RESIDENT_CREDENTIALS (256 passkeys), MAX_DYNAMIC_FILES (256 files across
all applets), MAX_OATH_CRED (255), plus a handful of OpenPGP/PIV slots. So a
fully provisioned device fills only a few hundred KB, well under the 1408 KB main
partition. Growing the store to “fill” a 16 MB board would buy nothing usable: it
lengthens the sequential-storage scan behind every cold boot and absent-key
probe (the present cache exists to dodge exactly that full-partition ~0.2 s cost),
and forces the logical caps (and the RAM/stack buffers sized to them) up for
capacity no one reaches. Empty flash here is headroom, not waste.
Device identity
USB VID/PID, product strings and the reported firmware version are
compile-time knobs (build.md). The default is RS-Key’s own
identity: VID:PID 0x1209:0x0001 (pid.codes), manufacturer “RS-Key”,
product “RS-Key Security Key” (the RSKey preset). An opt-in VIDPID=Yubikey5
preset builds the Yubico interop flavor (0x1050:0x0407, reader name “Yubico
YubiKey”) for the tools that auto-recognize the device purely by that reader
name. A flash-resident phy record can override VID/PID and the product
string at boot (the store mounts before the USB builder runs for exactly this
reason). FIDO tools find the device by HID usage page, CCID tools by the
reader name.
User presence
One presence button (BOOTSEL by default, or PRESENCE_PIN), shared by all
applets through a UserPresence trait the firmware implements once: FIDO
operations, OpenPGP UIF, PIV touch policies, OATH touch accounts, and OTP slot
typing (1–4 presses select the slot) all gate on it. The no-touch build
(--features no-touch) auto-confirms. For test rigs, not for daily use.
Provenance
RS-Key reimplements the applet behaviour, file layouts and protocol surface of pico-keys (AGPL, see NOTICE) in Rust, replacing the C HAL/runtime/transport stack with embassy and RustCrypto:
| was (C) | is (Rust) |
|---|---|
| pico-sdk runtime + TinyUSB | embassy-rp + embassy-usb |
| mbedTLS | RustCrypto (p256/p384/p521/k256, rsa, ed25519-dalek, …) |
| TinyCBOR | minicbor |
| bespoke wear-leveled flash writer | sequential-storage |
| core0/core1 + queues | one async executor pair; core1 = a keygen math engine only |
Where the two implementations deliberately differ (at-rest sealing, seed PIN-wrapping, OTP provisioning policy, several upstream bugs not carried over), the divergence is a documented design decision. See threat-model.md and the crate docs.
RS-Key host protocol reference
This document specifies the host-facing protocol of the RS-Key firmware: how a configuration/management tool talks to the device, what commands exist, the exact byte layout of each request and response, and what authenticates each one.
It exists so that third-party tooling (e.g. PicoForge) can configure and
manage RS-Key devices without reverse-engineering the firmware. The canonical,
runnable reference client is the rsk Python CLI. Every command
below is implemented there; file/line pointers are given throughout.
Audience & scope. This is a wire spec, not a tutorial. It documents the commands a host sends and the bytes it gets back. It does not cover the on-device storage format, the crypto internals, or the build system. Those live in architecture.md and the crate sources.
Licensing. RS-Key firmware is AGPL-3.0-only. This protocol description is published as part of the same repository; you are free to implement a client against it under any license. Interop implementations do not inherit AGPL by talking to the device.
Stability. The two transports and the standard applets (FIDO2, U2F, PIV, OATH, OTP, OpenPGP, Yubico Management) are stable. They follow public specs. The RS-Key-specific surface (Rescue applet, Vendor/LED applet, CTAPHID
authenticatorVendor 0x41) is versioned bybcdDeviceand may grow; new tags/subcommands are added, existing ones are not silently repurposed. Probe the version handshakes (§3, §6.1) and treat unknown tags as skippable.
1. Transports
RS-Key is a USB composite device exposing two host-reachable transports:
| Transport | Carries | Host API |
|---|---|---|
CTAPHID (FIDO HID, usage page 0xF1D0) | CTAP1/U2F, CTAP2, and the authenticatorVendor 0x41 vendor command | hidapi |
| CCID (PC/SC smart-card) | All ISO-7816 applets, selected by AID | pyscard / PC/SC |
A keyboard (HID) interface also exists for Yubico OTP. On the default build it
also carries the ykman OTP-HID admin writes (SET_DEVICE_INFO 0x15,
DEVICE_CONFIG 0x11, SCAN_MAP 0x12, NDEF 0x08/0x09) — ungated, like a stock
YubiKey; strict-config refuses them. SET_DEVICE_INFO shares the same
EF_DEV_CONF DeviceInfo store as the CCID WRITE CONFIG (§6); the rest are inert
on this USB-only board except SCAN_MAP (it remaps typed OTP output). Each admin
write advances the status frame’s program-sequence byte — that increment is
how ykman/yubikit confirm it (a write that left the sequence unchanged reports
CommandRejectedError: No data, which is what blocked ykman config usb over
this transport before). The frame codec itself is otherwise out of scope here.
The interfaces are presented in the stock YubiKey order — keyboard/OTP, FIDO
HID, CCID — because some hosts address the OTP interface by index instead of
by descriptor: the libusb backend ykpers/ykcore ships (KeePassXC,
ykchalresp, pam_yubico) claims interface 0 and sends the OTP frame reports
there whatever the descriptors say. An interface switched off in
ENABLED_USB_ITF (§7) is omitted and the rest keep that relative order, so a
host that assumes a fixed index only holds where the same interface set is
enabled.
For the same reason the OTP frame protocol answers a HID feature GET/SET_REPORT
on both HID interfaces — the keyboard one and the FIDO one — which is what a
5.7.4 YubiKey does. The FIDO report descriptor stays the CTAP-exact one and
declares no feature report (again as on a YubiKey), so a host reading descriptors
sees no change; the interrupt endpoints carry CTAPHID and nothing else. Reaching
the frames there needs a deliberate feature transfer — measured working both from
raw libusb and through macOS IOKit. Both interfaces marshal one frame state
machine, so the two are alternative doors to the same OTP application, not
independent sessions. Disabling the keyboard interface in ENABLED_USB_ITF
removes the protocol from both.
A slot programmed to require a touch answers its challenge only after a button
press, and reports the wait in the status byte (0x20) meanwhile. Two things end
that wait early, both matching a YubiKey: the host’s dummy write — a report
whose sequence byte is out of range, 0x8f, which also resets the read mode after
a response — and any new frame, which supersedes the pending challenge. A host
that does neither waits out the touch timeout (§7 PRESENCE_TIMEOUT), during
which the transport reports only that it is waiting.
1.1 CCID APDU framing
Standard ISO-7816 short APDUs. SELECT is always 00 A4 04 00 Lc <AID> 00; the
selected applet then receives CLA INS P1 P2 [Lc <data>] [Le]. There is no ISO
master file, so the master-file SELECT (00 A4 00 0C …, GnuPG’s 3F00 probe)
answers 6D00 like a YubiKey. The power-on ATR is T=1, its historical bytes labelled
YubiKey on a Yubico-identity build and RS-Key on the default build (identical
card capabilities). The reference transport is tools/rsk/ccid.py:
def select(conn, aid):
    return transmit(conn, [0x00, 0xA4, 0x04, 0x00, len(aid)] + list(aid) + [0x00])

A success body longer than the request’s Le (including a Case-3 command that
carries no Le at all, capped at 256) is returned with ISO-7816 response
chaining: the first chunk ships with status 61 XX (XX = further bytes
available, 00 = 256+), and the host issues GET RESPONSE (00 C0 00 00 <Le>)
until 9000. Any GET DATA reading a certificate object over 256 bytes chains
this way, so a host that sends GET DATA without an Le must still follow 61xx.
OATH LIST (0xA1) and CALCULATE ALL (0xA4) responses that outgrow one
frame chain the YubiKey-OATH way instead: 61 XX followed by SEND REMAINING
(00 A5 00 00) rather than GET RESPONSE, matching what ykman / Yubico
Authenticator send. A host that stops at the first frame still sees a valid
(shorter) list.
1.2 CTAPHID framing
64-byte HID reports. Init frame: CID(4) | CMD(1) | BCNT_HI | BCNT_LO | data[:57];
continuation frames: CID(4) | SEQ(1) | data[:59]. CTAPHID_INIT = 0x86,
CTAPHID_CBOR = 0x90, CTAPHID_KEEPALIVE = 0xBB. A CTAP2 message is
command_byte | CBOR_payload. Reference: tools/rsk/ctaphid.py.
Take the channel id from the CTAPHID_INIT response and use that one: every INIT on
the broadcast CID allocates a fresh id, so an id hardcoded or cached across sessions
will not be yours. CTAPHID_LOCK is honoured for the 1–10 seconds it asks for, and
other channels get ERR_CHANNEL_BUSY meanwhile.

1.3 CCID secure PIN entry (pinpad) — display builds only
A trusted-display build advertises bPINSupport = 0x01 (VERIFY) in its CCID class
descriptor (body byte 50 / full descriptor byte 52), so a host driver treats it as
a pinpad reader and sends PC_to_RDR_Secure (0x69) instead of a plaintext
VERIFY; the PIN is then typed on the device’s own screen. A standard (no-screen)
build leaves bPINSupport = 0x00 and rejects 0x69. No control transfer is
involved. The host CCID driver reads bPINSupport straight from the descriptor;
the device only has to handle 0x69. The validated trigger is GnuPG’s internal
CCID driver (keys solely off bPINSupport); PC/SC + libccid and macOS
CryptoTokenKit also expose pinpad from the descriptor, but their FEATURE_VERIFY_PIN_DIRECT
coverage varies, so treat the GnuPG-internal path as the reliable one.
Scope (honest): this keeps the PIN off the wire only when the host uses
pinpad mode. The device still accepts a normal plaintext XfrBlock VERIFY
(00 20 P1 P2 Lc <PIN>), so a host that chooses to send one puts the PIN on the
wire. Standard pinpad enables on-device entry, it does not enforce it (a
device-enforced mode is a planned opt-in follow-up).
Whatever the host driver, the bytes on the wire follow the CCID structure
below, not the PC/SC v2 Part 10 IOCTL structure (the driver drops that structure’s
bTimeOut2 and ulDataLength when it builds the 0x69), so the VERIFY template is
always at abData offset 15. The 0x69 payload is the CCID abPINDataStructure for
VERIFY:
bPINOperation(1)=0x00 verify | bTimeOut(1) | bmFormatString(1) | bmPINBlockString(1) |
bmPINLengthFormat(1) | wPINMaxExtraDigit(2 LE) | bEntryValidationCondition(1) |
bNumberMessage(1) | wLangId(2 LE) | bMsgIndex(1) | bTeoPrologue(3) |
abPINApdu = CLA INS=0x20 P1 P2 …   (the VERIFY template, at offset 15)
The device reads the template’s P2 (OpenPGP 0x81/0x82/0x83 = PW1-sign /
PW1-other / PW3-admin; PIV 0x80 = application PIN), collects the PIN on the pad,
builds the real VERIFY APDU (00 20 P1 P2 Lc <ASCII PIN>; PIV pads with 0xFF to
8 bytes), runs it through the selected applet, and replies with a normal
RDR_to_PC_DataBlock (0x80) carrying only the status word:
- success →
90 00,bStatus = 0,bError = 0. - wrong PIN → the card’s real
63 Cx(tries left) /69 83(blocked),bStatus = 0,bError = 0(the command succeeded; the card said wrong). - user cancel →
bStatus = 0x40(failed),bError = 0xEF→SCARD_W_CANCELLED_BY_USER. - pad timeout →
bStatus = 0x40,bError = 0xF0→SCARD_E_TIMEOUT.
The transport streams T=1 time-extensions for the whole on-screen entry, so the host
transaction does not time out. The device ignores the host’s format/offset bits and
builds the APDU from its own buffers, so a crafted 0x69 can’t index out of bounds.
Trigger from GnuPG: gpg-connect-agent "scd checkpin OPENPGP.1" /bye (internal CCID,
no host config). PIN parse + APDU assembly: crates/rsk-usb/src/secure_pin.rs.
2. Status words & error codes
2.1 CCID status words (ISO-7816 SW1 SW2)
Source: crates/rsk-sdk/src/sw.rs.
| SW | Name | Meaning |
|---|---|---|
9000 | OK | success |
6400 | EXEC_ERROR | execution error (internal) |
6581 | MEMORY_FAILURE | flash write failed |
6700 | WRONG_LENGTH | bad Lc/Le for this command |
6982 | SECURITY_STATUS_NOT_SATISFIED | auth/precondition missing |
6984 | DATA_INVALID | malformed payload (e.g. bad guard magic) |
6985 | CONDITIONS_NOT_SATISFIED | state precondition unmet (e.g. RTC unset) |
6A80 | INCORRECT_PARAMS | bad data field |
6A86 | INCORRECT_P1P2 | unsupported P1/P2 |
6D00 | INS_NOT_SUPPORTED | unknown INS for this applet |
6E00 | CLA_NOT_SUPPORTED | wrong CLA for this applet |
2.2 CTAP2 errors
Standard CTAP2 status bytes (0x00 = success), returned by CTAP2 and by the
0x41 vendor command. Source: crates/rsk-fido/src/error.rs. The ones the vendor
surface returns:
| Byte | Name | Meaning here |
|---|---|---|
0x00 | OK | success |
0x02 | INVALID_PARAMETER | malformed param / bad key / wrong blob length |
0x14 | MISSING_PARAMETER | required field absent (e.g. blob/pinUvAuthParam) |
0x27 | OPERATION_DENIED | touch declined / timed out |
0x30 | NOT_ALLOWED | precondition unmet (no MSE channel, sealed, soft-locked, or an authenticatorReset outside the §5.1 power-up window) |
0x33 | PIN_AUTH_INVALID | pinUvAuthParam MAC or acfg permission wrong |
0x36 | PUAT_REQUIRED | a PIN is set but no pinUvAuthToken was supplied |
0x39 | REQUEST_TOO_LARGE | subCommandParams over the limit |
0x3D | INTEGRITY_FAILURE | blob failed authenticated decryption |
3. Device identity & discovery
3.1 USB identity
The build picks a VID/PID preset (firmware/build.rs):
| Preset | VID:PID | Manufacturer / Product strings | Notes |
|---|---|---|---|
RSKey (default) | 1209:0001 | RS-Key / RS-Key Security Key | pid.codes identity; not a masquerade |
Yubikey5 (opt-in interop) | 1050:0407 | Yubico / YubiKey RSK OTP+FIDO+CCID | so ykman/Yubico Authenticator derive PID from the PC/SC reader name |
| others | NitroHSM, NitroFIDO2, GnuPG, Pico, Dev | — | local interop only |
The VID/PID, the product string and the manufacturer string can all be overridden
at runtime via the phy record (§7), taking effect at the next boot: VID/PID
(tag 0x00), product (tag 0x09) and manufacturer (tag 0x0F). If a runtime
product looks like a YubiKey (yubikey, any case) but omits the smartcard CCID
token, the firmware appends OTP+FIDO+CCID before enumerating — a token-less
Yubico YubiKey reader name otherwise crashes ykman / Yubico Authenticator on
Windows (_pid_from_name → PID.of → KeyError('YK4_'), which aborts the whole
PC/SC scan). Source: normalize_usb_product in phy.rs.
Each string is resolved in precedence order: an explicit phy tag (0x0F /
0x09) wins; otherwise the effective VID picks a default — a Yubico VID
(0x1050) yields Yubico / YubiKey RSK OTP+FIDO+CCID plus the Yubico OpenPGP AID
vendor, so setting only the Yubico VID/PID makes the whole identity “just work” for
ykman / Yubico Authenticator; otherwise the build const. The OpenPGP AID
vendor id stays keyed on the effective VID (a registered number, not a free
string). ⚠️ so a phy-repointed default key can present a full Yubico identity at
runtime; the USB/smartcard identity is cosmetic and host-configurable, never a
security or anti-counterfeiting control (see docs/threat-model.md).
Recognizing an RS-Key by PC/SC reader name: the reader name contains RS-Key
(default build) or RSK (Yubico-interop build). Neither appears in a genuine
YubiKey’s reader name. Reference: RSK_READER_TOKENS in
tools/rsk/ccid.py.
3.2 Firmware version & bcdDevice
| Field | Value | Where |
|---|---|---|
| firmwareVersion | 5.7.4 → 0x00050704 | CTAP getInfo 0x0E; Management/OTP DeviceInfo TAG_VERSION; Management SELECT ("5.7.4" ASCII) |
bcdDevice | 0x0780 (build counter, increments per firmware change) | USB device descriptor (firmware/src/main.rs device_release) |
| AAGUID | 2479c7bf-6b30-5683-9ec8-0e8171a918b7 | CTAP getInfo 0x03; one value across every VID/PID flavor of a build, overridable at build time with AAGUID=<uuid> |
The firmware version is overridable at build time (FW_VERSION=X.Y.Z); 5.7.4
mirrors a current YubiKey 5 so Yubico tooling is satisfied under the Yubico VID.
4. AID registry
SELECT an applet with 00 A4 04 00 Lc <AID> 00.
| Applet | AID | Spec status | Config-relevant? |
|---|---|---|---|
| FIDO2 | A0 00 00 06 47 2F 00 01 | Standard (CTAP2) | identity only |
| FIDO2 (backup id) | B0 00 00 06 47 2F 00 01 | RS-Key | — |
| U2F | A0 00 00 05 27 10 02 | Standard (CTAP1/U2F) | — |
| Management | A0 00 00 05 27 47 11 17 | Yubico-compatible | yes — §6 |
| OATH | A0 00 00 05 27 21 01 | Yubico OATH | data only |
| OTP | A0 00 00 05 27 20 01 | Yubico OTP | data only |
| PIV | A0 00 00 03 08 | NIST SP 800-73 | data only |
| OpenPGP | D2 76 00 01 24 01 | OpenPGP card 3.x | data only |
| Rescue | A0 58 3F C1 9B 7E 4F 21 | RS-Key-specific | yes — §7 |
| Vendor / LED | F0 00 00 00 01 | RS-Key-specific | yes — §8 |
Sources: crates/rsk-fido/src/consts.rs,
crates/rsk-mgmt,
crates/rsk-oath,
crates/rsk-otp,
crates/rsk-piv,
crates/rsk-openpgp/src/consts.rs,
crates/rsk-rescue,
firmware/src/vendor.rs.
5. Standard interfaces (pointers, not re-specified)
These follow public specifications; a tool that already speaks YubiKey/FIDO2 needs only the identifiers above. RS-Key implements:
- FIDO2 / CTAP 2.1: getInfo, makeCredential, getAssertion, getNextAssertion,
clientPIN, reset, selection, credentialManagement, authenticatorConfig,
largeBlobs (writable without a
pinUvAuthParamuntil a PIN is set oralwaysUvis on, per §6.10.2).maxMsgSize=7609. Supported COSE algorithms: ES256-7, ES384-35, ES512-36, ES256K-47, EdDSA-8, ML-DSA-44-48, ML-DSA-65-49(both negotiable viapubKeyCredParams; advertised in getInfo only under theadvertise-pqcbuild). ML-DSA-87-50is recognised but unsupported: its response overrunsmaxMsgSize. (crates/rsk-fido/src/consts.rs.) - CTAP1 / U2F 1.1/1.2.
- PIV: NIST SP 800-73 (Yubico PIV extensions for metadata).
GET DATAfor the CHUID (5FC102) returns a synthesized default (non-federal FASC-N + a device-stable GUID =sha256(serial)[..16]) when the host has not written one, so the Windows minidriver can enumerate the card; a host-written CHUID overrides it. - OATH: Yubico OATH (TOTP/HOTP).
- OTP: Yubico OTP / HOTP keyboard + CCID.
- OpenPGP card 3.x.
The only RS-Key-specific bytes a config tool needs are §6 (Management config),
§7 (Rescue), §8 (Vendor/LED) and §9 (CTAPHID 0x41).
5.1 Where a standard command answers differently
Two places where a host that works against other authenticators sees a status byte it may not expect. Both are spec-permitted strictness, not extensions.
authenticatorReset has a power-up window. CTAP 2.1 §6.6 lets an
authenticator with no display refuse a reset that does not follow a fresh
power-up. RS-Key does: more than 10 s after the device attached, command
0x07 answers 0x30 CTAP2_ERR_NOT_ALLOWED before the touch prompt, so a host
waiting on a press gets an immediate refusal instead. Four properties a host
implementation has to plan for:
- The origin is the USB attach, not power-on. Boot spends seconds before the bus pull-up goes up (TRNG seeding, seal migrations, the one-shot at-rest hardening lap), and none of it is time a host could have used.
- A warm reset closes the window, it does not reopen one. The vendor REBOOT
(§8
INS 1FP1=0), its rescue twin, and the auto-reboot after a phyCONFIG_WRITEare all host-requestable without a credential, so a window a host can restart at will would be no window at all. Only a real power cycle opens one. - Trusted-display builds are exempt. Their prompt names the operation on screen, which is what the window substitutes for; a reset is accepted at any time there and still needs the on-screen confirmation.
- The touch is unchanged. Inside the window the reset still requires user
presence, and a decline or timeout answers
0x27 OPERATION_DENIED.
Practically: prompt the user to replug, then send the reset. rsk offboard does
exactly that — it sends the reset, and only on 0x30 prints the unplug/replug
prompt and retries in the new window (tools/rsk/offboard.py), so it stays
correct against a display build and against pre-0x0854 firmware, which both
accept the first attempt.
U2F AUTHENTICATE rejects a reserved P1. U2F Raw Message Formats §7.2 assigns
three control bytes; RS-Key accepts exactly those and answers 6A86
(INCORRECT_P1P2) to anything else, before parsing the request body.
| P1 | Name | Behaviour |
|---|---|---|
03 | enforce-user-presence-and-sign | touch required; TUP flag set in the response |
07 | check-only | valid handle → 6985, unknown handle → 6A80; never touches |
08 | don’t-enforce-user-presence-and-sign | signs with no touch, TUP flag clear; rejected with 6A86 under --features strict-up, which promises a touch on every assertion |
6. Management applet (Yubico-compatible) — applet enable/disable
AID A0 00 00 05 27 47 11 17. CLA 00. This is what ykman / Yubico
Authenticator SELECT first to identify the key and to read/write which
applications are enabled. Source:
crates/rsk-mgmt/src/lib.rs.
SELECT returns the firmware version as an ASCII string, e.g. 35 2E 37 2E 34
("5.7.4").
| INS | Name | Request | Response |
|---|---|---|---|
1D | READ CONFIG | — | DeviceInfo TLV (see below) |
1C | WRITE CONFIG | data[0] = inner length n, then n bytes of enabled-apps TLV (n ≤ 64) | — (ungated by default; presence-gated under strict-config) |
1E / 1F | RESET / DEVICE RESET | — | device-wide factory reset (presence-gated) on the default build; 6D00 under strict-config |
6.1 DeviceInfo TLV (READ CONFIG 0x1D)
Response = one leading overall-length byte, then concatenated TAG LEN VALUE:
| Tag | Name | Len | Value |
|---|---|---|---|
01 | USB_SUPPORTED | 2 | capability bitmask (BE16) of applications the firmware implements |
02 | SERIAL | 4 | 8-digit serial (chip-id[0..4], MSB masked & 0x03) |
04 | FORM_FACTOR | 1 | 01 = USB-A keychain |
05 | VERSION | 3 | major, minor, patch (05 07 04) |
03 | USB_ENABLED | 2 | currently-enabled capability bitmask (BE16) |
08 | DEVICE_FLAGS | 1 | 80 = eject |
0A | CONFIG_LOCK | 1 | 00 = unlocked |
When no host config has been written, the device returns the defaults:
USB_ENABLED = all-supported, DEVICE_FLAGS = 80, CONFIG_LOCK = 00. Once
WRITE CONFIG has stored a blob, READ CONFIG echoes that blob verbatim after the
fixed USB_SUPPORTED/SERIAL/FORM_FACTOR/VERSION prefix.
Capability bits (USB_SUPPORTED / USB_ENABLED):
| Bit | Application |
|---|---|
0x0001 | OTP |
0x0002 | U2F |
0x0008 | OpenPGP |
0x0010 | PIV |
0x0020 | OATH |
0x0200 | FIDO2 |
USB_SUPPORTED is fixed at 0x023B (all six). To enable/disable applications,
WRITE CONFIG a TAG_USB_ENABLED(03) TLV with the desired mask, e.g. enable only
FIDO2+U2F → inner blob 03 02 02 02, full APDU
00 1C 00 00 05 04 03 02 02 02.
USB_ENABLED is enforced, not merely reported: a cleared bit makes that
application’s applet stop answering — PIV/OpenPGP/OATH/OTP return 6A82 on
CCID SELECT, FIDO2 (CBOR) and U2F (MSG) are refused over CTAPHID, and the OTP
keyboard goes inert. The change is live (next command; no replug). Its ceiling
is USB_SUPPORTED, so a wider host-written mask is clamped. The re-enable path
is never gated — the Management applet (§6), the FIDO vendor CONFIG_WRITE
(§9) and the OTP-HID identify/config slots stay reachable — so a disable is
always reversible. Building --features strict-config gates the write on
operator presence; the enforcement of a persisted mask is the same on both
builds.
WRITE CONFIG refuses an inner blob > 64 bytes (
6A80) so a malformed config can’t wedge later reads. On the default build the write is ungated (full ykman parity — any USB host can rewrite the reported config, matching a stock YubiKey with no config-lock code). Building--features strict-configrestores an on-device user-presence confirmation (Approve on the trusted-display build, a BOOTSEL press otherwise), so a hostile host cannot rewrite it unattended (declined/timed-out →6985). RESET (1E/1F) is a device-wide factory reset on the default build — presence-gated even there, since an ungated one-APDU wipe would be a footgun — and6D00understrict-config. Either way the identity is cosmetic, never an authenticity signal (see docs/threat-model.md §1/§3).
7. Rescue applet (RS-Key configuration conduit)
AID A0 58 3F C1 9B 7E 4F 21. CLA 80 for every INS below (SELECT itself is
the standard 00 A4 …). This applet carries the phy device-config record
(USB identity + LED hardware), RTC, flash/secure-boot status, the device
attestation key, and the one-way OTP fuses. Source:
crates/rsk-rescue/src/lib.rs.
SELECT response (identity): MCU(1) | PRODUCT(1) | SDK_MAJOR(1) | SDK_MINOR(1) | serial(8)
= 01 02 08 06 <8-byte chip serial>. (MCU 1 = RP2350, PRODUCT 2 = FIDO,
SDK 8.6 is the applet SDK version, distinct from the 5.7.4 firmware version.)
Use this as the capability/version handshake: a non-9000 here means the
firmware predates the rescue applet.
| INS | P1 | P2 | Request data | Response | Purpose |
|---|---|---|---|---|---|
10 | 01 | 00 | 32-byte SHA-256 digest | 64-byte secp256k1 signature | KEYDEV: sign a digest with the device attestation key |
10 | 02 | 00 | — | 65-byte uncompressed pubkey (04 ‖ X ‖ Y) | KEYDEV: read the device attestation pubkey |
10 | 03 | 00 | X.509 DER cert | — | KEYDEV: store the device end-entity cert |
1C | 01 | 00 | phy TLV blob (§7.1) | — | WRITE phy record |
1C | 02 | 01 | YYYY(BE2) Mon Day Wday Hour Min Sec (8 B) | — | SET RTC (civil; Wday ignored) |
1C | 02 | 02 | epoch seconds (BE4) | — | SET RTC (Unix) |
1E | 01 | 00 | — | phy TLV blob (§7.1) | READ phy record |
1E | 02 | 00 | — | free ‖ used ‖ kv_total ‖ nfiles ‖ flash_size (5×BE4 = 20 B) | READ flash usage |
1E | 03 | 00 | — | enabled(1) ‖ locked(1) ‖ bootkey_slot(1) (FF = none) | READ secure-boot status |
1E | 04 | 01 | — | YYYY(BE2) Mon Day Wday Hour Min Sec (8 B) | READ RTC (civil); 6985 if unset |
1E | 04 | 02 | — | epoch seconds (BE4) | READ RTC (Unix); 6985 if unset |
1E | 06 | 00 | — | required(1) ‖ version(1) ‖ capacity(1) | READ anti-rollback state |
1B | 58 | 00 | "LOCK58" | — | ⚠️ IRREVERSIBLE — burn page-58 access lock (user-presence-gated) |
1B | 48 | 00 | "ROLLBK" | — | ⚠️ IRREVERSIBLE — set ROLLBACK_REQUIRED fuse (user-presence-gated) |
1F | 00 | 00 | — | — | REBOOT (warm; device drops off bus) |
1F | 01 | 00 | — | — | REBOOT to BOOTSEL bootloader |
⚠️ Irreversible operations — handle with explicit confirmation
1B/58("LOCK58") permanently locks OTP page-58;1B/48("ROLLBK") permanently sets the anti-rollback-required fuse. Both are one-way fuse burns that cannot be undone and can brick a device if misapplied. The firmware triple-guards each (exact P1, exact magic payload, and a provisioning precondition), both are idempotent, and the firmware now also requires an on-device user-presence confirmation before the burn (the magic payload is a source-visible constant, not authentication). A config tool must still put these behind an explicit, clearly-worded user confirmation: never a default action, never a bulk “apply”. Most management tools should not expose them at all.1F/01(BOOTSEL) drops the device into the bootloader for reflashing; also confirm.
User-presence gate (runtime)
The runtime-reachable privileged commands require an on-device user-presence confirmation (a button touch, or an Approve on the trusted-display build) before the firmware acts, and return
6985(CONDITIONS_NOT_SATISFIED) if the operator declines or the wait times out. This gates10/01(attestation sign),10/03(store cert),1C/01(WRITE phy record), the irreversible OTP fuse burns1B/58and1B/48, and1F/01(reboot to BOOTSEL) against a hostile USB host. Read-only status (1E/*), the pubkey read (10/02), SET RTC (1C/02) and a warm reboot (1F/00) stay ungated.The Management applet’s WRITE CONFIG (
§6, INS1C) is gated the same way only understrict-config; the default build ungates it (§6). The rescue phy WRITE (1C/01), OTP-fuse burns and BOOTSEL reboot above stay gated in both builds — they are not part of the ykman admin-write flip.The vendor applet (§8) exposes the same reboot verb, reachable over both the CCID and CTAPHID transports; its
1F/01(BOOTSEL) is gated identically, so the gate cannot be bypassed via the vendor AID. Its warm reboot (1F/00) is ungated.
7.1 The phy record (EF_PHY) — PicoForge-compatible
The phy record is the device-config TLV blob. It is the same format PicoForge
already writes, so an existing PicoForge config path largely works
as-is. Source: crates/rsk-rescue/src/phy.rs.
Wire format: a flat sequence of TAG(1) LEN(1) VALUE(LEN) records, any order, all
optional. An unknown tag is skipped; a record whose length runs past the buffer
ends the parse. The firmware applies the record at boot (USB identity + LED
hardware).
A write (CCID WRITE 0x1C §6, or FIDO CONFIG_WRITE 0x0C target 1 §9) is a
read-modify-write merge: only the tags the blob carries are updated; every
untouched tag keeps its stored value. So a host may send just the fields it
changed without wiping the rest, and a tag is cleared only by an explicit
zero/empty TLV. (A host may still do a full read-modify-write for clarity.)

| Tag | Name | Len | Value |
|---|---|---|---|
00 | VIDPID | 4 | VID(BE2) ‖ PID(BE2) |
04 | LED_GPIO | 1 | data-pin GPIO 0..=29 |
05 | LED_BRIGHTNESS | 1 | global channel max 0..=255 |
06 | OPTS | 2 | flags (BE16): WCID 0x1, DIMM 0x2, DISABLE_POWER_RESET 0x4, LED_STEADY 0x8 |
08 | PRESENCE_TIMEOUT | 1 | touch-wait timeout in seconds (0/absent ⇒ firmware default 30 s; a non-zero value below 10 is raised to 10). Matches PicoForge PresenceTimeout. |
09 | USB_PRODUCT | 1..33 | product string + trailing NUL (length includes the NUL) |
0A | ENABLED_CURVES | 4 | FIDO curve bitmask (BE32) |
0B | ENABLED_USB_ITF | 1 | interface mask: CCID 0x1, WCID 0x2, HID 0x4, KB 0x8, LWIP 0x10 |
0C | LED_DRIVER | 1 | 1 = gpio, 2 = pimoroni, 3 = ws2812 (follows PicoForge LedDriverType) |
0D | LED_ORDER | 1 | RS-Key extension — WS2812 wire order: 0 = rgb, 1 = grb |
0E | LED_NUM | 1 | RS-Key extension — addressable LEDs actually connected (1..=255; 0/absent = the build’s MAX_LEDS). Firmware saturates a value above its compiled MAX_LEDS ceiling. |
0F | USB_MANUFACTURER | 1..33 | RS-Key extension — iManufacturer string + trailing NUL (length includes the NUL). Absent ⇒ the VID-derived default, then the build const. |
Notes for a host implementation:
- Read-modify-write. READ the record, change only your tags, WRITE it back.
This is exactly what
rsk hwdoes (tools/rsk/hw.py). Preserve tags you don’t recognize. - RS-Key-specific tags PicoForge skips as unknown:
0x0B(ENABLED_USB_ITF),0x0E(LED_NUM) and0x0F(USB_MANUFACTURER). RS-Key’s own tools preserve them across a RMW; LED_NUM sets how many daisy-chained addressable LEDs are lit (the binary carries a compile-timeMAX_LEDSceiling and drives the first LED_NUM of it). The rest, including0x08(PRESENCE_TIMEOUT) and0x0D(LED_ORDER), is shared with PicoForge. PRESENCE_TIMEOUThas a floor. The record is host-writable and the touch wait reads it live, so a one-second window could expire in the middle of a press and let the next queued request inherit that same hold. The firmware raises any non-zero value below 10 seconds. The floor is applied at boot, on the way to the wait. The stored record keeps the value as written, so a read-modify-write round-trip is lossless;CONFIG_READ’s effective map (§9) reports the floored value, because that is the window the device actually waits.ENABLED_USB_ITF: absent ⇒ ALL. A mask that would disable every interface the firmware actually builds (CCID | HID | KB) is rejected and falls back to ALL. Otherwise CCID would vanish and the rescue applet that could fix it would be unreachable. Never write a mask without CCID unless you intend that.- A never-written record reads back as the single zero-OPTS TLV
06 02 00 00.
8. Vendor / LED applet — per-status LED color & effects
AID F0 00 00 00 01. CLA 00. Live LED customization (color/brightness/effect
per device status), persisted in flash and applied immediately. Source:
firmware/src/vendor.rs,
firmware/src/led.rs. Reference client:
tools/rsk/led.py.
| INS | P1 | P2 | Request | Response | Purpose |
|---|---|---|---|---|---|
01 | — | — | — | counter (BE4) | INCREMENT test counter, return new value |
02 | — | — | — | counter (BE4) | GET test counter |
10 | brightness 0..255 | color | steady | status<<4 | [effect[, speed]] opt. | — | SET LED for one status |
11 | 00 | 00 | — | 17-byte config block | GET LED config |
1F | 00/01 | 00 | — | — | REBOOT (warm / BOOTSEL). 01 is user-presence-gated (6985 if declined; see §7) |
INS 12 (CORE1_STATS) and INS 13 (KEYGEN_BENCH) exist only in debug/bench
builds and are not part of the stable surface.
SET LED 0x10 gating: ungated by default (like the rest of the config surface),
user-presence-gated under strict-config — the FIDO twin
(CONFIG_WRITE/CONFIG_TARGET_LED) is gated there too, so the vendor AID cannot be
used to bypass it.
Touch-status normalization. The awaiting-touch indicator is the only consent
signal on a build without the trusted display, so the EF_LED_CONF codec — not any
one command handler — normalizes it on every decode: the vendor SET LED, the
FIDO CONFIG_WRITE LED target (§9), and the boot reload of the stored record
alike. Four rules, in that order:
color 0(off) on the touch status becomes the default touch colour (yellow).- its
brightnessis raised to8. - a non-zero
speedis raised to2(speed 1makes the breathing effect render an all-black frame every tick while the brightness byte still reads compliant). - the touch colour is the touch status’s alone. Any other status configured in
that colour is reset to its own factory look — whatever its effect, brightness or
speed. Uniqueness deliberately keys on colour rather than on the whole
(effect, color, brightness, speed)quad: brightness and speed are continuous bytes, so a one-unit nudge is byte-unequal and eye-identical; steady mode renders a solid frame for every effect; and on a one-LED boardbounceandflowboth collapse to the same solid frame, so the effect byte carries no signal there.
The give-way case. If the status wearing the touch colour has that colour as
its factory colour, resetting it would not resolve the clash, so the touch
status reverts to its factory look (bounce / yellow) instead. Only boot (red) and
idle/processing (green) can trigger this. A red touch status therefore sticks
only while boot is not red, and a green one only while neither idle nor
processing is green. Yellow is nobody else’s factory colour, which is what makes
the fallback converge: enforcing twice is enforcing once.
What this does not guarantee. Two statuses in different colours can still be
hard to tell apart. The gpio backend has no hue at all — the indicator is lit or
unlit; red, green and yellow are mutually confusable under red-green colour
blindness; and on a one-LED board the effect adds nothing. What separates the
states there is the per-status blink timing (touch 1000/100 ms vs idle
500/500 ms), which is compile-time fixed and cannot be reconfigured — but the
global steady toggle suppresses blinking altogether, and on a single-colour backend
that leaves nothing at all to tell the states apart. A build with the trusted
display remains the strong answer for consent signalling.
So the bytes you write are not always the bytes that render. SET LED 0x10
normalizes before it persists, and GET LED 0x11 always returns what is actually
showing. The FIDO CONFIG_WRITE LED target (§9) stores the block you sent
verbatim and CONFIG_READ echoes that, so after a CONFIG_WRITE read back with
GET LED to see the rendered values.
SET LED 0x10 P2 layout: bits [2:0] = color, bit 3 (0x08) = steady
(solid, no blink, a global toggle), bits [5:4] = status. P1 = per-channel
brightness. The command data field is optional: data[0] sets the status’s
effect, data[1] its speed (0 = the effect’s built-in default). They
are independent: send no data to leave both unchanged, one byte to set only the
effect (the current speed is kept), two bytes to set both.
GET LED 0x11 response (config_block, 17 bytes):
steady(1) | (effect, color, brightness, speed) × 4 for statuses idle,
processing, touch, boot in that order. (block[0] = steady; status s →
effect block[1+4s], color block[2+4s], brightness block[3+4s], speed
block[4+4s].) Read the response length: older firmware returns a 13-byte
(effect, color, brightness) or 9-byte (color, brightness) block. The stride
is (len − 1) / 4.
| Color | Code | Status | Code | |
|---|---|---|---|---|
| off | 0 | idle | 0 | |
| red | 1 | processing | 1 | |
| green | 2 | touch | 2 | |
| blue | 3 | boot | 3 | |
| yellow | 4 | |||
| magenta | 5 | |||
| cyan | 6 | |||
| white | 7 |
Effects (the effect byte, ws2812 backend only; gpio/pimoroni always
use the classic on/off blink). legacy reproduces the original blink; the rest
animate across the connected LEDs and reduce gracefully on a single LED:
| Effect | Code | Effect | Code | |
|---|---|---|---|---|
| legacy (classic blink) | 0 | flow | 3 | |
| vapor (breathing) | 1 | sparkle | 4 | |
| bounce | 2 |
Example. Set the idle status to solid blue at brightness 0x20:
P2 = color 3 | steady 0x08 | status 0<<4 = 0x0B, APDU 00 10 20 0B.
Example. Set touch to yellow bounce at brightness 0x10, speed 0x0F:
P2 = color 4 | status 2<<4 = 0x24, data = effect 2 ‖ speed 0x0F,
APDU 00 10 10 24 02 02 0F.
9. CTAPHID authenticatorVendor (0x41) — seed backup, attestation, audit
A CTAP2 vendor command (command byte 0x41) carrying a CBOR map. This is the
most security-sensitive surface: it can export the device master seed. Source:
crates/rsk-fido/src/vendor.rs, constants in
crates/rsk-fido/src/consts.rs.
Request map: {1: subcommand(uint), 2: subCommandParams(map), 3: pinUvAuthProtocol(uint), 4: pinUvAuthParam(bstr)}.
Keys 3/4 are present only when a PIN is set (see gating).
| Sub | Name | Params (key 2) | Response | Gate |
|---|---|---|---|---|
01 | MSE | {1: COSE_Key, 2: mlkem_ek?} | {1: COSE_Key, 2: ct?} | none (establishes channel) |
02 | BACKUP_EXPORT | — | {1: blob(60)} | MSE + touch + PIN-token; refused if sealed |
03 | BACKUP_LOAD | {1: blob(60)} | — | MSE + touch + PIN-token; refused if soft-locked. With no PIN set it additionally takes a distinct “Replace device seed?” confirmation — the PIN-token half is waived in that state, and a LOAD re-keys every existing credential |
04 | BACKUP_FINALIZE | — | — | touch + PIN-token when a PIN is set (no MSE) |
05 | BACKUP_STATE | — | {1: sealed, 2: has_seed, 3: locked, 4: unlocked} | ungated |
06 | UNLOCK | {1: blob(60)} | — | MSE (the lock key is the auth) |
07 | AUDIT_READ | — | journal window | PIN-token; touch if no PIN |
08 | AUDIT_CHECKPOINT | {1: nonce ≤32} | DEVK signature over chain head ‖ nonce | PIN-token + touch |
09 | ATT_IMPORT | {1: blob(60), 2: DER chain} | — | MSE + touch + PIN-token. With no PIN set it additionally takes a distinct “Replace attestation identity?” confirmation — the PIN-token half is waived in that state, and an import replaces the identity every later U2F REGISTER signs with |
0A | ATT_CLEAR | — | — | MSE + touch + PIN-token |
0B | ATT_STATE | — | {1: present, 2: sha256(chain)?} | ungated |
0C | CONFIG_WRITE | {1: target(uint), 2: blob(bstr)} — target 0=DEV_CONF, 1=PHY, 2=LED | — | ungated by default; touch + PIN-token under strict-config; no MSE. A write that changes nothing is a no-op: no flash write, no journal entry, and for PHY no reboot latch |
0D | CONFIG_READ | {1: target(uint)} — target 1=PHY, 2=LED | {1: blob(bstr)[, 2: {phy_tag: uint}]} | ungated |
0E | AUDIT_CONFIG | {1: op(uint)} — 0=disable, 1=enable, 2=status | {1: enabled(bool)} | set: PIN-token + touch; status (2): ungated |
Device configuration over FIDO (
CONFIG_WRITE 0x0C)The pcscd-free twin of the CCID device-config writes (§6 WRITE CONFIG and the
§7/§8phy/LED records): a host that cannot reach the CCID interface writes the same config over CTAPHID.targetselects the record:0x00= the management enabled-apps TLV (EF_DEV_CONF, the §6 blob,≤ 64bytes → the sameCTAP1_ERR_INVALID_LENGTH 0x03cap);0x01= the phy record (EF_PHY, §7.1: VID/PID, USB interfaces, LED wiring, presence-timeout; a read-modify-write merge — only the TLV tags in the blob are updated, the rest preserved (the samemerge_savethe CCID path uses), effective on the next boot);0x02= the LED config block (EF_LED_CONF, §8,CONF_LENbytes), persisted and then applied live by the firmware, which reloads the block after a0x41command (the LED atomics are firmware-side;CONFIG_READ 0x02returns the current block, seeded with the build defaults on first boot, so a host can read-modify-write it — verbatim, so it can differ from what renders once §8’s touch normalization applies). No MSE channel. The config is not secret. On the default build this write is ungated (full ykman parity — any USB host process can rewrite it). Building--features strict-configgates it on a physical touch and, when a PIN is set, apinUvAuthTokenwith theacfgpermission (the MAC below): a stronger gate than the CCID path’s presence-only, because CTAPHID is reachable by any unprivileged host process. The write lands in the sameEF_DEV_CONF, so a later CCID READ CONFIG echoes it.Replays and the audit journal. A write whose result equals what is already stored returns
0x00and does nothing at all — no flash write, no journal entry, and forPHYno auto-reboot latch. The comparison is against the merged record forPHY, so a partial blob that changes nothing is also a no-op; an absent or unreadableEF_PHYis never “unchanged”, so a host writing the default values to repair one is not answered0x00with nothing stored.A write that does change something is journalled, and a run of them costs a single ring entry.
CONFIG_WRITEis the only journalled event an ungated host can drive on demand, so appending one per call would let it evict the 128-entry window; instead, when the newest entry is already a config write the device folds into it. The entry keeps itsseq, its timestamp (the first write of the run) and itsaux(the target that opened it), and itsdetailbecomesrepeats(2 LE) ‖ targets(1)— the number of further writes absorbed (saturating) and a1 << targetmask of every record the run touched. A run never folds across a power cycle, so theBOOTentry between two runs is never swallowed. For a host re-checking the chain: a fold changes the head without advancingseq_next, so the sameseq_nextwith a different head is legitimate and is not a tamper signal (start,seq_nextand the epoch are untouched, so the window still folds to the head exactly as before).
CONFIG_READ 0x0DPHY key 2 (RS-Key0x0852+): the PHY read also returns an optional2:map of the boot-effective values a host can’t otherwise know — keyed by phy tag:4= LED GPIO pin,12= LED driver,8= presence timeout (seconds) — resolved to the build default when the record has no override. Tag8reports the window the wait actually uses, i.e. with the 10 s floor of §7.1 already applied. It is display-only (the1:blob stays the raw override record for read-modify-write); absent (empty map) on a headlessled_kind="none"build, and older hosts ignore it.
⚠️ Seed export hands out a normally non-exportable key
BACKUP_EXPORT (0x02)returns the device’s 32-byte master seed (encrypted over the MSE channel). It is gated by a one-time setup window (re-opened only by anauthenticatorReset) and physical touch and, when a PIN is set, apinUvAuthToken. A management tool exposing this must treat it as a destructive-trust operation: clear warning, explicit confirm, and ideally a “show the mnemonic once” flow rather than storing the blob.BACKUP_FINALIZEseals the window. Thefips-profilebuild refuses export entirely.
9.1 The MSE channel (0x41 / 0x01)
Establishes an encrypted channel for the seed-moving subcommands.
- Request
subCommandParams = {1: COSE_Key}where the COSE key is the host’s P-256 public key{1:2, 3:-25, -1:1, -2:X, -3:Y}. Optional key2= the host’s ML-KEM-768 encapsulation key (1184 B) to make the channel hybrid PQC. - Response
{1: COSE_Key}= the device’s ephemeral P-256 public key (same COSE shape,-2:dx, -3:dy). If the request included an ML-KEM ek, the response adds key2= the 1088-byte ML-KEM ciphertext. - Channel key (32 bytes):
- classical:
HKDF-SHA256(salt="", ikm = ECDH_x(32), info = dev_pub(65)) - hybrid:
HKDF-SHA256(salt="RSK-MSE-PQ-v1", ikm = ECDH_x(32) ‖ ss_mlkem(32), info = dev_pub(65) ‖ ct(1088)) dev_pubis the 65-byte uncompressed device key04 ‖ dx ‖ dy.
- classical:
Blob format (the 60-byte blob in EXPORT/LOAD/UNLOCK/ATT_IMPORT):
nonce(12) ‖ ciphertext(32) ‖ tag(16), ChaCha20-Poly1305 under the channel key
with AAD = dev_pub (65 bytes).
9.2 PIN gating
When a PIN is configured, seed-moving and audit subcommands require
pinUvAuthProtocol (key 3) and pinUvAuthParam (key 4). The param is
HMAC-SHA256(pinUvAuthToken, 0xFF×32 ‖ 0x41 ‖ subcommand ‖ rawSubCommandParams)
and the token must carry the acfg permission (0x20). rawSubCommandParams is
the verbatim CBOR bytes of the key-2 map. Reference flow:
tools/rsk/backup.py.
10. Worked examples
All bytes hex; → shows the response (status word omitted when 9000).
Identify the device (Management DeviceInfo):
SELECT  00 A4 04 00 08 A0 00 00 05 27 47 11 17 00
READ    00 1D 00 00 00
→  <len> 01 02 023B 02 04 <serial> 04 01 01 05 03 050704 03 02 023B 08 01 80 0A 01 00
Read the phy record (Rescue):
SELECT  00 A4 04 00 08 A0 58 3F C1 9B 7E 4F 21 00
→  01 02 08 06 <8-byte serial>            # identity handshake
READ    80 1E 01 00 00
→  <phy TLV blob>                          # e.g. 06 02 00 00 on a virgin device
Switch USB identity to 1209:0001 (phy RMW): read the blob, upsert tag 00
with 12 09 00 01, write back:
WRITE   80 1C 01 00 <Lc> <…00 04 12 09 00 01…> 00
REBOOT  80 1F 00 00 00
Set processing-status LED to red, brightness 64 (Vendor/LED):
SELECT  00 A4 04 00 05 F0 00 00 00 01 00
SET     00 10 40 11        # P1=0x40 brightness, P2 = color 1 | status 1<<4 = 0x11
Read backup state (CTAPHID 0x41): CTAP2 message 41 A1 01 05
(0x41 + CBOR {1: 5}) → on a fresh provisioned device
00 A4 01 F4 02 F5 03 F4 04 F4 (status 00, then CBOR
{1:sealed=false, 2:has_seed=true, 3:locked=false, 4:unlocked=false};
F5=true, F4=false).
11. Integration notes for PicoForge
- The phy record (§7.1) is your existing PicoForge config path. Same TLV
layout, same
LedDriverTypenumbering. The differences to handle: the Rescue AID isA0 58 3F C1 9B 7E 4F 21(not the upstream one), the Rescue CLA is0x80, and tag0x0D(LED_ORDER) is an RS-Key extension you can skip on read. You need not re-send unmodelled/untouched tags: the phy write is a merge (§7.1), so omitting a tag no longer wipes it — send only the fields you changed. - Hardware config over FIDO (no PC/SC) is supported: PicoForge’s legacy
hardware-config path. Send
authenticatorConfig(CTAP0x0D) with subCommandvendorPrototype(0xFF) and subCommandParams{1: vendorCommandId(u64), 3: value(uint)}, gated by anacfgpinUvAuthToken (no touch). The supported IDs, the ones PicoForge writes, set the phy record and take effect on the next boot:PhysicalVidPid 0x6fcb19b0cbe3acfa(value(vid<<16)|pid),PhysicalLedGpio 0x7b392a394de9f948,PhysicalLedBrightness 0x76a85945985d02fd,PhysicalOptions 0x269f3b09eceb805f(bitmask0x2dimmable /0x4disable-power-reset /0x8led-steady — all three are honoured: dimmable gates the global boot-brightness override, led-steady forces a solid LED, and disable-power-reset — clear by default — lets a FIDO phy write auto-reboot so the change applies without a replug). Product name, touch-timeout, LED driver and curves stay Rescue-only. RS-Key reports firmware5.x(< 7), so PicoForge enables its legacy hardware-config path. (RS-Key’s ownrskuses the CTAPHID0x41CONFIG_WRITE/READpath instead, see §9, which also covers those extras.) - Applet enable/disable is the Yubico-compatible Management applet (§6),
identical to how you’d configure a YubiKey’s USB applications — and enforced:
a disabled application’s applet stops answering (see §6,
USB_ENABLED). - Version-gate on the Rescue SELECT identity (
01 02 08 06 …, §7) and the Management SELECT version string. Treat unknown phy tags /0x41subcommands as skippable, not errors. - Keep the dangerous surface behind explicit confirmation: the OTP fuse burns (§7), BOOTSEL reboot (§7/§8), and seed export (§9). Consider not exposing the fuse burns at all in a general management UI.
- Reference client:
tools/rskis a complete, runnable implementation of everything here:ccid.py(transport),ctaphid.py(CTAP),hw.py(phy),led.py(LED),backup.py(0x41),status.py/inventory.py(DeviceInfo). When in doubt, match its bytes.
Testing
Several layers, fastest first. The protocol and applet crates are
hardware-agnostic on purpose (only firmware touches the HAL), so everything
except board bring-up is tested and fuzzed on the host. The device is reserved
for end-to-end integration.
| Layer | What it checks | Where |
|---|---|---|
| Host unit tests | parsers, state machines, applets, crypto (~350 tests) | #[cfg(test)] in each crate |
| Fuzzing | the same logic under adversarial bytes | fuzz/ |
| Miri | the fuzz targets’ logic under the UB checker | fuzz/tests/miri.rs |
| Kani proofs | bounded model checking — every input, not a sample | #[cfg(kani)] in the crates |
no_std build | the crates still link for the device | default thumbv8m target |
| On-device tests | real USB + flash on the board | tests/*.py |
flowchart TD
    u["Host unit tests"] --> f["Fuzzing"] --> m["Miri"] --> k["Kani proofs"] --> n["no_std build"] --> d["On-device tests"]
Top to bottom: fast and host-only, tapering to slow and needs-a-board.
The one command
nix develop -c ./scripts/check.sh
runs fmt, clippy (embedded and host targets, -D warnings), all host
tests, both firmware builds (touch + no-touch), the rsk-wipe build, a firmware
flash-size ratchet (the shipping image must stay under a ceiling that hugs its
current size, well below the 2560K code region), cargo-audit, cargo-deny,
cargo-vet and gitleaks.
Green check.sh is the bar for every commit.
Host tests
cargo test must target the host explicitly (the workspace defaults to
thumbv8m):
nix develop -c cargo test -p rsk-sdk -p rsk-fs -p rsk-usb -p rsk-crypto \
    -p rsk-fido -p rsk-openpgp -p rsk-rsa-asm -p rsk-mgmt -p rsk-oath \
    -p rsk-otp -p rsk-piv -p rsk-rescue --target aarch64-apple-darwin
(HOST_TARGET env overrides the triple in check.sh.) Crypto tests pin
NIST/RFC vectors; applet tests drive full protocol flows (register → assert,
PIN lockout ladders, OpenPGP import → sign → verify against RustCrypto,
PIV generate → attest → parse with x509-parser).
Fuzzing
Every parser and every applet’s full dispatch has a cargo-fuzz target.
30+ of them: APDU, BER-TLV, CTAPHID reassembly (+ round-trip property), CCID
framing, all the FIDO command surfaces (CBOR dispatch, credentials,
credMgmt, U2F, extensions, large blobs, the vendor backup/lock commands,
half that corpus runs soft-locked), OpenPGP dispatch + the EC/RSA crypto
parsers, OATH/OTP/PIV/management/rescue dispatch, the keyboard frame codec,
the phy TLV codec (parse∘serialize round-trip is an asserted invariant), the
PIN protocols, AEADs, the DRBG, ML-DSA (both parameter sets: attacker-shaped
verify decode, plus a keygen→sign→verify property that a one-bit tamper must
break) / ML-KEM decoding, the FIDO post-quantum credential path (the
(alg, curve) box codec + CredKey dispatch → sign / COSE-AKP encode), the
trusted-display Label sanitizer (attacker rpId / account text must stay
printable ASCII, no bidi / homoglyph escape, and the confirm screen must
render without panic), and the seed-blob format/migration state machine.
Most targets drive one applet from a fresh state. Four are stateful. They replay an attacker-chosen sequence against persistent state, hunting the multi-step seams a fresh-state target can’t reach (both real bugs of this class, the largeBlobs overflow and the mgmt write→read mismatch, were multi-step):
cross_appletwires the realDispatcherto the OpenPGP / Management / OATH / OTP / PIV set over a single sharedFs: SELECT switches, command chaining and the file system persist across APDUs. State leaking between applets, a SELECT mid-chain, FID collisions. (GENERATE is skipped, as on device the RSA prime search is fast-pathed off the dispatcher.)fido_sessionreplays a CTAPHID_CBOR message sequence against oneFidoState+Fswith an all-permissions token armed and a resident credential provisioned. PIN/token state, the credential store, large blobs and the journal persist across commands.now_msadvances over the token-timeout edges. A mid-sequence reset wipes the store under the session’s feet. getInfo must still succeed after anything.fs_opsdrives put / read / delete / meta ops / reboot (into_storage→scan) over one image against aHashMapshadow model: every read checks the full-length-returned / copy-clamped contract (the mgmt bug was a caller missing it),meta_addis checked against the exactMETA_MAXboundary, and the live key set must equal the model’s after any prefix of operations.power_cutis the torture extension offs_ops: the same op-sequence shadow model, but over the real on-device storage stack, a scaled-down mirror offirmware/src/flash_storage.rs(the twosequential-storagepartitions, counter-FID routing, the caches) on a mock NOR flash whose power can be cut after any byte of any write or erase. Once a cut fires, a dead-latch fails every further mutation (a dead device cannot keep writing), the stack is rebuilt with fresh caches over the surviving bytes, and the model checks atomicity (the torn op reads as old or new, never garbage; a torndeletenever leaves the value gone but its metadata alive), durability (every committed file reads back exactly; a spurious “absent” is the on-device “seed lost” disaster), and the key set. Cuts landing inside the next mount’s own repair are survived by dying again.
nix develop .#fuzz -c cargo fuzz list
nix develop .#fuzz -c cargo fuzz run <target> -- -max_total_time=60
The fuzz workspace is separate (nightly + libfuzzer) and is not built by
check.sh. After changing a shared type, nix develop .#fuzz -c cargo fuzz build
to catch drift. House rule: new attacker-facing parser or dispatch
surface ⇒ new fuzz target in the same change.
Miri runs every target’s logic once more as plain tests under the UB
checker, reporting undefined behavior instead of panics (fuzz/tests/miri.rs;
the MIRIFLAGS policy is set by the .#fuzz shell):
nix develop .#fuzz -c cargo miri test --manifest-path fuzz/Cargo.toml
Neither suite gates a commit. CI runs both daily in the deep-checks
workflow: the Miri suite, plus a timed libFuzzer pass over every target with
the corpus carried between runs, crash artifacts uploaded. A separate
fuzz-coverage job then measures per-target region/line coverage over that
accumulated corpus (scripts/fuzz-coverage.sh, run it the same way locally),
writing a summary table and uploading a per-target HTML report.
Kani proofs
Where a fuzzer samples inputs, Kani
(a bounded model checker over CBMC) checks every input up to a stated
bound: no panic, no overflow, no out-of-bounds access, and the asserted
invariants hold. The harnesses live next to the unit tests as
#[cfg(kani)] mod proofs and cover the small, total, attacker- or
crypto-critical helpers, where a proof genuinely beats a sample:
rsk-sdk: BER-TLV walk over arbitrary bytes;format_lenround-trip for everyu16; APDU case-1..4 parsing over every buffer up to the bound.rsk-fs: theEF_METArecord-walk (rebuild_meta) over arbitrary (corrupt) blobs.rsk-rsa-asm:mod_smallproven functionally (== v % m, every dividend up to 2 bytes and every modulus) and panic-free /< mfor every input up to 8 bytes; theIncrementalSieveresidue invariant (res[i] == cand mod p_iafter a step, verdict identical to the flat sieve) for every seed.rsk-crypto: thebase64urllength helpers (encoded_len/decoded_len) panic-free (no overflow/underflow) and mutually inverse for every length up to 64 KiB;encode∘decode == idfor every input up to 9 bytes (everylen % 3tail, with and without preceding full chunks);decodepanic-free over every byte string up to 8 chars.rsk-rescue: thephydevice-configuration record:parsetotal over every byte string up to 12 bytes (and always materializes an interface mask);serialize∘parse == idfor everyPhyData(every field-presence combination and value, product strings up to 4 bytes), modulo the documented missing-ENABLED_USB_ITF→ALL normalization, withPHY_MAX_SIZEsufficiency proven en route.
Kani is not in nixpkgs and its setup downloads a prebuilt CBMC bundle, so this is the one deliberately non-nix tool (install once, outside the dev shell):
cargo install --locked kani-verifier && cargo kani setup
cargo kani -p rsk-sdk -p rsk-fs -p rsk-rsa-asm -p rsk-crypto -p rsk-rescue -p rsk-openpgp
The proofs are bounded, and the bound is the honest fine print. A 16- to 20-byte symbolic buffer reaches every branch of the TLV/APDU parsers; bigger inputs are the fuzzers’ job. Big loops (a full modexp, Baillie–PSW) are out of CBMC’s reach by design and stay covered by the differential tests and on-device KATs.
The sharpest bound is on functional division specs. Proving
mod_small == v % m makes the solver equate two division circuits
(mod_small’s byte-wise Horner reduction against one wide %), which is the
shape resolution-based SAT handles worst: it discharges in ~100 s at a 2-byte
dividend, but the cost climbs steeply per added byte and a full u32 dividend
(4 bytes) does not converge (it ran ~30 min without a verdict; the early
SATISFIABLE lines are Kani’s reachability covers, not the property). So
mod_small’s exact value is pinned exhaustively at 2 bytes
(mod_small_matches_value), its panic-freedom and range over the full 8
(mod_small_in_range), and the full-width semantics by the 32-byte BigUint
differential test plus the division-free IncrementalSieve proof. The earlier
instinct, “never spec a division functionally”, was half right: avoid it at
wide dividends; at a narrow width it is the strongest evidence there is.
House rule: a small total helper in a parsing or arithmetic hot path gets a
proof harness sized to what CBMC can swallow: functional where it converges,
structural (< m, panic-free) where it doesn’t, or relational against a
division-free reformulation. Anything bigger gets a fuzz target.
CI: the daily deep-checks workflow has a kani job (rustup-based, version
pinned, ~/.kani cached) running the same cargo kani line.
On-device tests
Numbered, self-contained scripts under tests/, run from the dev shell
against a flashed board:
nix develop -c python tests/10_fido_getinfo.py
nix develop -c python tests/80_piv.py
nix develop -c python tests/75_seed_backup.py --pin <your PIN>
- Most need the no-touch build (
--features no-touch): they cannot press the button. If the board runs secure boot, sign the test build too. - Numbering:
0xtransport smoke,1xFIDO basics,2xFIDO full,3x/4x/5xOpenPGP,6xPQC,7xmanagement/OATH/OTP/backup/lock,8xPIV/rescue,9xOTP-fuse migration. - Tests that reboot the device do it hands-free over CCID and wait for re-enumeration; tests are idempotent where the applet allows it and say so in their docstring when they are destructive (resets).
- A factory reset needs you at the desk. On a screenless build the firmware
honours
authenticatorResetonly within 10 s of a USB attach, and a warm reboot does not reopen that window (protocol.md). So the eleven suites that reset (22–27,60,61,63–65) prompt for a physical unplug/replug and send the reset the moment the key re-enumerates. The prompt lives intests/replug.py, shared by both transports (resetfor the raw-CTAPHID scripts,reset_fido2for the python-fido2 ones); its docstring is the reference. On a trusted-display build the prompt is redundant — that build is exempt from the window. tests/27_reset_window.pyexercises the window itself: reset immediately after the replug (expectsCTAP2_OK), then again past 10 s (expects0x30 NOT_ALLOWED). It needs theno-touch, non-displayimage and it wipes FIDO state.tests/28_ctap_spec_alignment.pycovers the CTAP 2.1 spec-alignment surface the per-command suites do not reach: CTAPHID channel allocation andCTAPHID_LOCK, theuv/pinUvAuthParamprecedence rule,makeCredUvNotRqd, the largeBlobs parameter validation,setMinPINLengthoverflow, the rpId-scopedcredentialManagementtoken, and the U2F gate underalwaysUv. It neither resets nor replugs, but it does need--pin, and it togglesalwaysUvon and back off — so start it withalwaysUvoff, which it checks.- The FIDO PIN is never guessed: destructive PIN tests take
--pinexplicitly.
Two external suites were run against the implementation: Yubico’s python-fido2 test corpus and the Gnuk/OpenPGP card suite (see third_party/ if vendored, or run them from their upstream checkouts). Running an upstream corpus shows conformance on the cases it covers; it is not a security audit.
Latency harness
Timing a crypto primitive from the host is noisy. On the RP2350 the hot working set (the variable-base P-256 scalar multiply is ~34 KB) overflows the 16 KB XIP cache, so which cache lines evict depends on where the linker placed the code. Steady-state EC latency then swings ±~30 ms from an innocent code move, and a host-timed mean over a few USB round-trips reports that swing as a regression.
rsk bench measures on the device instead. The bench firmware feature adds a
vendor command (like keygen-bench, never shipped) that times a primitive with
the RP2350’s own timer, so there is no USB jitter, and returns a robust summary:
a median and MAD over the warm samples plus a separate cold first sample
(the ~1.4x cold-cache op right after a power-cycle). The summary is computed
on-device by the Kani-proved rsk-bench crate, so the number is not re-derived
host-side.
# build + flash a bench image (it is a --features bench build, so never ship it)
cargo build --release -p firmware --features bench,no-touch
# then, from the dev shell or the venv that has pyscard:
rsk bench ecdh                 # variable-base P-256 ECDH (the layout-sensitive one)
rsk bench sign                 # P-256 comb sign (the getAssertion hot path)
rsk bench ratchet              # the HKDF-SHA512 key-derivation ratchet
To A/B two builds without the cross-session trap that faked a “-33%” during the
0.14 EC migration: measure one build with --save a.json, flash the other,
measure with --save b.json, then rsk bench --compare a.json b.json prints
whether the median moved by more than the pooled noise. Always compare in one
sitting; comparing raw numbers across sessions or builds reads cache-layout luck
as a real change.
FIDO conformance
RS-Key is run against the FIDO Alliance Conformance Tools (v1.8.5.1), the same protocol test suites the FIDO certification programs are built on, and passes them clean:
| Suite | Result |
|---|---|
CTAP2.3 (profile_featureful — the strictest profile) | 235 / 0 |
| U2F 1.1 / 1.2 | 55 / 0 |
A green run exercises the full CTAP2/U2F wire surface: makeCredential /
getAssertion validation and up/uv privacy, clientPIN protocols 1 and 2
(including the force-PIN-change and PIN-policy edge cases), credential
management, large blobs, authenticatorConfig (alwaysUv, setMinPINLength,
enterprise attestation), CTAPHID framing + CANCEL, and U2F register /
authenticate with batch attestation.
Two honest caveats:
- This is a self-run pass, not a “FIDO Certified” mark. Those are the publicly available conformance tools (the same ones a lab uses), so a clean result is strong evidence the protocol behaviour is spec-correct, but RS-Key is not listed in the FIDO Metadata Service and claims no certification. That is a deliberate non-goal (membership + a lab + fees, not a code change). See AAGUID & metadata.
- The full enterprise-attestation suite needs a conformance-only build. It
asserts against the suite’s own test RP ID, which a build flag
(
ea-conformance-rpid) whitelists; the shipping build does not bake it in (build options). Everything else runs on the normal firmware.
As with any corpus, this shows conformance on the cases the tools cover. It is not a security audit.
Real-world interop
Protocol conformance is necessary but not sufficient: a response can be
spec-arguable yet still trip a strict third-party parser. The layer above
drives the real consumer software (gpg, ssh, libfido2, ykman,
OpenSC, browsers) and records whether the device works end to end. The
ykman and Yubico Authenticator cells gate on the “Yubico YubiKey” reader
name, so they run against the opt-in VIDPID=Yubikey5 interop flavor (never
distributed); the default RS-Key build (0x1209:0x0001) does not expose itself
to them. The sweep tests/interop/run.py automates the read-only CLI cells;
the full matrix (including the GUI/ceremony cells) lives in
interop.md. It is how the ykman openpgp info GET DATA 6E
wrapper bug was caught: every protocol test passed, only the real ykman
parser rejected the reply.
CI parity
check.sh is plain bash over the Nix dev shell. A CI job is
nix develop -c ./scripts/check.sh plus, on a runner with the board
attached, the tests/ scripts. The scheduled deep-checks workflow is the
Miri, fuzz and Kani commands from this page, daily, plus a repro job that
builds the hermetic firmware twice and requires bit-identical outputs
(build.md), an llvm-cov job that
floors host-crate line coverage, and a complexity job that ratchets
crate-library cognitive complexity. No hidden state.
flowchart TB
    a["Merge gate — every commit / PR<br/>check.sh: fmt · clippy · host tests · firmware builds · size ratchet · audit · deny · vet · gitleaks"]
    b["Daily — deep-checks<br/>Miri · timed libFuzzer · Kani · repro (bit-identical build) · llvm-cov (coverage floor) · complexity (cognitive ratchet)"]
    a ~~~ b
Refactor metrics (advisory)
scripts/metrics.sh is reconnaissance, not a gate. Run it to decide
where to refactor. It reports the heaviest functions by cognitive/cyclomatic
complexity (rust-code-analysis), firmware size by crate and function
(cargo-bloat), and generic monomorphization (cargo-llvm-lines). The tools are
pulled ad-hoc via nix shell nixpkgs#…, so they never join the pinned dev
shell or a shipping build:
nix develop -c ./scripts/metrics.sh            # applet handlers by default
nix develop -c ./scripts/metrics.sh crates/rsk-piv/src
Read the cognitive column, not cyclomatic: a high cyclomatic with a low
cognitive is a flat serializer (a long match that just encodes), not a
refactor target.
The same signal has a ratcheted, automated sibling. scripts/complexity_gate.sh
runs in deep-checks and fails if any crate-library function crosses a
cognitive-complexity ceiling (COGNITIVE_CEILING), catching a new hotspot the
day it lands. Lower the ceiling as the peak falls; raise it only for a justified
growth, in the same commit. firmware/ is out of scope: it is embedded glue plus
the trusted-display UI state machines, whose complexity is a separate concern.
Interop — does it actually work with the real tools?
RS-Key has three test layers below this one (tests/, the vendored
third_party/
suites, and the host cargo test / fuzz / Kani stack, see
testing.md). All of them drive the device at the protocol
level: APDUs, CBOR, CTAPHID frames. They prove the wire format is correct
against our reading of the specs and against two upstream suites.
flowchart BT
    a["Host cargo test · fuzz · Kani<br/>(protocol logic)"] --> c
    b["Vendored third_party suites<br/>(python-fido2, OpenPGP card)"] --> c
    c["Interop — this page<br/>real gpg / ssh / ykman / browsers, on hardware"]
This document is the layer above: does the device work end-to-end with the
software a real user actually runs (gpg, ssh, a browser’s WebAuthn
stack, ykman, fido2-token, OpenSC), not with our own scripts. Protocol
conformance is necessary but not sufficient: a response can be spec-arguable
yet still trip a strict third-party parser. (The canonical example is the
ykman openpgp info crash below: our GET DATA 6E was readable by gpg but
rejected by ykman’s stricter Tlv.unpack(0x6E, …).)
This is experimental firmware with no security audit. Most cells below run on the default RS-Key build (USB VID:PID
0x1209:0x0001, reader name “RS-Key”).gpg,ssh, browsers, OpenSC, and libfido2 bind the ATR / FIDO HID usage page, not the VID/PID, so they don’t care about branding. Theykmanand Yubico Authenticator cells are the exception: they derive the device from the “Yubico YubiKey” reader name, so they need the opt-inVIDPID=Yubikey5interop flavor (0x1050:0x0407), see build.md. A ✅ means the cell was observed working on the dated build; it is a record, not a guarantee of future builds or other hosts.
The matrix is a living artifact. A cell is evidence only once it has been
run on hardware and dated; everything else is ⏳ untested. The 0758 /
0759 tags in the Status column are the firmware bcdDevice the cell was run
against.
Baseline, 2026-06-13, firmware 0x0758 (tests/interop/run.py, live
device): libfido2 enumeration + getInfo, gpg --card-status, and ykman
piv/oath/otp info all ✅; ykman openpgp info ❌ (the GET DATA 6E
wrapper bug below, reproduced live as ERROR: Incorrect TLV length).
Re-verified, 2026-06-13, firmware 0x0759 (the fix): the full CLI sweep
is green: 7 passed, 0 failed, ssh-sk skipped (touch). ykman openpgp info now prints the card (OpenPGP version: 3.4, app 4.6.0, PIN counters)
instead of the TLV error.
Touch / GUI round, 2026-06-13, firmware 0x0759→0x075A (--features up-button confirmed live): ssh-keygen -t ed25519-sk enrol, fido2-cred/
fido2-assert (assertion verified), and the OTP HID keyboard (short-tap typed
the static slot verbatim) all ✅ with a real button press; Chrome / Firefox /
Safari WebAuthn ✅ by user attestation. gpg --edit-card generate was the lone
❌ on 0x0759, not a crypto failure (the APDU suites GENERATE
P-256/Ed25519/RSA-2048 and UIF-sign fine) but a GET DATA 6E short-Le
overflow in scdaemon; fixed in 0x075A (dispatcher response chaining) and
re-verified end-to-end. See
Known issues.
Status legend
| Mark | Meaning |
|---|---|
| ✅ | verified end-to-end on hardware (date + firmware in Notes) |
| ⚠️ | works with caveats / partial coverage |
| ❌ | broken — known defect (link the issue/fix) |
| ⏳ | not yet run on hardware |
| 🚫 | not applicable on this platform / not implemented |
A note on firmware builds
The CLI suites cannot press the BOOTSEL button, so anything touch-gated either
needs the no-touch test build (cargo build -p firmware --features no-touch, see build.md) or a human. The matrix splits
accordingly:
- CLI sweep: run on the no-touch build; fully automatable
(
tests/interop/run.py). - GUI / ceremony: run on the touch build with a finger on the button
(browser WebAuthn,
ssh-keygen -t ed25519-sk, OpenPGP UIF signing).
Matrix
FIDO2 / WebAuthn / U2F
| Consumer | What it exercises | Build | How | Status |
|---|---|---|---|---|
fido2-token -L / -I (libfido2) | enumeration + getInfo | no-touch | tests/interop/run.py | ✅ 0759 |
fido2-cred / fido2-assert (libfido2) | make credential / get assertion | touch | manual (fido2-cred -M ‖ fido2-assert -G) | ✅ 0759 (touch ×2, assertion verified 2026-06-13) |
| python-fido2 (Yubico) | full CTAP2 flows | no-touch build | pytest third_party/pico-fido-tests/pico-fido | ⚠️ 075A — 191 passed / 4 failed / 9 errored; all test-side, not firmware defects |
| Chrome WebAuthn | register + authenticate | touch | webauthn.io (manual) | ✅ user-attested (macOS/Linux/Win, 2026-06-13) |
| Firefox WebAuthn | register + authenticate | touch | webauthn.io (manual) | ✅ user-attested (macOS/Linux/Win, 2026-06-13) |
| Safari WebAuthn | register + authenticate | touch | webauthn.io (manual) | ✅ user-attested (2026-06-13) |
ssh-keygen -t ed25519-sk + ssh | sk-key enrol + auth | touch | tests/interop/run.py --touch | ✅ 0759 (touch, ed25519-sk enrolled 2026-06-13) |
OpenPGP card
| Consumer | What it exercises | Build | How | Status |
|---|---|---|---|---|
gpg --card-status | application-related-data read | either | tests/interop/run.py | ✅ 0759 |
gpg --edit-card keygen/sign/encrypt | full card lifecycle | touch (UIF) | manual | ✅ 075A (EC+RSA generate land on-card after the GET DATA short-Le fix; was ❌ on 0759) |
ykman openpgp info | Tlv.unpack(0x6E, …) strict parse | either (needs VIDPID=Yubikey5) | tests/interop/run.py | ✅ 0759 (was ❌ on 0758) |
| openpgp-card-tests (Gnuk-derived) | spec suite | no-touch | pytest third_party/openpgp-card-tests/… | ⚠️ 075A — 001_initial_check 31/34; 3 fails, one root, not a defect |
PIV
| Consumer | What it exercises | Build | How | Status |
|---|---|---|---|---|
ykman piv info | discovery + slot state | no-touch (needs VIDPID=Yubikey5) | tests/interop/run.py | ✅ 0759 |
OpenSC pkcs11-tool | PKCS#11 module load + enumerate | no-touch | pkcs11-tool --module …/opensc-pkcs11.so -L -O | ✅ 075A (loads + enumerates; OpenSC auto-selects the OpenPGP app via PKCS#15 emulation — 2 slots, metadata + object store read clean; sign/cert untested on a fresh card) |
macOS native (sc_auth, Keychain) | system smartcard discovery | no-touch | sc_auth identities, system_profiler SPSmartCardsDataType | ✅ 075A (CryptoTokenKit sees the reader + ATR, binds pivtoken.appex; no paired identity on a fresh card) |
OATH / OTP
| Consumer | What it exercises | Build | How | Status |
|---|---|---|---|---|
ykman oath accounts list | OATH credential listing | no-touch (needs VIDPID=Yubikey5) | tests/interop/run.py | ✅ 0759 |
| Yubico Authenticator (app) | TOTP/HOTP GUI | no-touch (needs VIDPID=Yubikey5) | manual (desktop app) | ✅ 075A — detects the key + all 6 apps; OATH add/calc/delete work; TOTP crypto-verified (2026-06-13) |
ykman otp info | OTP slot state | no-touch (needs VIDPID=Yubikey5) | tests/interop/run.py | ✅ 0759 |
| OTP keyboard (types the code) | USB-HID keyboard emulation | touch | manual (focus a text field) | ✅ 0759 (short-tap typed the static slot verbatim, 2026-06-13) |
Differential against a real YubiKey
The matrix above proves each RS-Key cell works. This layer asks a sharper
question: run the same reads against RS-Key and a genuine YubiKey with the
same fill, then diff every field. Anything that is not a documented, expected
divergence is a fidelity gap. The harness lives in
tests/interop/
(capture.py → snapshot, diff.py → classify against the divergences.py
allow-list, parity.py → OATH crypto known-answer); see its README to run it.
Both keys stay plugged: the VIDPID=Yubikey5 build carries an RSK marker in
its USB product string, FIDO HID descriptor and PC/SC reader name that a real
key never has, and ykman cells target by --device <serial>. An identity guard
refuses a snapshot whose FIDO AAGUID does not match its --label.
Result, 2026-07-16, macOS 27 — RS-Key VIDPID=Yubikey5 vs a real YubiKey
5C NFC, both fw 5.7.4, 162 canonical fields. The first run
(bcd 0x081b) surfaced 1 unexpected field — the usbEnabled mask, a real
fidelity gap
(fixed on 0x081C).
The re-run on the fixed build (bcd 0x081C) is clean: 85 identical, 77
expected-divergence, 0 rule-violations, 0 unexpected. Representative expected
divergences:
| Field | Real | RS-Key | Why it is expected |
|---|---|---|---|
ccid.atr | 3bfd13…5900 | same | RS-Key reproduces the YubiKey ATR byte-for-byte (a MATCH, not a diff) |
fido.getinfo.aaguid | (Yubico’s model AAGUID) | 2479c7bf-… | RS-Key self-assigns its AAGUID, deliberately not Yubico’s |
fido.getinfo.versions | …FIDO_2_1_PRE | …FIDO_2_2, FIDO_2_3 | RS-Key targets the final specs; drops the legacy _PRE |
fido.getinfo.algorithms / extensions | ES256/EdDSA/… | superset | RS-Key adds ES384/512 (+ML-DSA, credBlob, thirdPartyPayment) |
fido.getinfo.maxMsgSize etc. | 1536 | 7609 | RS-Key’s buffers/capacities are larger |
fido.getinfo.transports | nfc, usb | usb | RS-Key is USB-only, no NFC |
mgmt.formFactor | USB-C (3) | USB-A (1) | RS-Key reports the 5A form factor; the reference is a 5C |
mgmt.usbSupported | 0x033f | 0x023b | the real 5C also has YubiHSM Auth, which RS-Key does not implement |
openpgp.application_version | 5.7.4 | 4.6.0 | RS-Key’s OpenPGP app is pico-openpgp 4.6.x |
usb.serialNumber / bcdDevice | (none) / fw | rs-key-0001 / 0x081b | RS-Key’s USB serial is fixed; bcdDevice is a build counter |
Notable matches (not just structural, but exact): the CCID ATR, PIN retry
budget (8), minPINLength (4), pinUvAuthProtocols ([2, 1]), the six USB
capability bits, and every unprivileged FIDO option (rk, up, clientPin,
credMgmt, pinUvAuthToken, …).
Crypto parity (OATH) — parity.py provisions the RFC 4226 appendix-D
known-answer credential and reads it back: RS-Key returns 755224 → 287082 → 359152, byte-identical to the RFC vector every conforming YubiKey produces, so
the HMAC-SHA1 + dynamic-truncation engine matches. The same control could not run
on the reference key here because its OATH store was full (64/64, the YubiKey
5.7 cap) — itself a capacity divergence, RS-Key holds more.
Suite triage
Detail for the ⚠️ / multi-result cells above.
python-fido2 (Yubico): 075A, 191 passed / 4 failed / 9 errored (8m26s). All
four failures are test-side, not firmware defects:
test_lockout/test_pin_attemptsneed a manualdevice.reboot()(conftest.py:205 human prompt, unanswered headless) → our spec-correctPIN_AUTH_BLOCKEDcorrectly persists.test_option_upcallsdoGA(options=…), no such kwarg; broken upstream test.test_bad_authexpects the upstream0xE0for an invalid(0,0)EC keyAgreement, where ourINVALID_PARAMETERis spec-reasonable.- The 9 errors are
test_070_oathfixture setup, not core CTAP2.
openpgp-card-tests (Gnuk-derived): 075A, 001_initial_check 31/34. The
3 fails (6E, 65, 7A) share one root and are not a defect:
util.get_data_object strips the constructed-DO wrapper only when
is_yubikey=True (never set in this Gnuk config), so our deliberately-wrapped
templates (the bug-#1 ykman/real-Yubikey requirement) fail the Gnuk “unwrapped”
asserts. Wrapping is mandatory for ykman; the two expectations are mutually
exclusive.
Yubico Authenticator (app): 075A (built VIDPID=Yubikey5; the GUI gates
on the “Yubico YubiKey” reader name). Detects the key + all 6 apps
(OTP/PIV/OATH/OpenPGP/U2F/FIDO2); OATH add → calculate → delete all work in-GUI.
The displayed TOTP 111429 then 629022 cryptographically matched an
independent software HMAC-SHA1 TOTP of the same secret/window (2026-06-13).
Known issues
ykman openpgp info rejected our GET DATA 6E — FIXED (0x0759)
ykman/yubikit parse the application-related-data response with
ApplicationRelatedData.parse, which calls
Tlv.unpack(0x6E, response): it requires the whole GET DATA 6E reply to be
a single TLV tagged 6E. RS-Key stripped the outer 6E 82 LL LL wrapper for
every non-flash DO, returning the bare nested 4F …, so ykman failed with
ERROR: Incorrect TLV length (the 4F TLV parses but leaves a trailing
remainder Tlv.unpack rejects) while gpg (which tolerates either form)
worked. Fixed by keeping
the wrapper on constructed template DOs (6E/65/73/7A/FA, BER constructed
bit 0x20) and stripping only primitive DOs, which is what real OpenPGP
cards do. See crates/rsk-openpgp/src/getdata.rs. Verified on hardware
2026-06-13 (firmware 0x0759): ykman openpgp info prints the card data
(OpenPGP version: 3.4, app 4.6.0, PIN counters) instead of ERROR: Incorrect TLV length.
ykman openpgp info # prints card data, no TLV traceback
GET DATA short-Le chaining FIXED on 0x075A
Was (0x0759): gpg/scdaemon read the application-related-data template
with the short APDU 00 CA 00 6E 00 (Le = 256). Once keys are present the
6E template is 269 bytes (> 256); the firmware returned the whole 269-byte
body instead of truncating to 256 with 61 0D (“13 more bytes”) for a
GET RESPONSE follow-up. scdaemon’s 256-byte buffer overflowed → PC/SC
SCARD_E_INSUFFICIENT_BUFFER (0x80100008) → apdu_send_simple … failed: invalid value, so key enumeration and gpg --edit-card generate aborted with
card_key_generate … General error / KEY_NOT_CREATED. Reproduced on two
boards. The on-card crypto was never the problem: tests/36_openpgp_keygen.py
GENERATEs P-256/Ed25519/ECDH/RSA-2048 (3.7 s) and tests/52_openpgp_uif_touch.py
UIF-signs with a real touch, both fine, because they use extended Le and so
never overran the buffer (which masked the bug). Likely surfaced by the bug-#1
fix, which restored the 6E wrapper and pushed the template past 256 bytes.
Fix: the dispatcher (crates/rsk-sdk/src/applet.rs) now does ISO 7816-4
outgoing response chaining: when an opted-in applet’s body exceeds the command’s
short Le it ships the first Le bytes with 61xx and serves the remainder on
GET RESPONSE (0xC0); the held tail is zeroized after delivery. OpenPGP and PIV
opt in via Applet::response_chaining; OATH (own 0xA5 SEND REMAINING) and the
vendor/rescue tools (extended Le) are untouched, so every extended-Le
consumer (ykman, the APDU suites) is byte-for-byte unchanged.
Verified on hardware 2026-06-13 (0x075A): with EC keys present the 6E
read returns 256 + 61 0D then GET RESPONSE → 13 + 9000 (0 insufficient buffer in the scdaemon log), gpg --card-status prints the full card, and both
EC and RSA gpg --edit-card generate complete (KEY_CREATED, keys land
on-card). The RSA GENERATE response itself never needed chaining: scdaemon
issues GENERATE with extended Le (em=1), so its 270-byte pubkey is fine.
# before (0x0759): short-Le 6E with keys present
send apdu: c=00 i=CA p1=00 p2=6E  le=256 em=0  ->  pcsc: insufficient buffer (0x80100008)
# after (0x075A): chained per ISO 7816-4
send apdu: c=00 i=CA p1=00 p2=6E  le=256 em=0  ->  response sw=610D datalen=256
send apdu: c=00 i=C0 00 00 ...                 ->  response sw=9000 (remaining 13 B)
sequenceDiagram
    participant S as scdaemon
    participant F as firmware
    S->>F: 00 CA 00 6E  (short Le = 256)
    F-->>S: 256 bytes + 61 0D  ("13 more")
    S->>F: 00 C0 …  (GET RESPONSE)
    F-->>S: 13 bytes + 9000
READ CONFIG usbEnabled clamped to supported — FIXED (0x081C)
The two-device diff (2026-07-16) surfaced one unexpected divergence. The
management applet READ CONFIG (0x1D) reported usbEnabled = 0x3a3b on the test
board while usbSupported = 0x023b — the enabled mask carries bits (0x3800)
the supported mask does not, so enabled ⊄ supported. A real YubiKey guarantees
enabled ⊆ supported (both were 0x033f on the reference).
Root cause was not the default: config_tlv (crates/rsk-mgmt/src/lib.rs) sets
the default USB_ENABLED to SUPPORTED_CAPS (0x023b), which is correct. But
once a host had written an enabled-applications config, READ CONFIG echoed the
persisted EF_DEV_CONF blob verbatim without clamping the mask. A host that
once wrote a wider mask (a newer ykman that knows capability bits RS-Key lacks)
left the device advertising enabled apps it does not support.
Fixed on 0x081C: config_tlv now masks the USB_ENABLED TLV against
SUPPORTED_CAPS on read, so enabled ⊆ supported always holds and an
already-provisioned board heals without a rewrite. The dated differential result
above was recorded against 0x081b, before the fix.
How to run the CLI sweep
# Flash the no-touch build first (signed, if secure boot is on).
nix develop -c python tests/interop/run.py            # automatable cells only
nix develop -c python tests/interop/run.py --touch    # also the touch cells (presses needed)
nix develop -c python tests/interop/run.py --json      # machine-readable
The runner discovers the device via fido2-token -L (HID) and ykman info
(CCID), runs each probe, and prints this matrix’s automatable rows with live
results. The ykman-based probes only see the device on the opt-in
VIDPID=Yubikey5 build (they gate on the “Yubico YubiKey” reader name); on the
default RS-Key build the HID and gpg/PC/SC probes still run. It never mutates
state by default (read-only probes); destructive cells (enrol/keygen) are
opt-in.
Versions
What the firmware advertises itself as, per protocol: the place to look when a host tool gates a feature on a version number. The build knobs that change any of this are documented in Build options; what has actually been checked against real host software is in the Interop matrix.
Firmware version
5.7.4 (rsk_sdk::FIRMWARE_VERSION) is reported everywhere a tool reads a device
firmware version: FIDO getInfo and CTAPHID INIT, the YubiKey Management
DeviceInfo (ykman info), and the OATH / OTP / PIV version fields. It mimics a
current YubiKey 5 so Yubico tooling unlocks its feature gates. Override it with
the FW_VERSION build variable. It is not the OpenPGP card version and not
the USB bcdDevice.
| Surface | Advertised version | Spec implemented |
|---|---|---|
| FIDO / CTAPHID | getInfo versions = U2F_V2, FIDO_2_0; device version 5.7.4 | CTAP2 (FIDO2) + CTAP1 (U2F) |
| OpenPGP card | 3.4 | OpenPGP Smart Card Application 3.4 |
| PIV | 5.7.4 | NIST SP 800-73-4 (command subset) |
| OATH | SELECT version 5.7.4 | YKOATH (Yubico OATH over CCID), AID A0 00 00 05 27 21 01 |
| Management | DeviceInfo version 5.7.4 | YubiKey Management over the FIDO / CCID transports |
USB bcdDevice | 0x075E | internal build counter — bumped on every behaviour change, not a protocol version |
Algorithms, by build knob
The default algorithm menu and the two feature flags that change it (full mechanics in Build options):
| Default | --features advertise-pqc | --features fips-profile | |
|---|---|---|---|
| FIDO signature algorithms (COSE) | ES256 (−7), ES384 (−35), ES512 (−36), ES256K (−47), EdDSA / Ed25519 (−8) | ML-DSA-65 (−49) and ML-DSA-44 (−48) prepended to the getInfo algorithms list | ES256K (−47) removed from the menu |
| Post-quantum | ML-DSA-44 and ML-DSA-65 negotiable from pubKeyCredParams (capability always on); not advertised | advertised in getInfo | same as default |
| Minimum PIN length | 4 | 4 | 6 |
| Vendor seed export | allowed | allowed | refused |
| PIV | 3DES management keys + RSA-1024 import allowed | same | new 3DES management keys + RSA-1024 refused |
- PQC capability is on in every build.
advertise-pqconly controls whether ML-DSA-65 (−49) and ML-DSA-44 (−48) appear in the getInfoalgorithmslist. It is off by default because released Firefox aborts the entire getInfo parse on an unknown COSE id. makeCredential negotiates −49 / −48 from the request’spubKeyCredParamsregardless — the RP lists the one it wants first, since the first supported entry is selected (CTAP 2.1 §6.1.2). −49 / −50 (ML-DSA-65 / 87) are recognised but have no enabled backend. fips-profileis a locked policy, not a FIPS validation. See the FIPS-style profile guide.
Toolchain
The project tracks the latest stable Rust, pinned hermetically rather than to a
declared MSRV. nix develop / nix build take the toolchain from the flake
(fenix stable, frozen in flake.lock, currently rustc 1.96), on Rust edition
2024. rust-toolchain.toml (channel = "stable") is only the fallback for the
non-Nix rustup path. “Which Rust built this image” is answered by the committed
flake.lock, so there is no separate minimum-version commitment to drift.
Motivation
The short version
Commercial security keys are excellent, and closed. The firmware is a black box. The capacity limits are product-segmentation choices. When a key dies or a vendor discontinues a line, your enrolled identity dies with it. RS-Key exists to see how far an open, auditable, memory-safe implementation can get on a $5 board.
The honest long version is a story about how one open-source project first amazed me, then demonstrated, very concretely, what trust in a security project actually rests on.
The story
In the spring of 2025 I came across
pico-fido, a firmware that turns
a Raspberry Pi Pico into a FIDO2 key. A five-dollar board passed for a
YubiKey. The ecosystem tooling (browsers, ssh-keygen -t ed25519-sk, ykman)
worked with it like with the real thing. Next to it lived pico-openpgp.
Together they looked like a small miracle: a complete security key you assemble
yourself and can read down to the last byte.
I was hooked and got involved right away. WebAuthn was broken in Firefox on
Linux. Chromium worked, Firefox silently refused. I dug in with
RUST_LOG=authenticator=debug and traced it down: Firefox’s strict CTAP2
parser was rejecting the device’s responses over garbage zero bytes trailing
the CBOR payload
(pico-fido#129). The
fix was accepted and everything worked. For the next year the key was simply
part of my daily life.
The turn
On October 26, 2025, this commit landed: “Update license models and add ENTERPRISE.md”.
Point by point, without emotion:
- The project split into a “Community Edition” and a proprietary “Enterprise Edition”, priced on request.
- The list of paid enterprise options includes post-quantum cryptography support. Protection from a quantum adversary became a premium feature.
- The combined firmware, pico-fido2
(FIDO + OpenPGP), moved into a repository consisting of three markdown
files. There is no source code. Releases v7.0 and v7.2 exist, with
zero attached files. The README, meanwhile, lists “Open source” among
the features, and its build instructions begin with
git clone https://github.com/youruser/pico-fido2, an address with nothing behind it to clone. - There is exactly one way to get the firmware: through the companion app, under a per-device license: €29.49 for a single key, €49.49 for “Primary + Backup”. A firmware license for a five-dollar board, priced in the range of an entry-level commercial key (which at least ships with a secure element and audits behind it).
I am not arguing the maintainer has no right to earn money. He does; it is his code and his time. A security key is a special case. The only thing separating a DIY key from a no-name dongle off AliExpress is that you can read the firmware down to the last byte. A binary-only security-key firmware is a “trust me” from a single person: no source, no audit, no guarantees, exactly the thing this project had been an escape from. That day I understood the project was over for me, and that I would have to write the replacement myself.
The principle
The irony is that Raspberry Pi themselves champion the opposite approach for the RP2350: security through transparency. Open hacking challenges against their own chip, public write-ups of the attacks that succeeded, and a second round on fixed silicon. TROPIC01 does the same at the secure-element level: an open, auditable architecture instead of an NDA. That is the right side of this story, and RS-Key intends to stay on it.
What RS-Key does differently
- AGPL-3.0-only, irreversibly. RS-Key is a derivative work of the AGPL-licensed pico-keys (see NOTICE), so the “relicense it proprietary” trick is legally impossible here, for anyone, me included. There is no CLA; contributors keep their copyright. This is not a promise of good behaviour. It is how the licensing is built.
- Post-quantum in the open tree. ML-DSA-44 and ML-DSA-65 credentials work today, for free, with the source in front of you.
- The “enterprise” features live in the public tree. Attestation, secure boot, backup, audit: the things usually kept behind a paywall land in the open repository.
- Transparency as artifacts, not as a slogan. Every external-facing parser
has a fuzz target, every
unsafeis documented and justified, and the threat model was written down before anyone is asked to trust the key with something real. - Accessibility. A Trezor or a Nitrokey is hard and expensive to get in Russia. An RP2350 board is 500 rubles and a friend with a 3D printer.
And yes, this is still a love letter to writing real systems software in Rust on a ten-dollar board. Only now it comes with a moral: the openness of a security project is tested not by years of honest work, but by a single commit. RS-Key is built so that the relicensing in that commit cannot happen here.